Raspberry Pi Media Center
Have you ever felt that, you need a dedicated Media center to take your entertainment to next level. Then try our Media Center Kit, this guide will help you to set up your own media center, also we have added guide in the section below to control this media center using any IR remote and playing and controlling photos and videos from your smart phones.
This Media Center allows you to view free digital TV Shows, Music, Sports and much more direct from the Internet. You can play any of your unencrypted digital movies and music from USB storage devices or connecting to your network drives. You can stream movies, and manage your media library, all with full iOS and Android compatibility.
The SD card is loaded with OSMC, OSMC (Open Source Media Center) is a free and open source media player based on Linux. OSMC is the leading media center in terms of feature set and community and is based on the Kodi project. OSMC can play all major media formats out there and supports a variety of sharing protocols so you’re guaranteed to be able to stream from other devices. OSMC can stream media and serve files to other devices as well. It looks fantastic,
a great deal of love and care has been put in to engineering OSMC to be the best media center out there. OSMC’s look and feel is no exception. OSMC is more than just a media center, it’s an experience. Don’t take our word for it though. Give it a spin!
Let us have a look at the guide contents, refer to the list below:
-
Package Contents
-
Hardware Connections
-
Setting up Network Connections
-
IR Remote Configuration
-
Playing photos and videos from smart phone
-
Using Kore/Yatse as OSMC remote
-
Raspberry Pi Media Center Installation Manual
Package Contents
One more variant of the mentioned kit is available, check it out here. The only difference between the two is the Raspberry Pi official Case. One kit comes with Grey-black case and the other kit comes with white case.
Hardware Connections
The connections are really simple, we had provided all the parts and accessories to get it running. you need to connect following two things to start with media center:
- HDMI Cable
- Power Supply 3A
The HDMI cable from the TV / Monitor/ Display must be connected to the Raspberry Pi HDMI Port in order to see the display. Once you done connecting your HDMI, plug in the SD card we provided and then connect the power supply cable to the micro USB port. Refer the Image below for better idea.
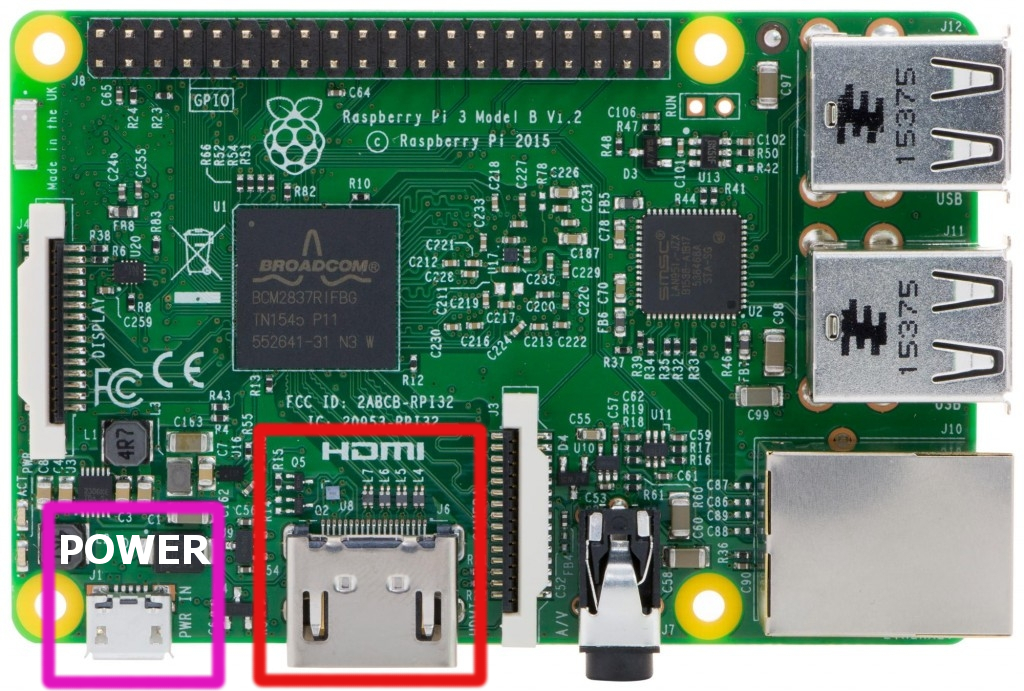
Once you done with connecting the power adapter and HDMI cable, you need to either connect the USB keyboard/Mouse to the USB port or connect the IR remote receiver we provided in the kit before powering up the device. No need to add or install any drivers or configuration file, all you need to do is to connect hardware properly. Follow the below image to connect your IR Receiver to the Raspberry Pi.

Once you done with above mentioned connections, you are ready to go, now you are able to control your media Center just using the IR remote we Provided. Refer the Key functions in the image below, you are free to modify these key functions, we will show you how to modify these key functions at later stage.

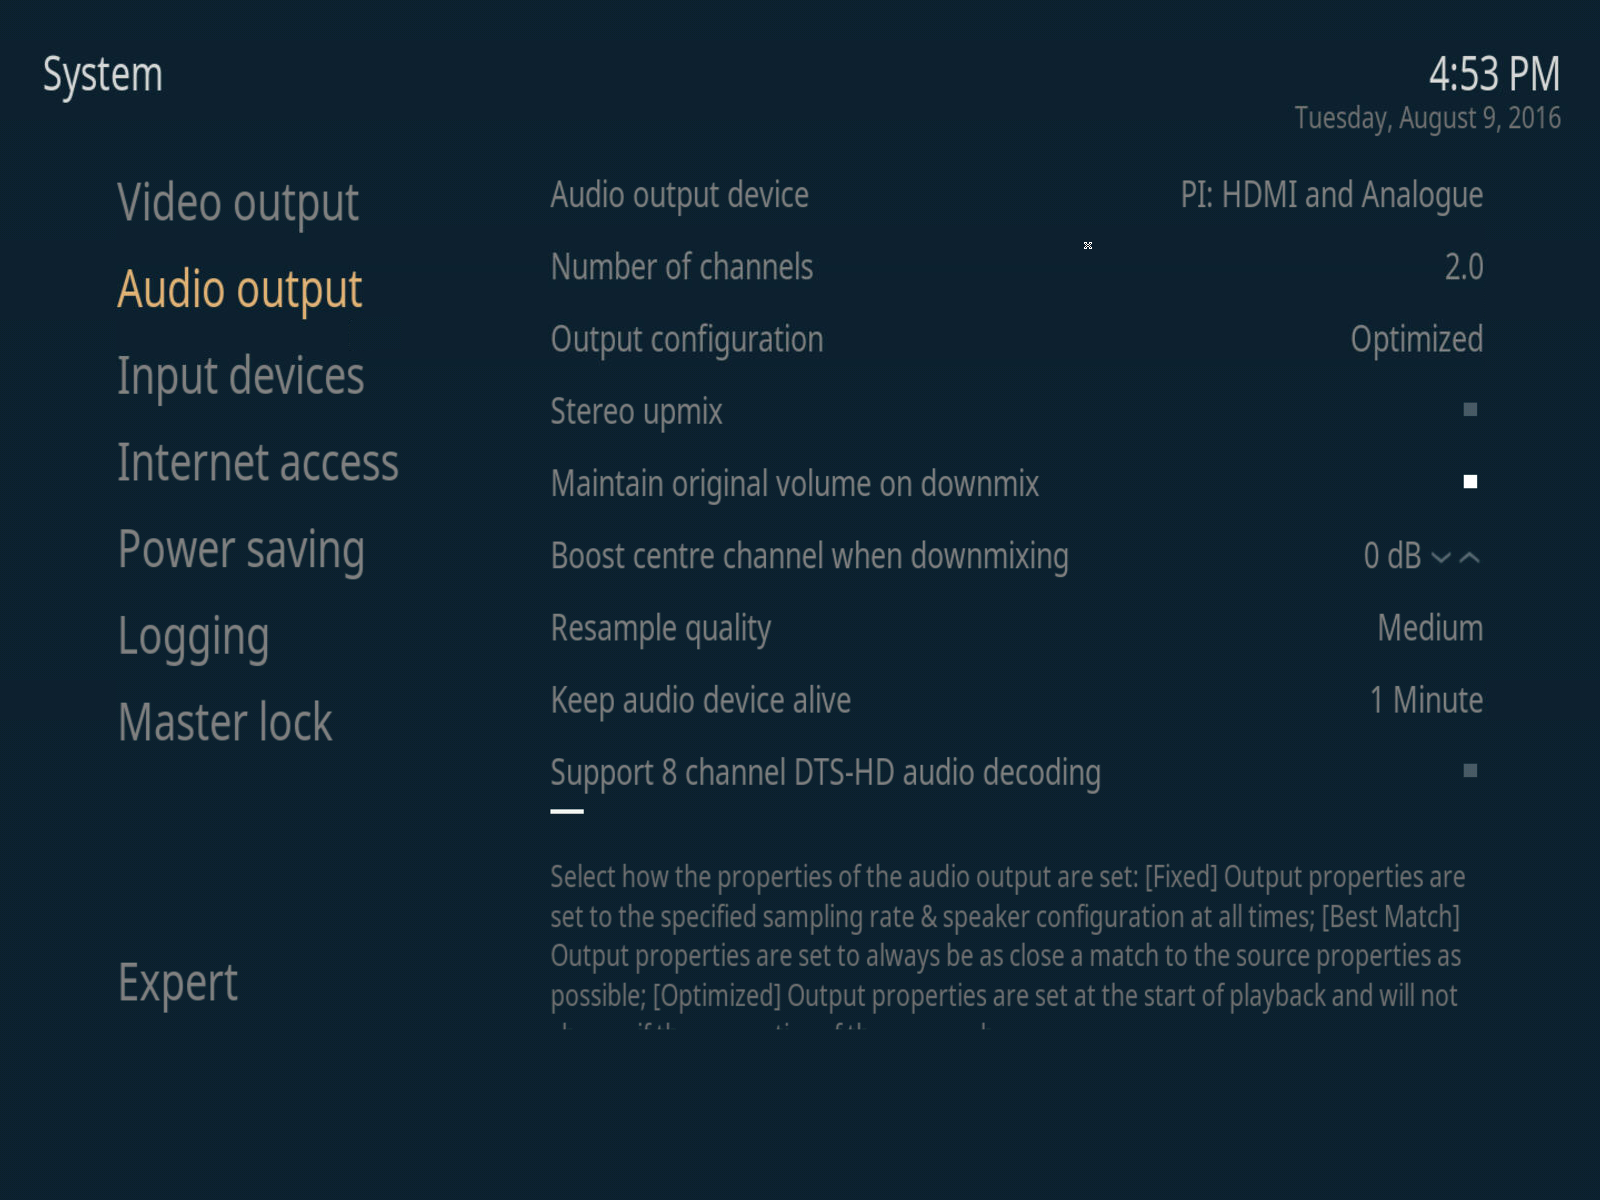
By default the OSMC outputs the audio through HDMI cable itself, thus there is no need to connect any other cables or wires for the audio, but in case you need to connect your headphones or speakers, you need to connect 3.5mm audio cable to the audio jack. The Audio Jack is present next to the HDMI port. We had set the default audio output option as HDMI and Analog, thus you are able to listen audio from HDMI as well as audio jack at the same time, you are able to change and modify these audio settings anytime. you can find these settings under:
System Settings -> System -> Audio output
Once you open the mentioned tab, you are able to see the page as shown in the image below. This page refers to audio settings, which you can modify as per your requirements.
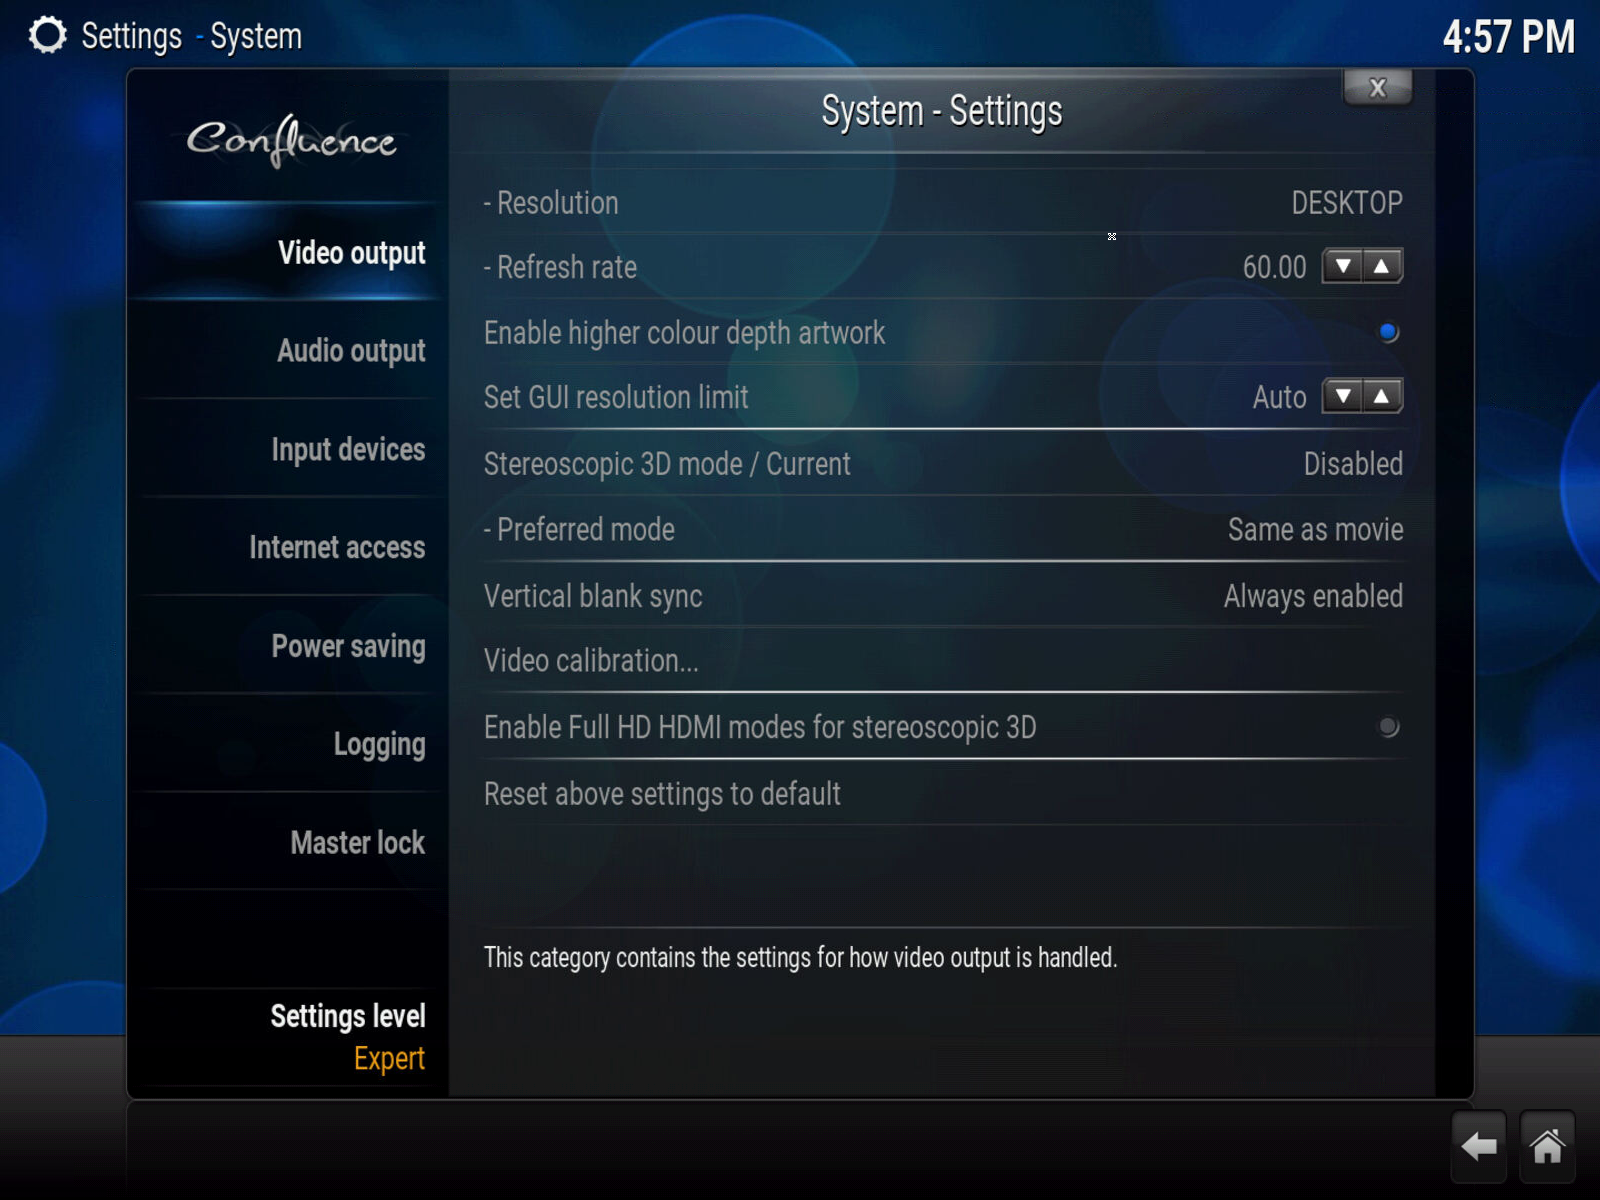
We had set the OSMC skin as default, if you are using the same skin, you can see the same as shown in the above image, but if you had modified the Skin from OSMC to confluence then you can see the same window as shown in the image below.
Setting up Network Connections
The OSMC comes with Network Interface GUI, where you are able to change the settings for multiple network related devices. All you need to do is open the following path in the OSMC
My OSMC -> Network
Refer the video below for the same:
If you look at the available options, you can see following options:
- Wired
- Wireless
- Bluetooth
- Tethering
- MySQL
Under each tab you can see the enable and disable keys and you can use connect and disconnect to make connectivity with any of the Wifi access point or Bluetooth devices or even you are able to set the Pi as hotspot too under the tethering tab. The GUI is so simple and easy to understand, you will hardly face any issue connecting the media center to your network. Make Sure that you enable the adapter under the Wired tab, if you are using Ethernet cable for network connectivity.
IR Remote Configuration
This section will help you to add new IR configuration to the OSMC. Right now we had configured the OSMC with the remote we provided but you are able to use any IR remote around you to control the media center, all you need is to add the configuration file to the OSMC system and set that configuration file as preferred file for IR remote.
Since OSMC is Linux based, we are going to use LIRC “Linux Infrared Remote Control”, LIRC is a package that allows you to decode and send infra-red signals of many (but not all) commonly used remote controls. Under this we are going to use LIRCD System Administration Utilities, its capable to decode infrared signals and provide them on a socket.
If you are using standard remote like Samsung, sony, apple, etc. You have to download the configuration file for the same and needs to add it to the OSMC.
Use this Link to find your remote, here you can find most of the LIRC config file for most of the standard remotes.
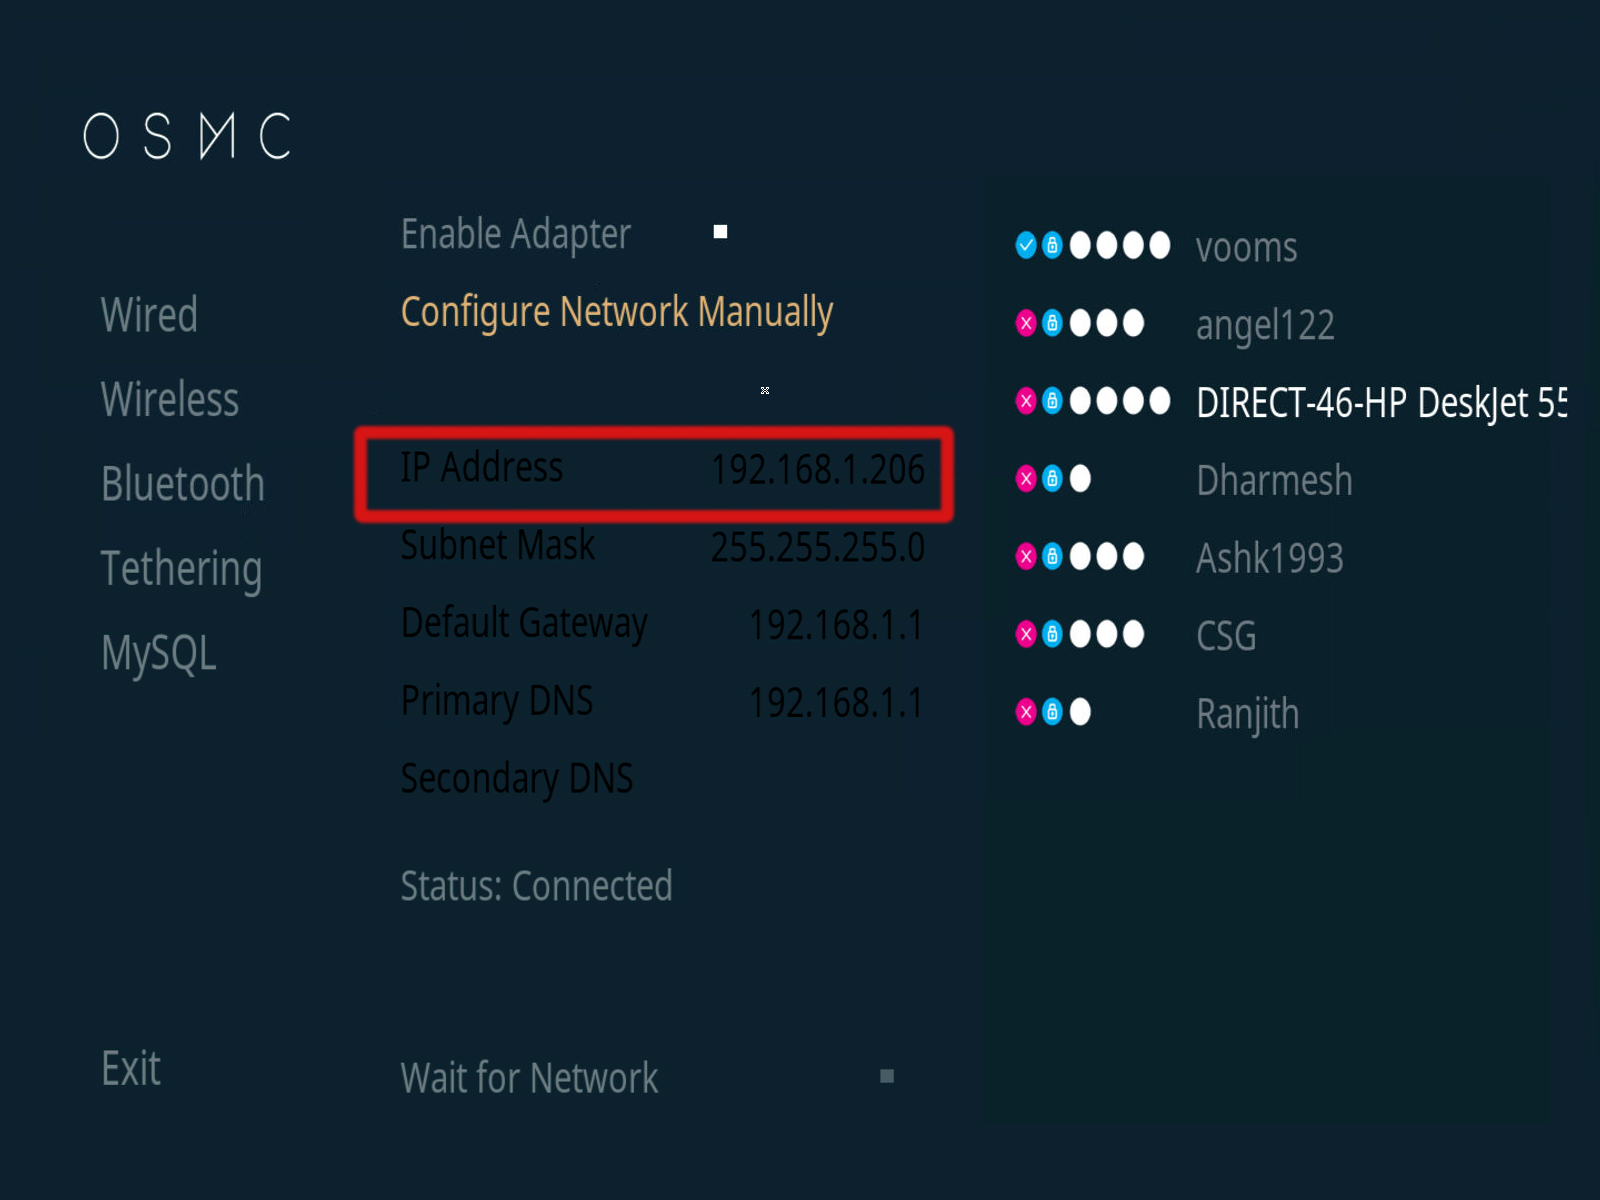
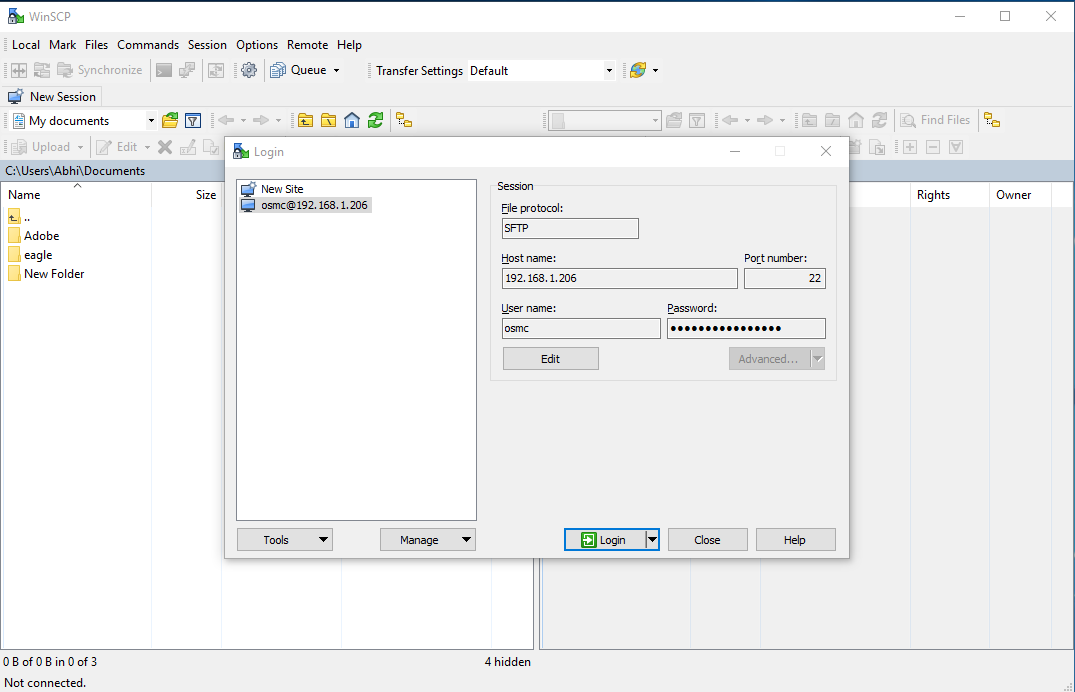
You can download the files to your computer. In this tutorial we used windows computer. Once you done with downloading, you need WinSCP (SCP, FTP Client for windows), download winSCP from this Link, once you done with installation you need to connect to OSMC via network IP address, refer the image below to check your IP address:
Once you find out the IP address, enter the following credentials in the Login Window:
Host Name: Your IP Address
User name: osmc
Password: osmc
Once you are logged in successfully, you can see two windows, one window as your computer files explorer and the second window as OSMC files explorer, you just need to upload the files from your computer to the OSMC. Refer the video below for the demonstration we did to transfer one configuration file from windows system to OSMC.
In the video shown, you have noticed that there is already one ER-lircd.conf in the OSMC, this is the configuration file we used for our remote, then we shown how to add one other configuration file to the OSMC, we dragged the ER-lircd-temp.conf file from windows desktop to OSMC.
Once you are done with uploading file to the OSMC, you can close the WinSCP, now all you need to do is to select the configuration file for your remote from the system directory, we had added one video for the same, where we are adding configuration file for the remote we provided.
OSMC LIRCD CONFIGURATION
This is one way of adding remote to your media center, now there are chances that you are not able to find configuration files for your remote, or you are using universal remotes or you want to modify the existing configuration file, in that case, you need to manually make configuration file for your remotes, it means you need to record each and every key on the remote whichever you want to be functional. Follow the steps to record your keys:
- Stop the LIRCD service
- Start Recording
- Assigning standard functions to Individual Keys on the remote
- Save and load the Configuration file
Stop the LIRCD Service
Before you start with this step, you need to download putty . once you done with downloading putty in you computer, you are able to login to your OSMC command shell, you need to login to your OSMC system using IP address(The steps to find IP address mentioned above), enter the username and password as osmc. Once you are connected you need to run the following command to stop the LIRCD service on the OSMC.
sudo systemctl stop lircd_helper@lirc0
The above steps ensures that service is stopped and we can proceed with recording key strokes.
Start Recording
Your need to use following command to start with recording.
irrecord -d /dev/lirc0 /home/osmc/lircd.conf
This steps lets the LIRC decoder, to decode the format of the remote. During the process you need to keep pressing all the keys and follow the instructions which will be displayed in the command line. You can refer the video below for all the process we went through.
Assigning standard functions to Individual Keys on the remote
Once the LIRCD understands the remote format, the next step is to assign the name and functions to each key on the remote. You have to follow the standard configuration file for this step, as the names are standard and the LIRCD won’t accept any other names, so you have to refer the one of the available standard config files, we have already provided the Link for the same in the above section.
Watch this video to see, how to record and assign functions to the remote keys.
Save and load the configuration file
If you had followed the video, you have seen that you need to hit enter at the end of recording process, to save the file. If the message “Successfully written config file” does not comes up , no need to worry about it, the file will be saved in the /home/osmc/ directory. You can use the nano editor to check the contents of the file. Use ” sudo nano /home/osmc/filename.conf ” Command. Make sure that you had replaced the filename with what you have provided.
To load the configuration file, you need to watch the video above tagged with: OSMC LIRCD CONFIGURATION once done with all these steps you need to reboot the system.
Playing Photos and videos from Smartphone
The cool thing with this part is you are able to play your mobile contents in the OSMC player or vise versa, all you need to do is to change some settings in the OSMC to use this feature and install the BubbleUPnp from the play store. The BubbleUPnp comes in paid and free version, we tried this feature with free version.
To establish UPnp between OSMC and your mobile phone, you need to enable the UPnp services in the OSMC.
Open the following the path: System Settings -> Services
Once you are open the services you will see the following options:
- General
- UpnP/DLNA
- Web Server
- Remote Control
- Zeroconf
- AirPlay
General : Under this tab you can modify the device name
UPnp/DLNA: Under this you need to enable both the options to allow remote controlling and sharing the libraries
Web Server: This is by defualt enabled, if not please enable it.
Remote Control: Enable both the options to allow remote controlling
Zeroconf: This is by default enabled, if not please enable it.
Airplay: This you can enable if you having Apple product with you.
Now in the mobile application part, all you need to do is to expand the Renderer tab, under that you are able to list your OSMC, just connect it and you are ready to go.
To play the content from Mobile:
- Select Local Media Server under Library tab
- Expand Media tab to select from a list of available options.
Play any video/ Music from the media and you are able to watch it now on the OSMC.
Install BubbleUPnP from Google Play
Using Kore/Yatse as OSMC Remote
There are lots of remote control applications are available for the OSMC/KODI/XBMC. All you need to do is to download the application from the play store, once done with installation, the remote will look for available media center on the network, make sure that your media center is connected to network, then you will see that, these apps will comes with OSMC option. You need to select the device from the available option and then you are ready to control your media center from your mobile Apps.
We tried and tested out both the Kore and Yatse App with OSMC and its works out really well with it.