IRON MAN ARC REACTOR

Ironman Arc Reactor – DIY
Programming WS2812 RGB LEDs to produce various cool patterns.
OVERVIEW
Iron Man has always been one of the most popular among heroes of Marvel, especially among Tech Geeks and has been one of the popular choices at comic cons when it comes to showing off coolness with a dash of technology. On the other hand, due to its difficulty in implementation and costs involved, not many enthusiasts are able to build their own costumes. And here we have a DIY to make it easy.
This super fun DIY project will help you replicate the famous Arc Reactor which powers this superhero, along with various cool customizable patterns of glowing LED.
All you need is a circular cardboard cutting, some double-sided tape, Velcro, addressable RGB LEDs, the Medusa Head for Sparkfun ESP32 Thing and a LiPo battery to power the project.
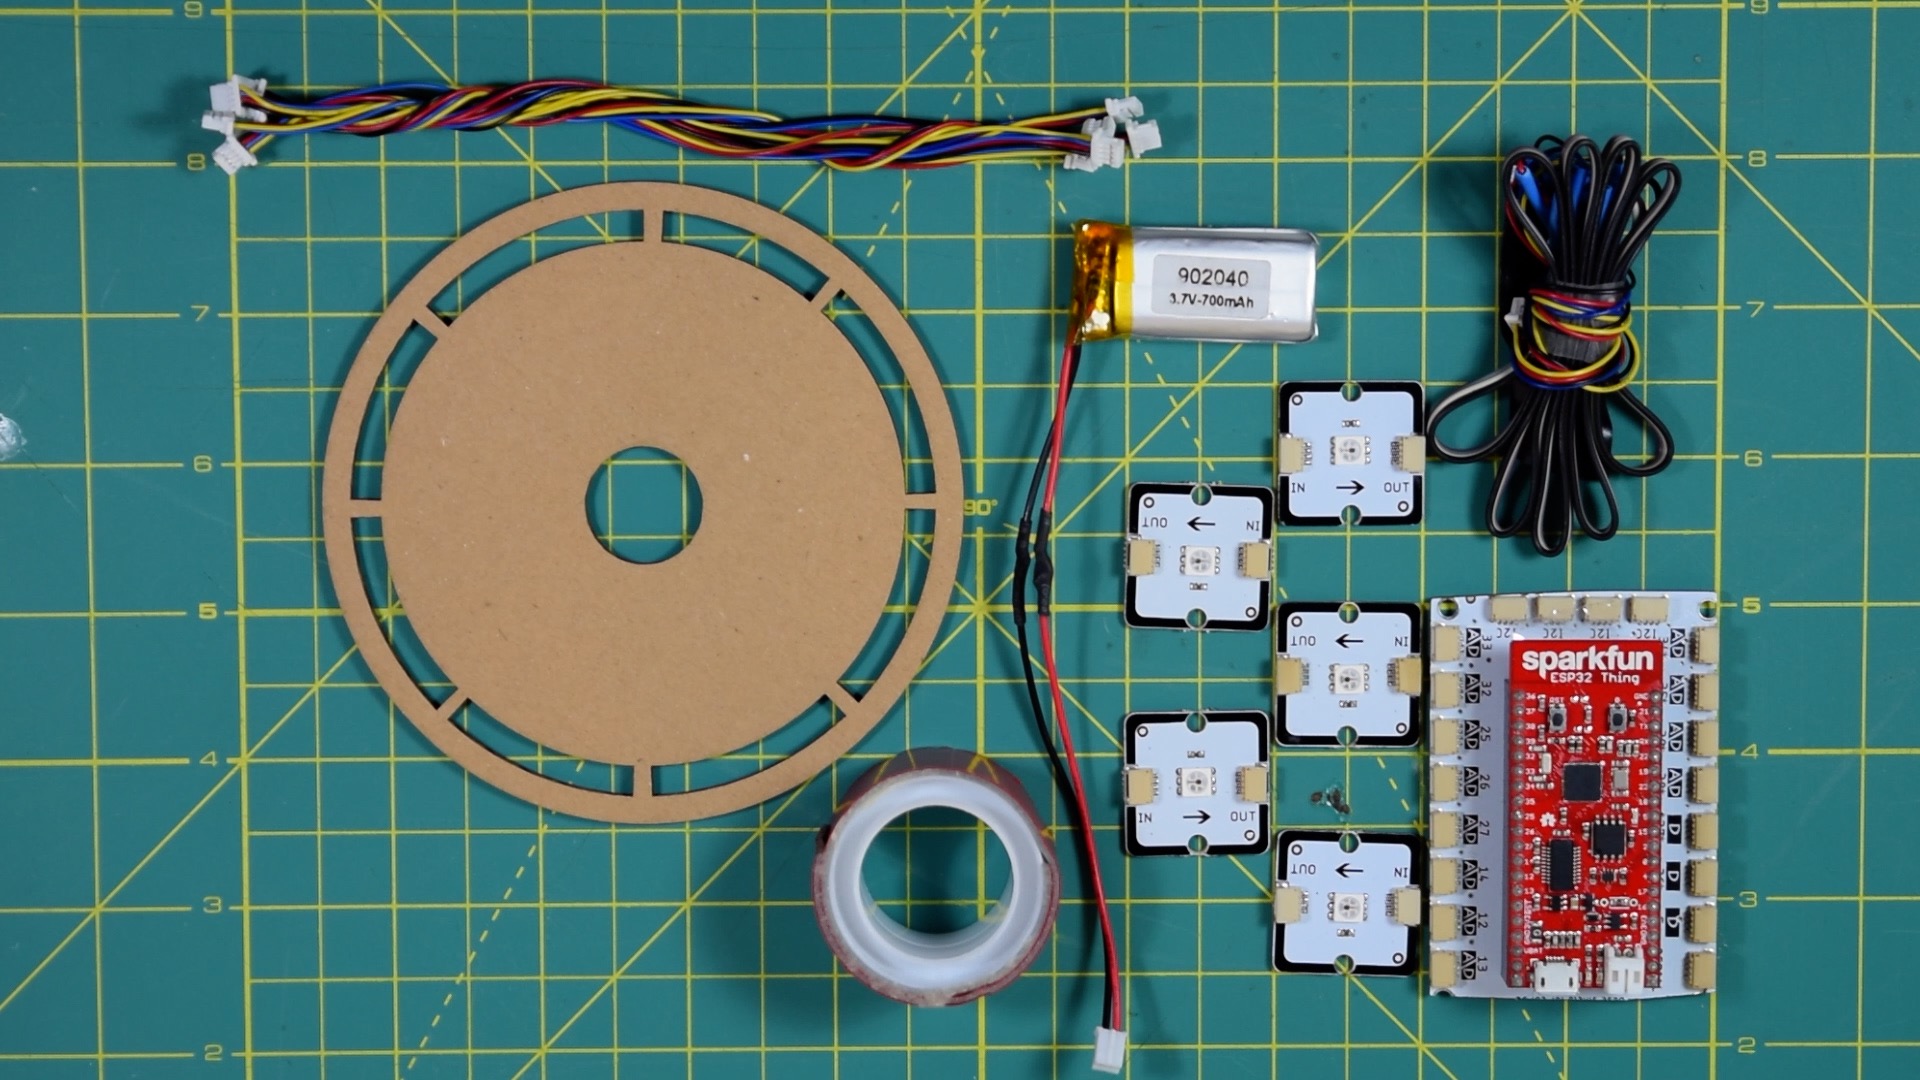
Components for IronMan Arc Generator Project
Additionally, you can use a switch (Medusa Push Button) for some cool custom applications.
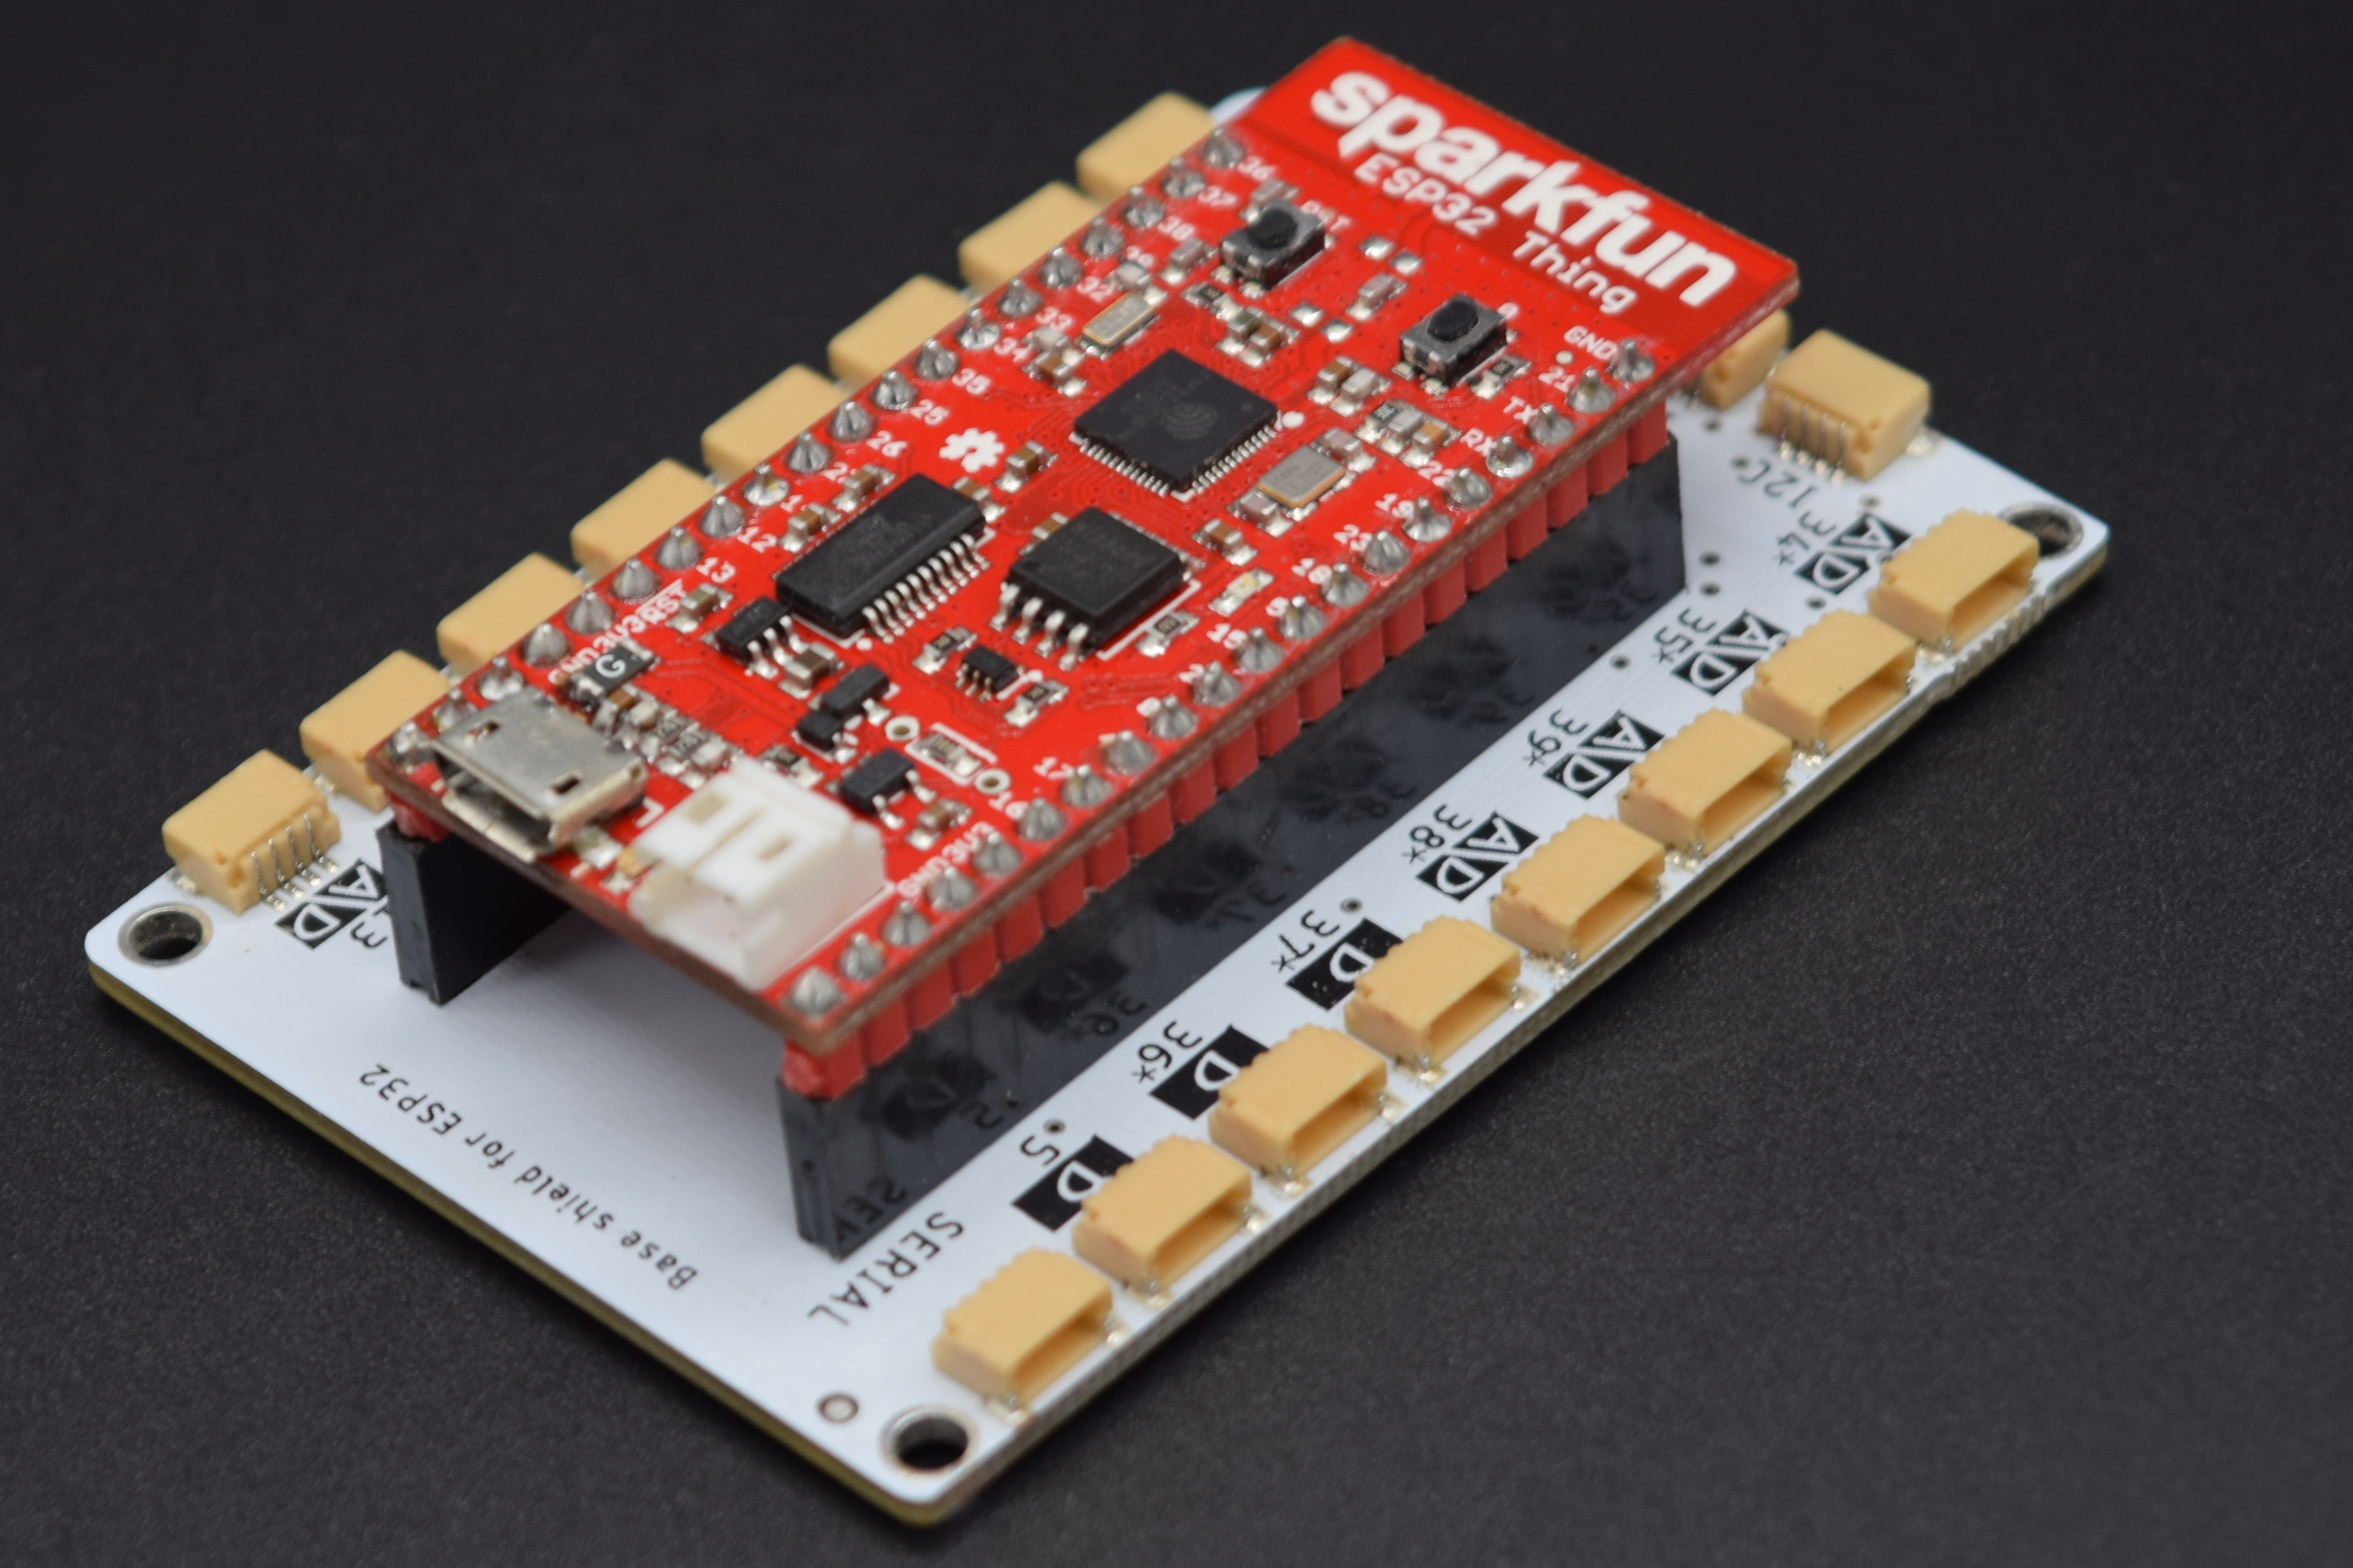 Medusa Head for SparkFun ESP32 Thing Medusa Head for SparkFun ESP32 Thing | 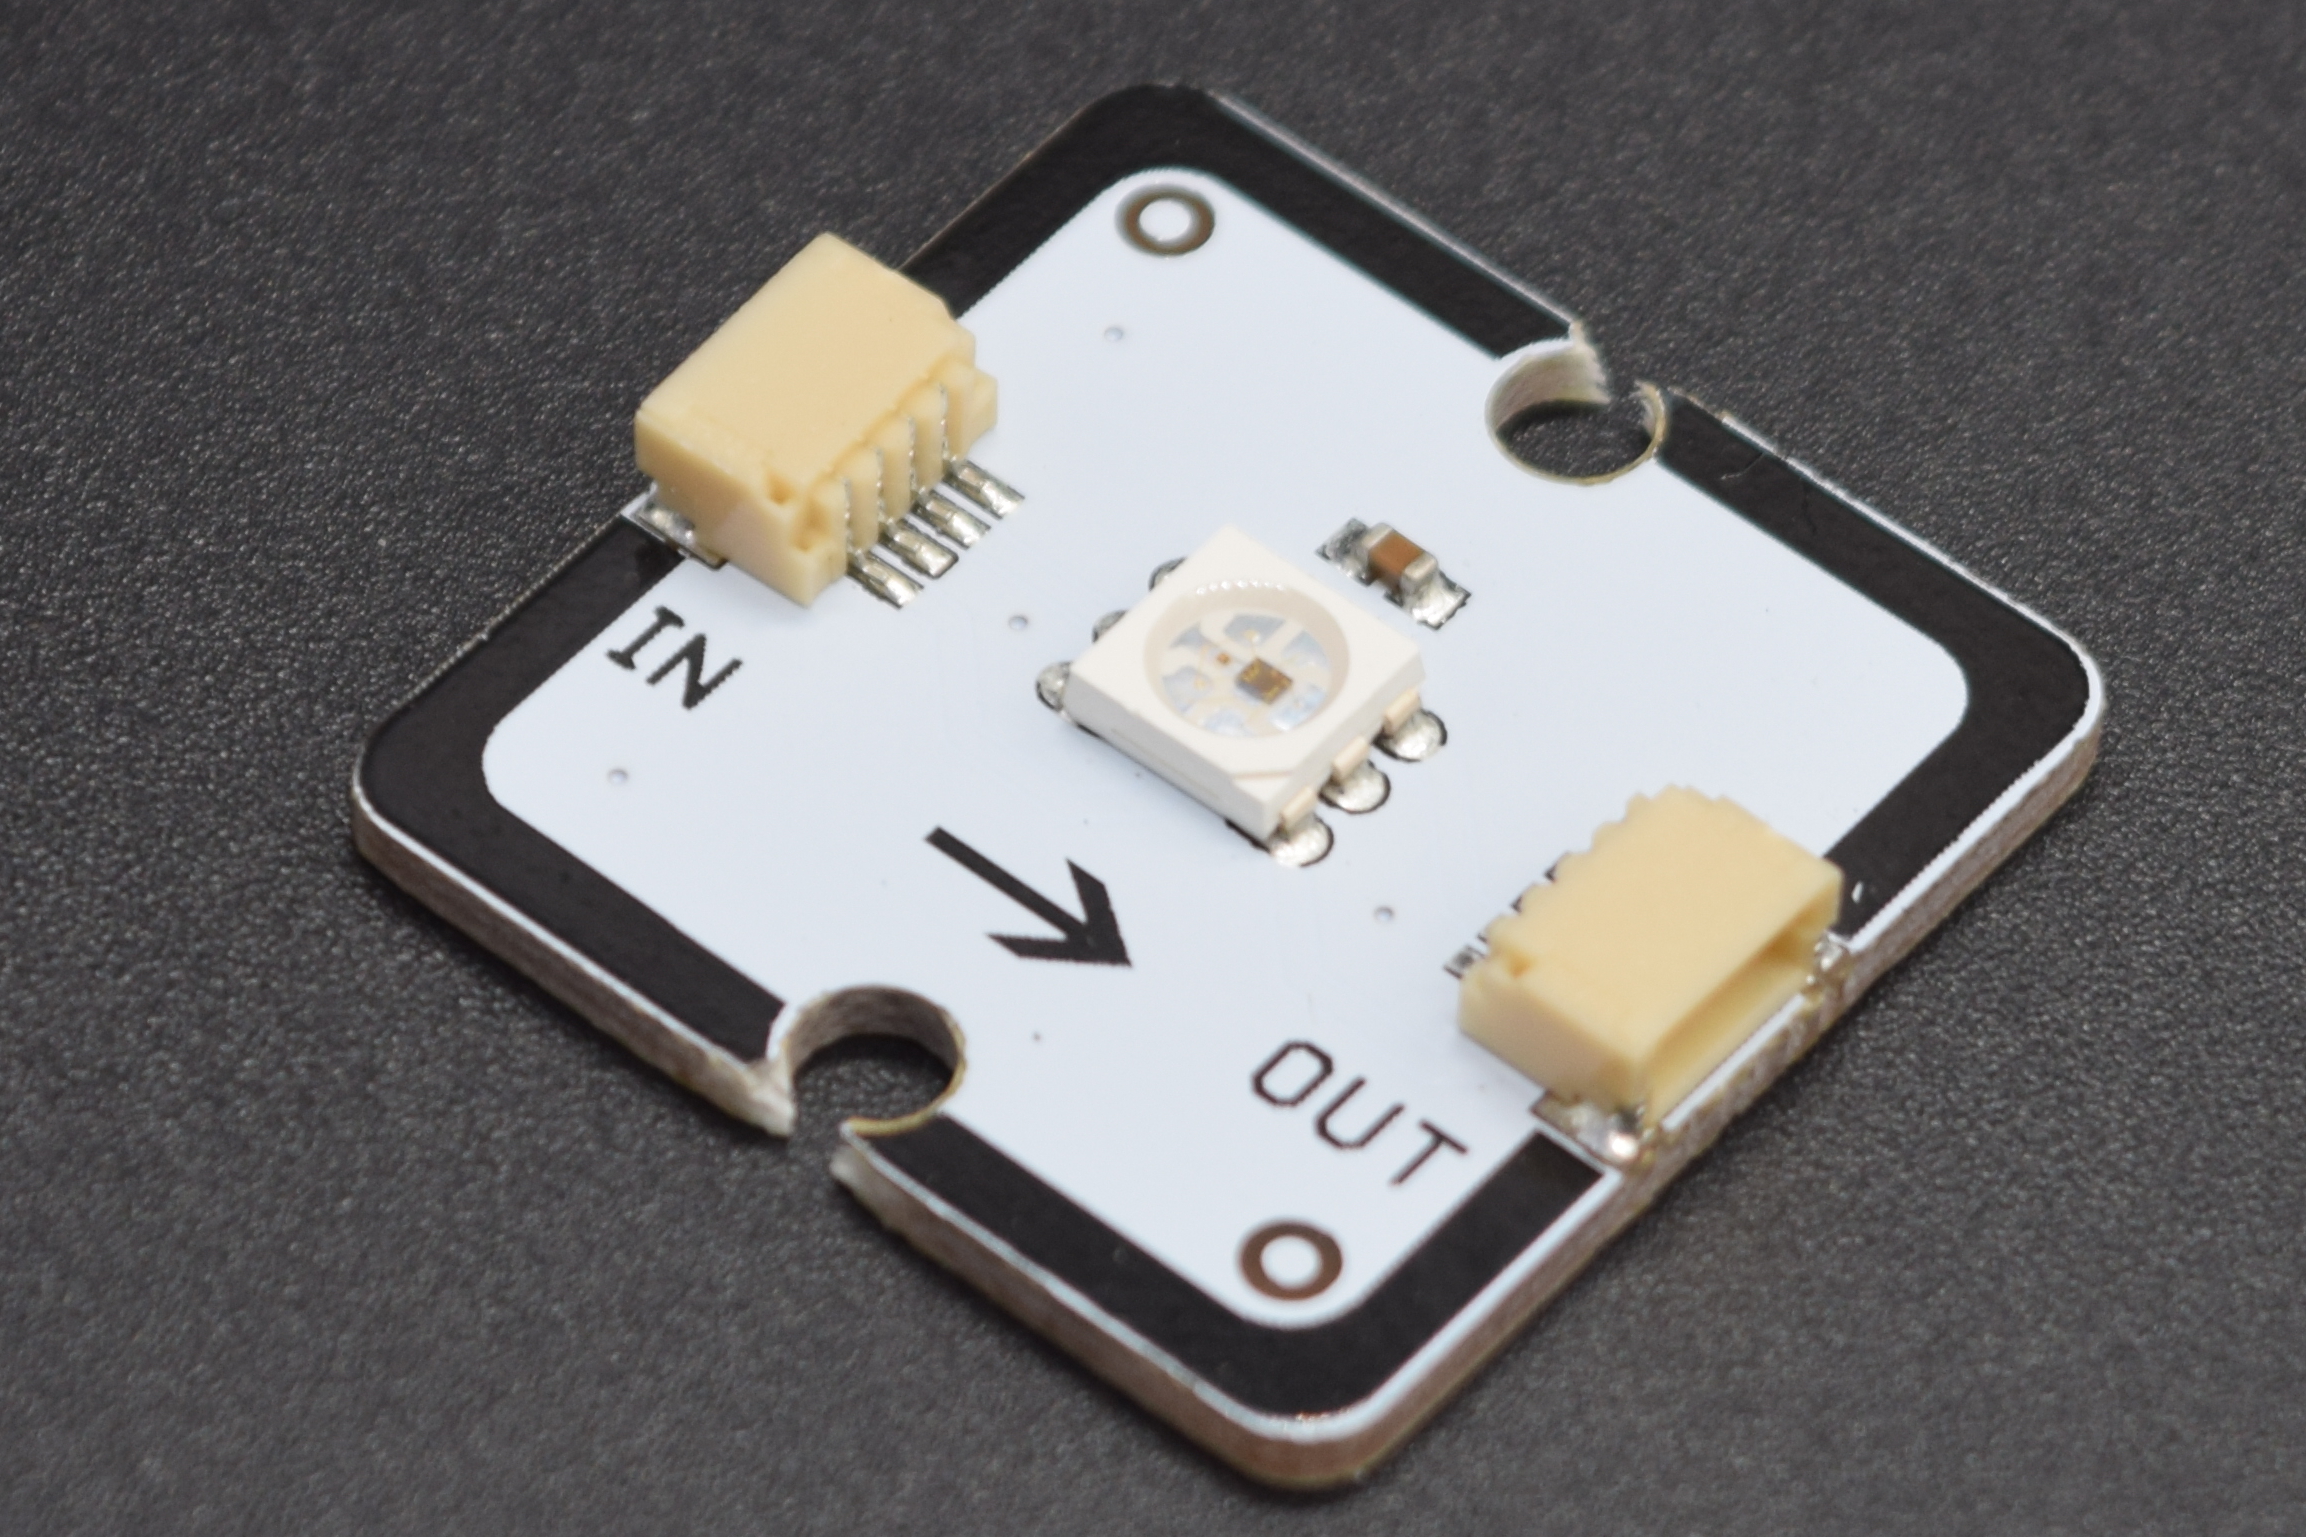 Medusa Addressable RGB LED Medusa Addressable RGB LED | 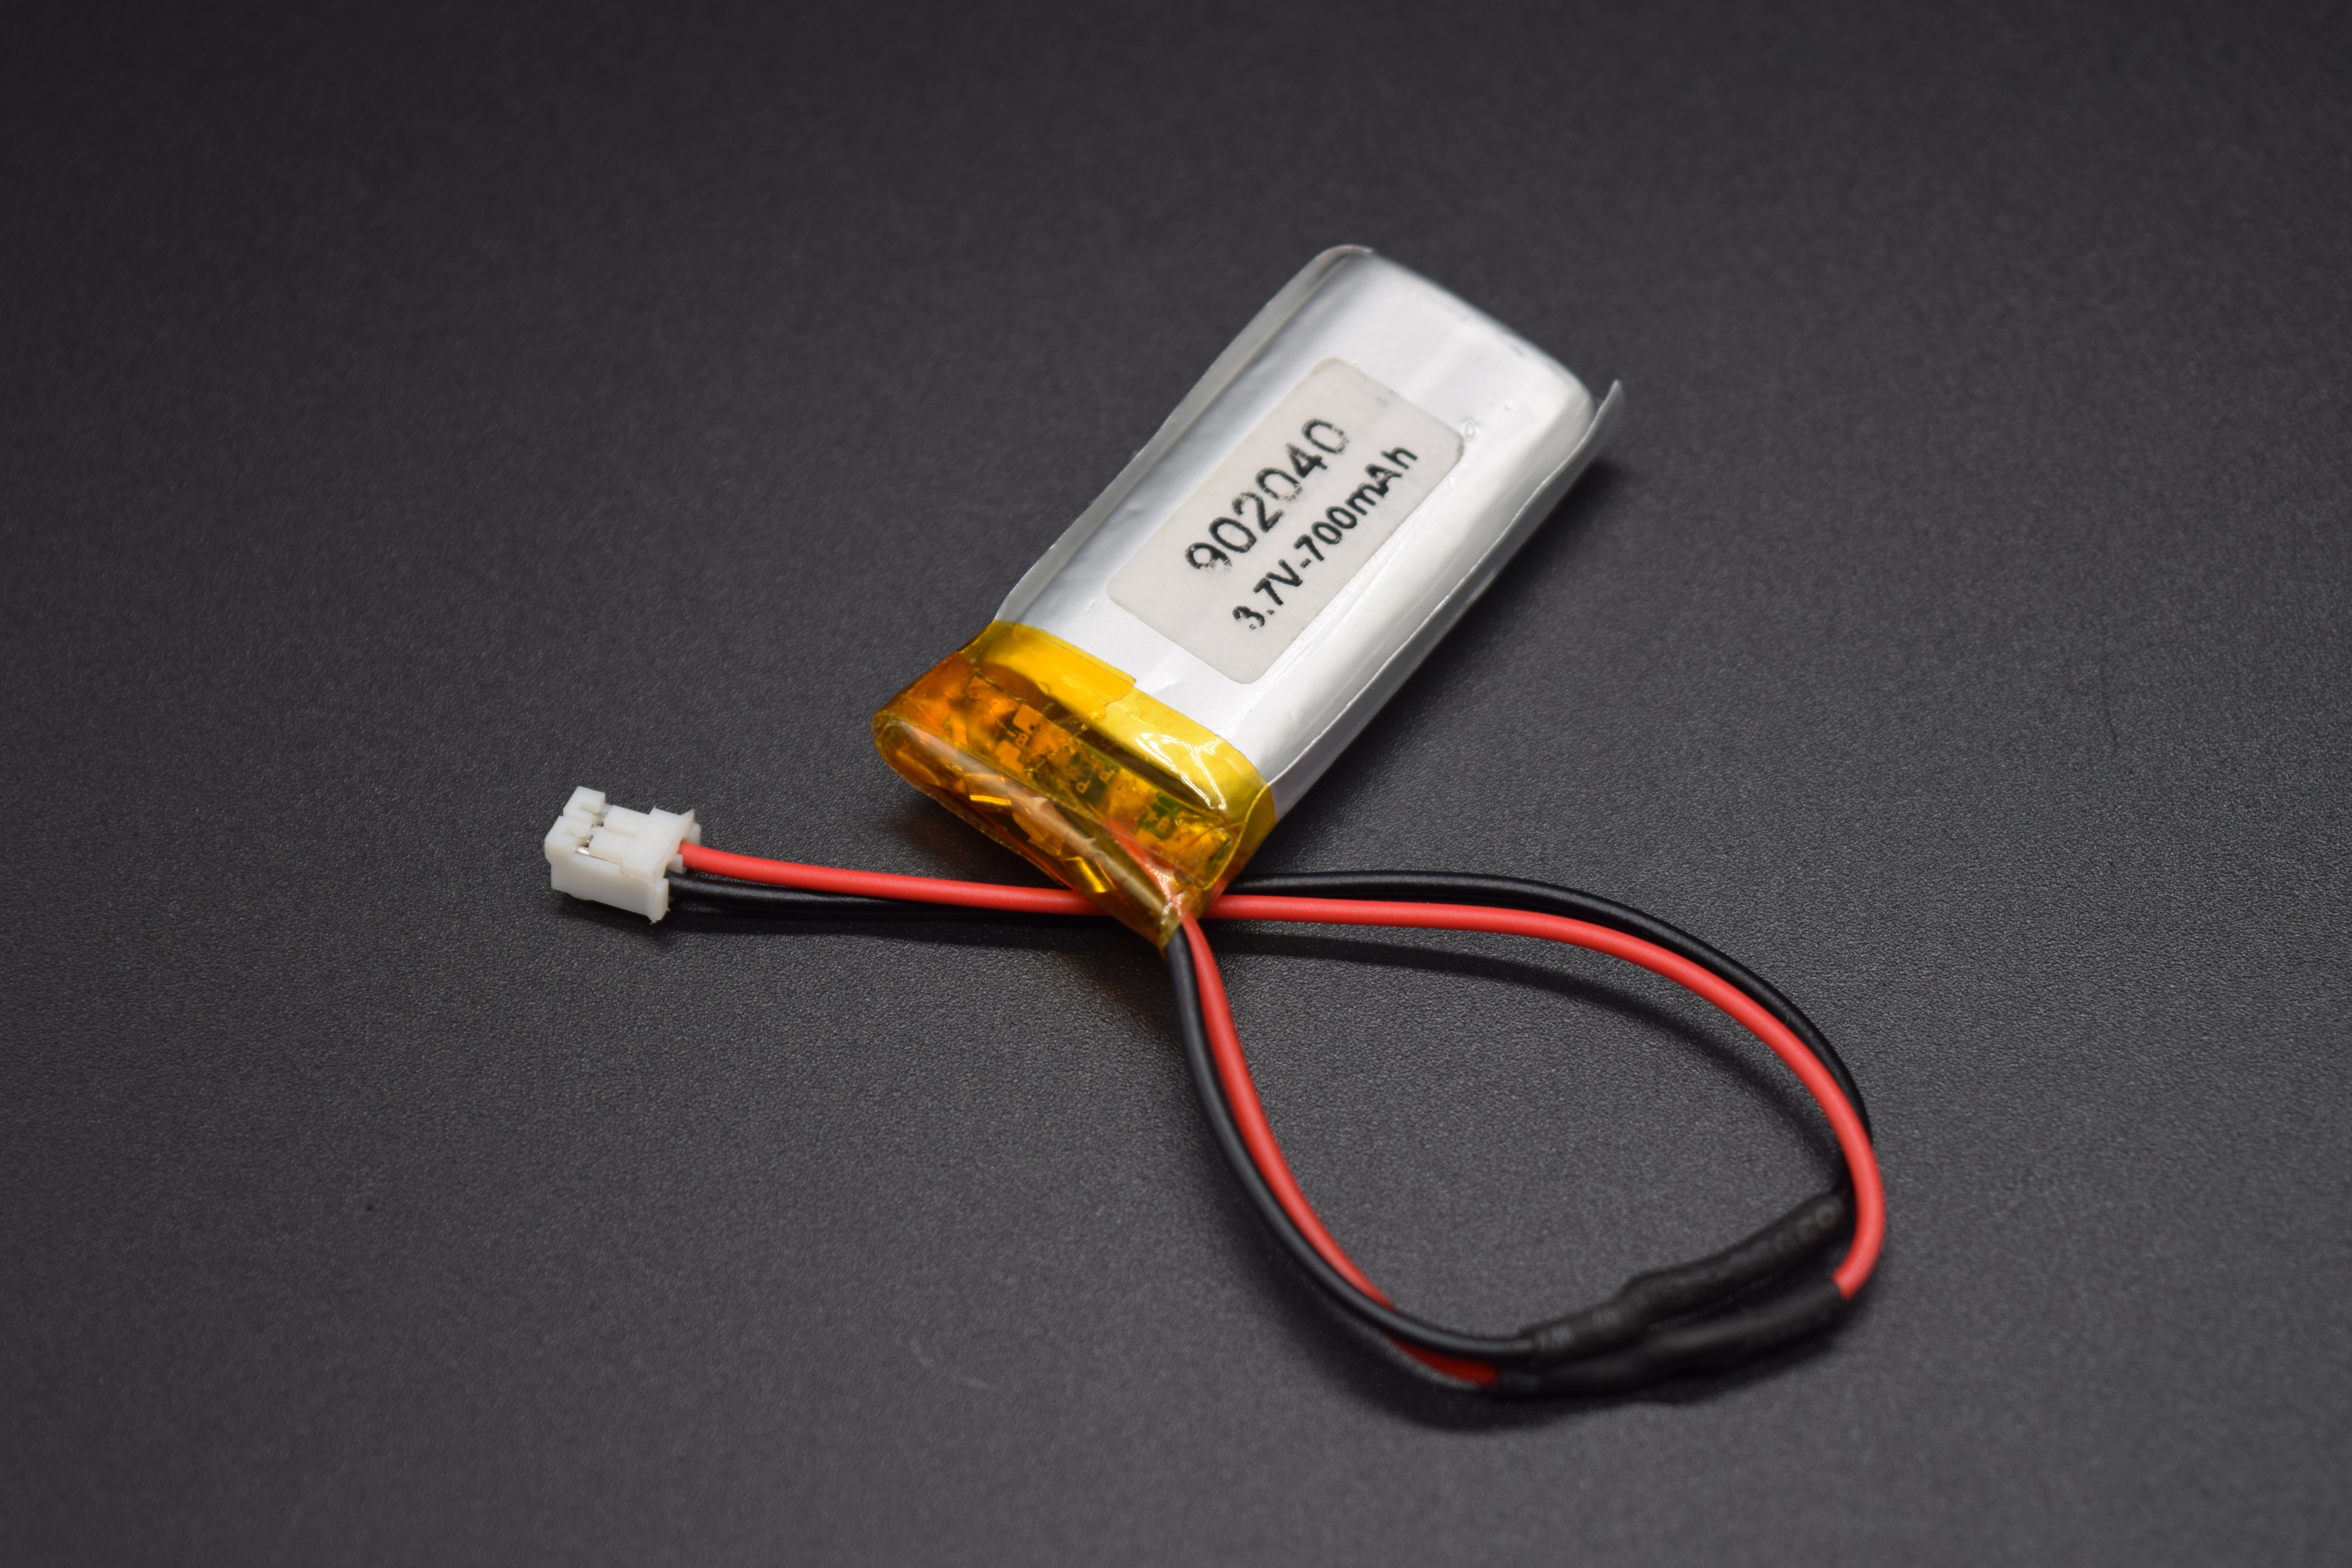 700mAh Lithium Polymer Battery 700mAh Lithium Polymer Battery |
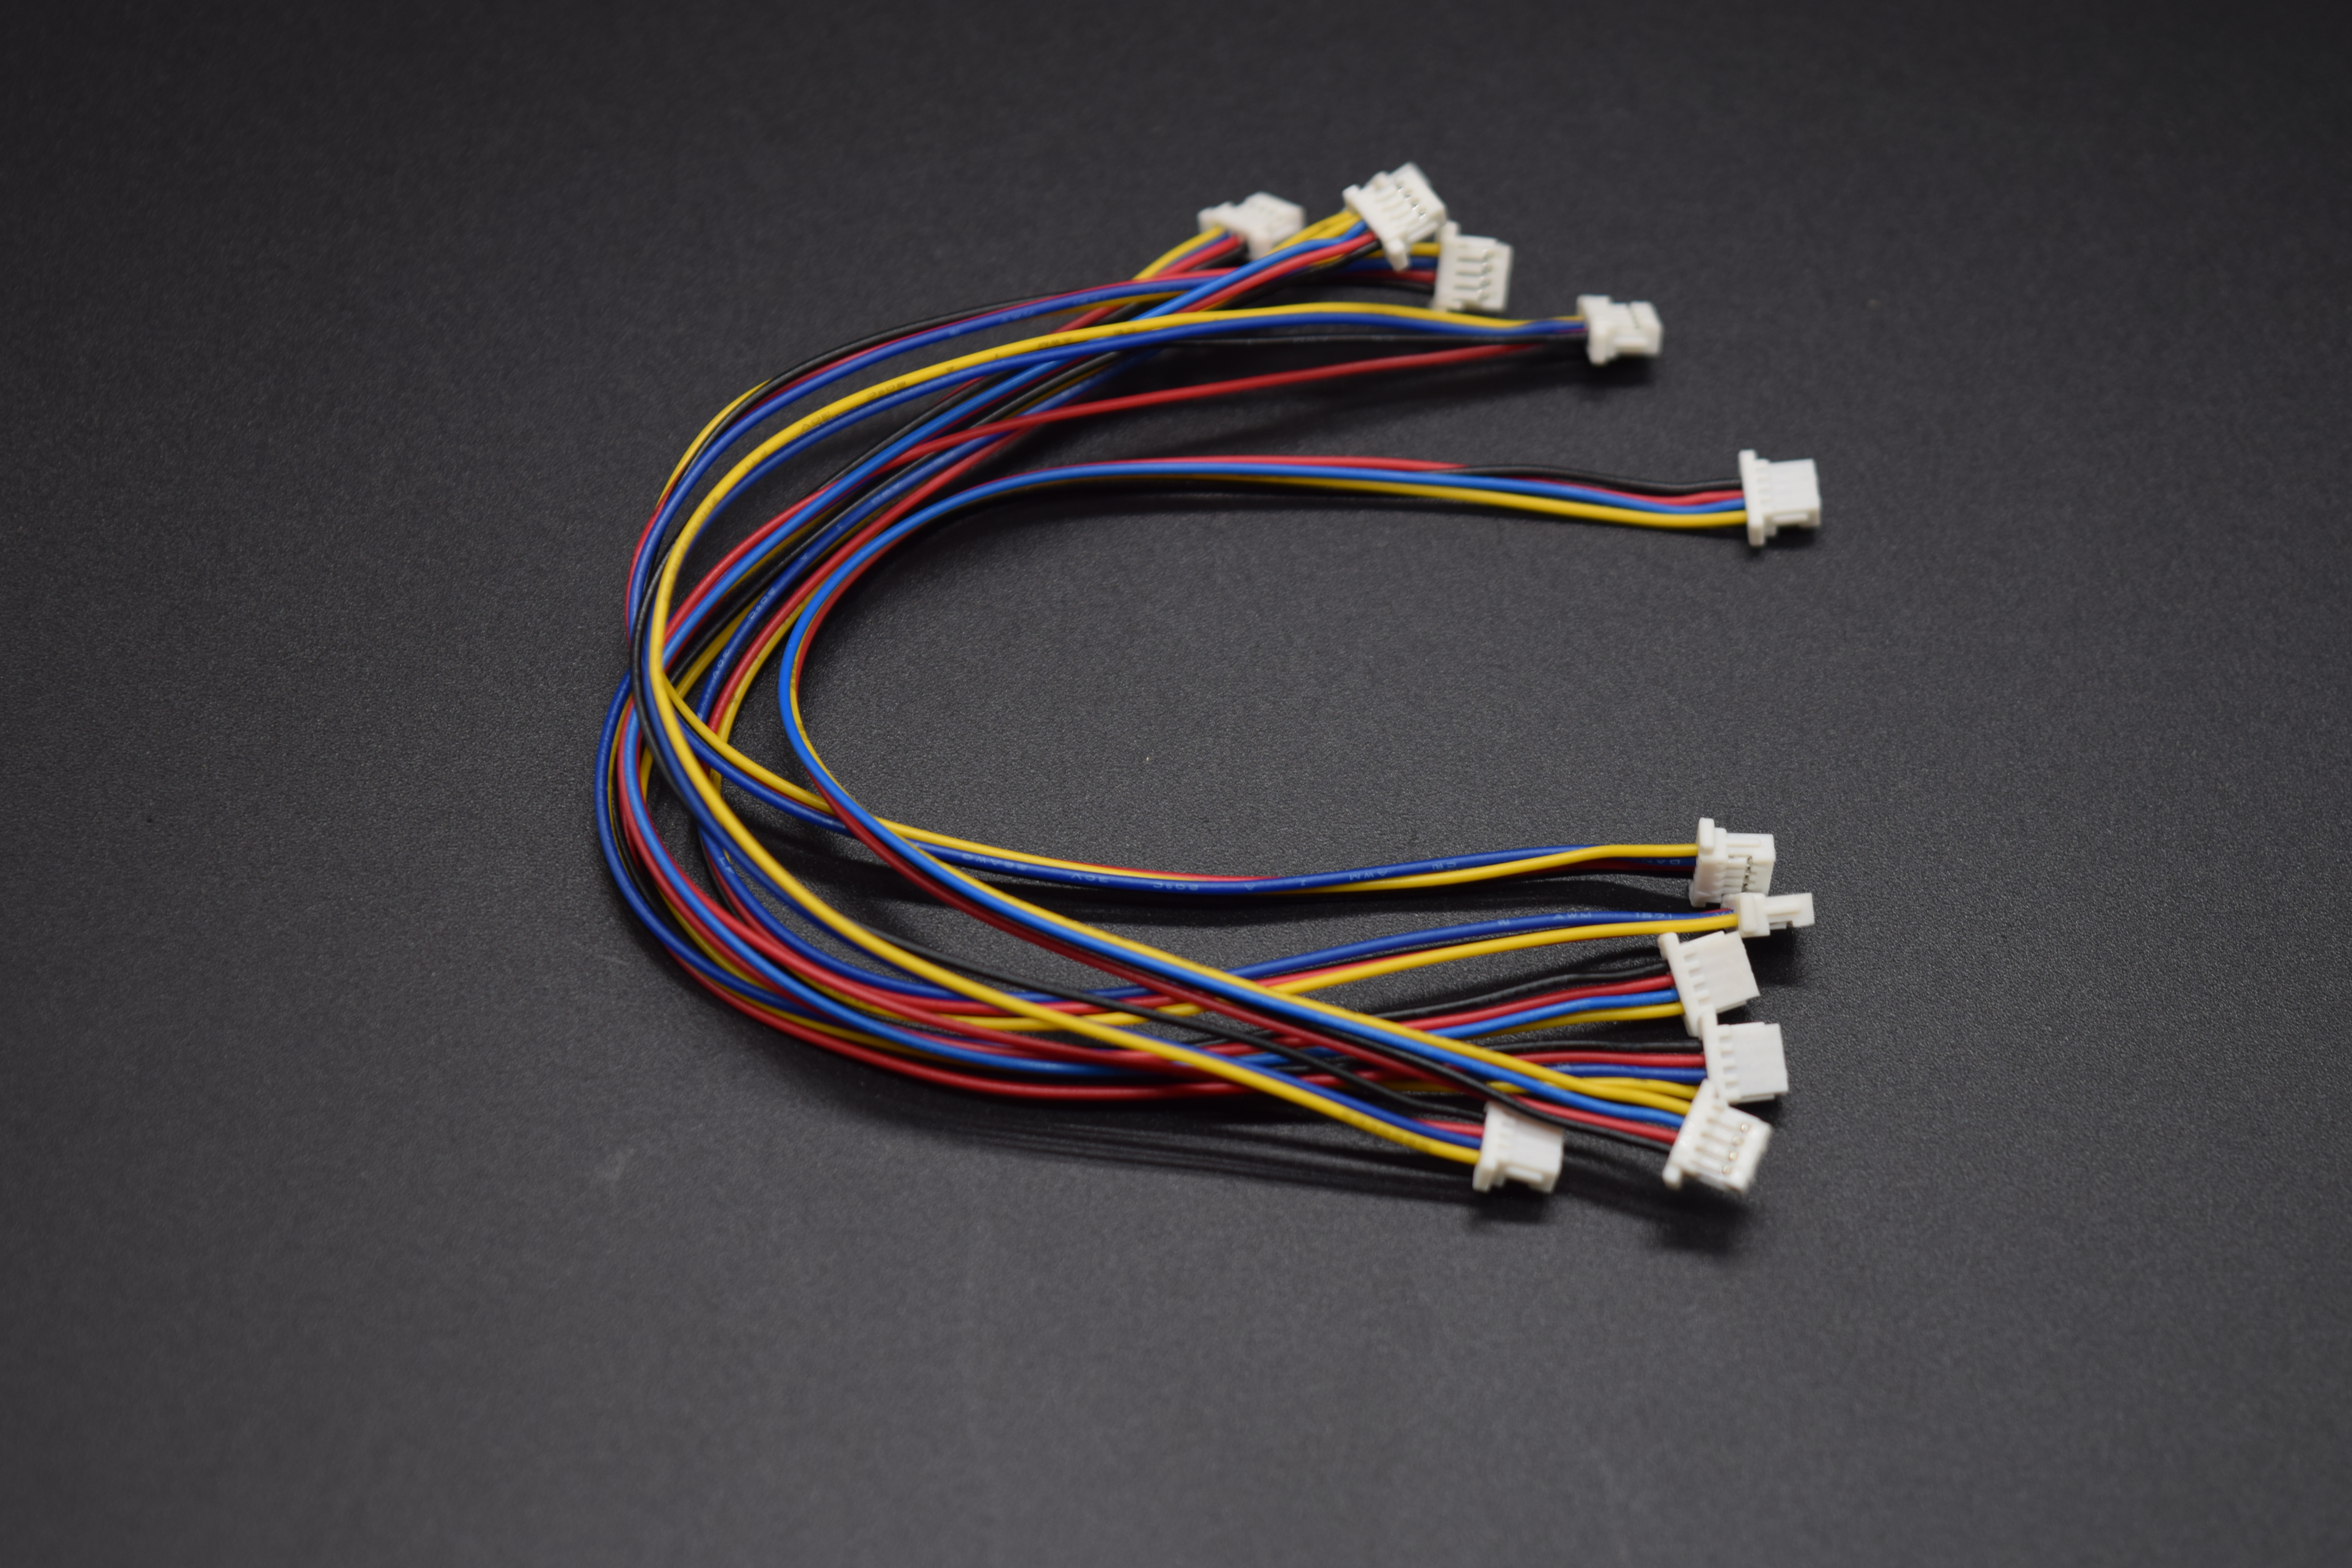 Medusa Cable 150mm Medusa Cable 150mm |  Medusa Cable 1m Medusa Cable 1m | 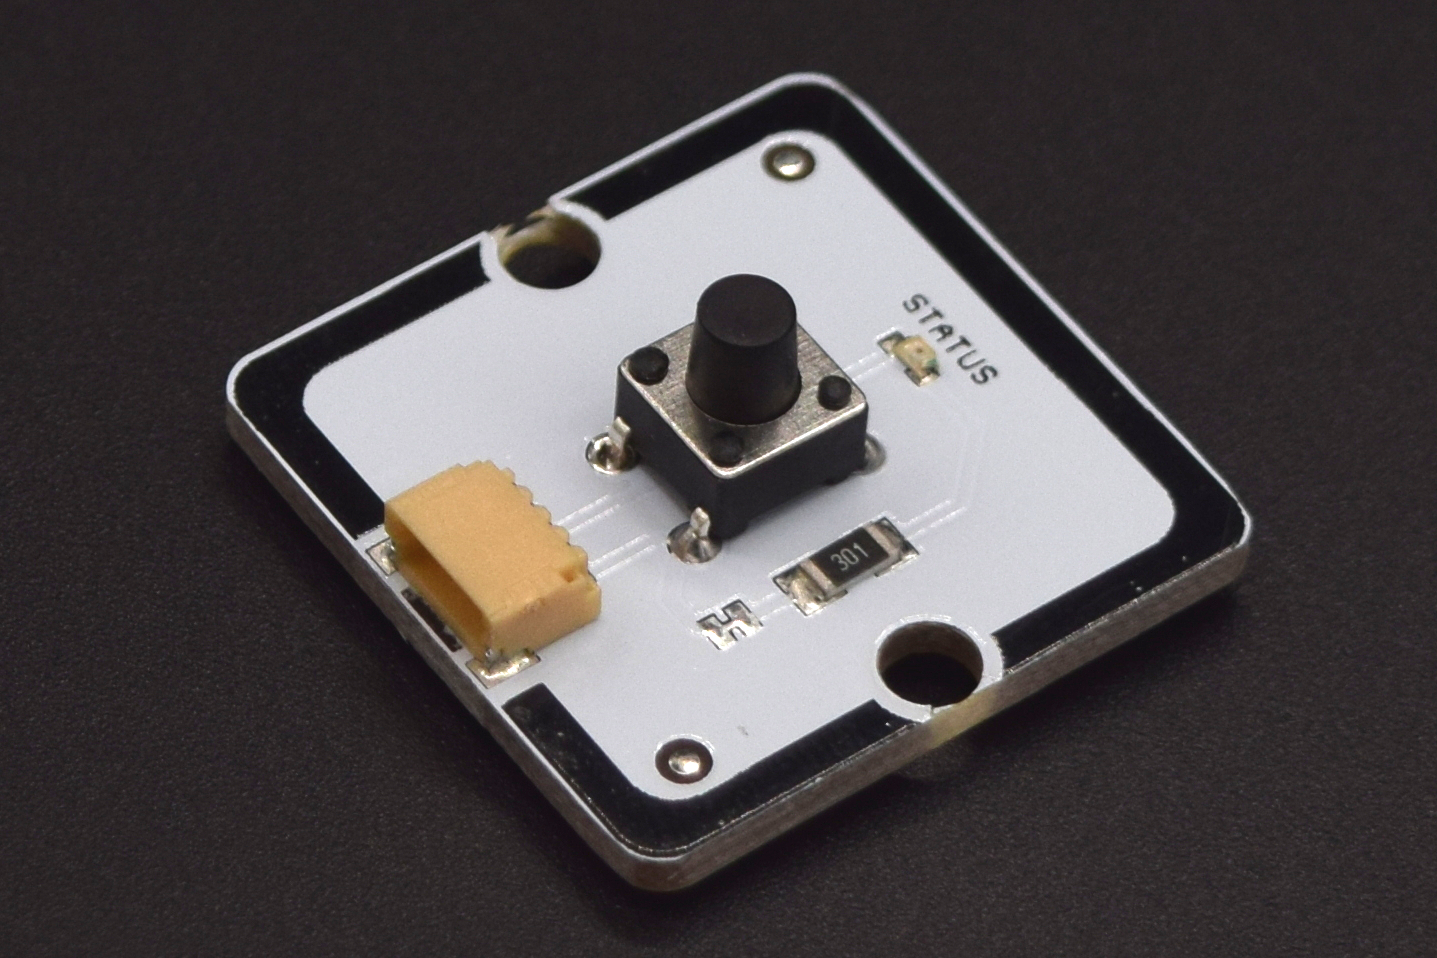 Medusa Push Button Medusa Push Button |
CODE
Test Setup: (to check your code and try out cool patterns of led blink)
The first step is to choose an output pin. Let’s say 25 on Medusa Head. The LEDs are daisy chained, be sure to connect the output of one to the input of the next.
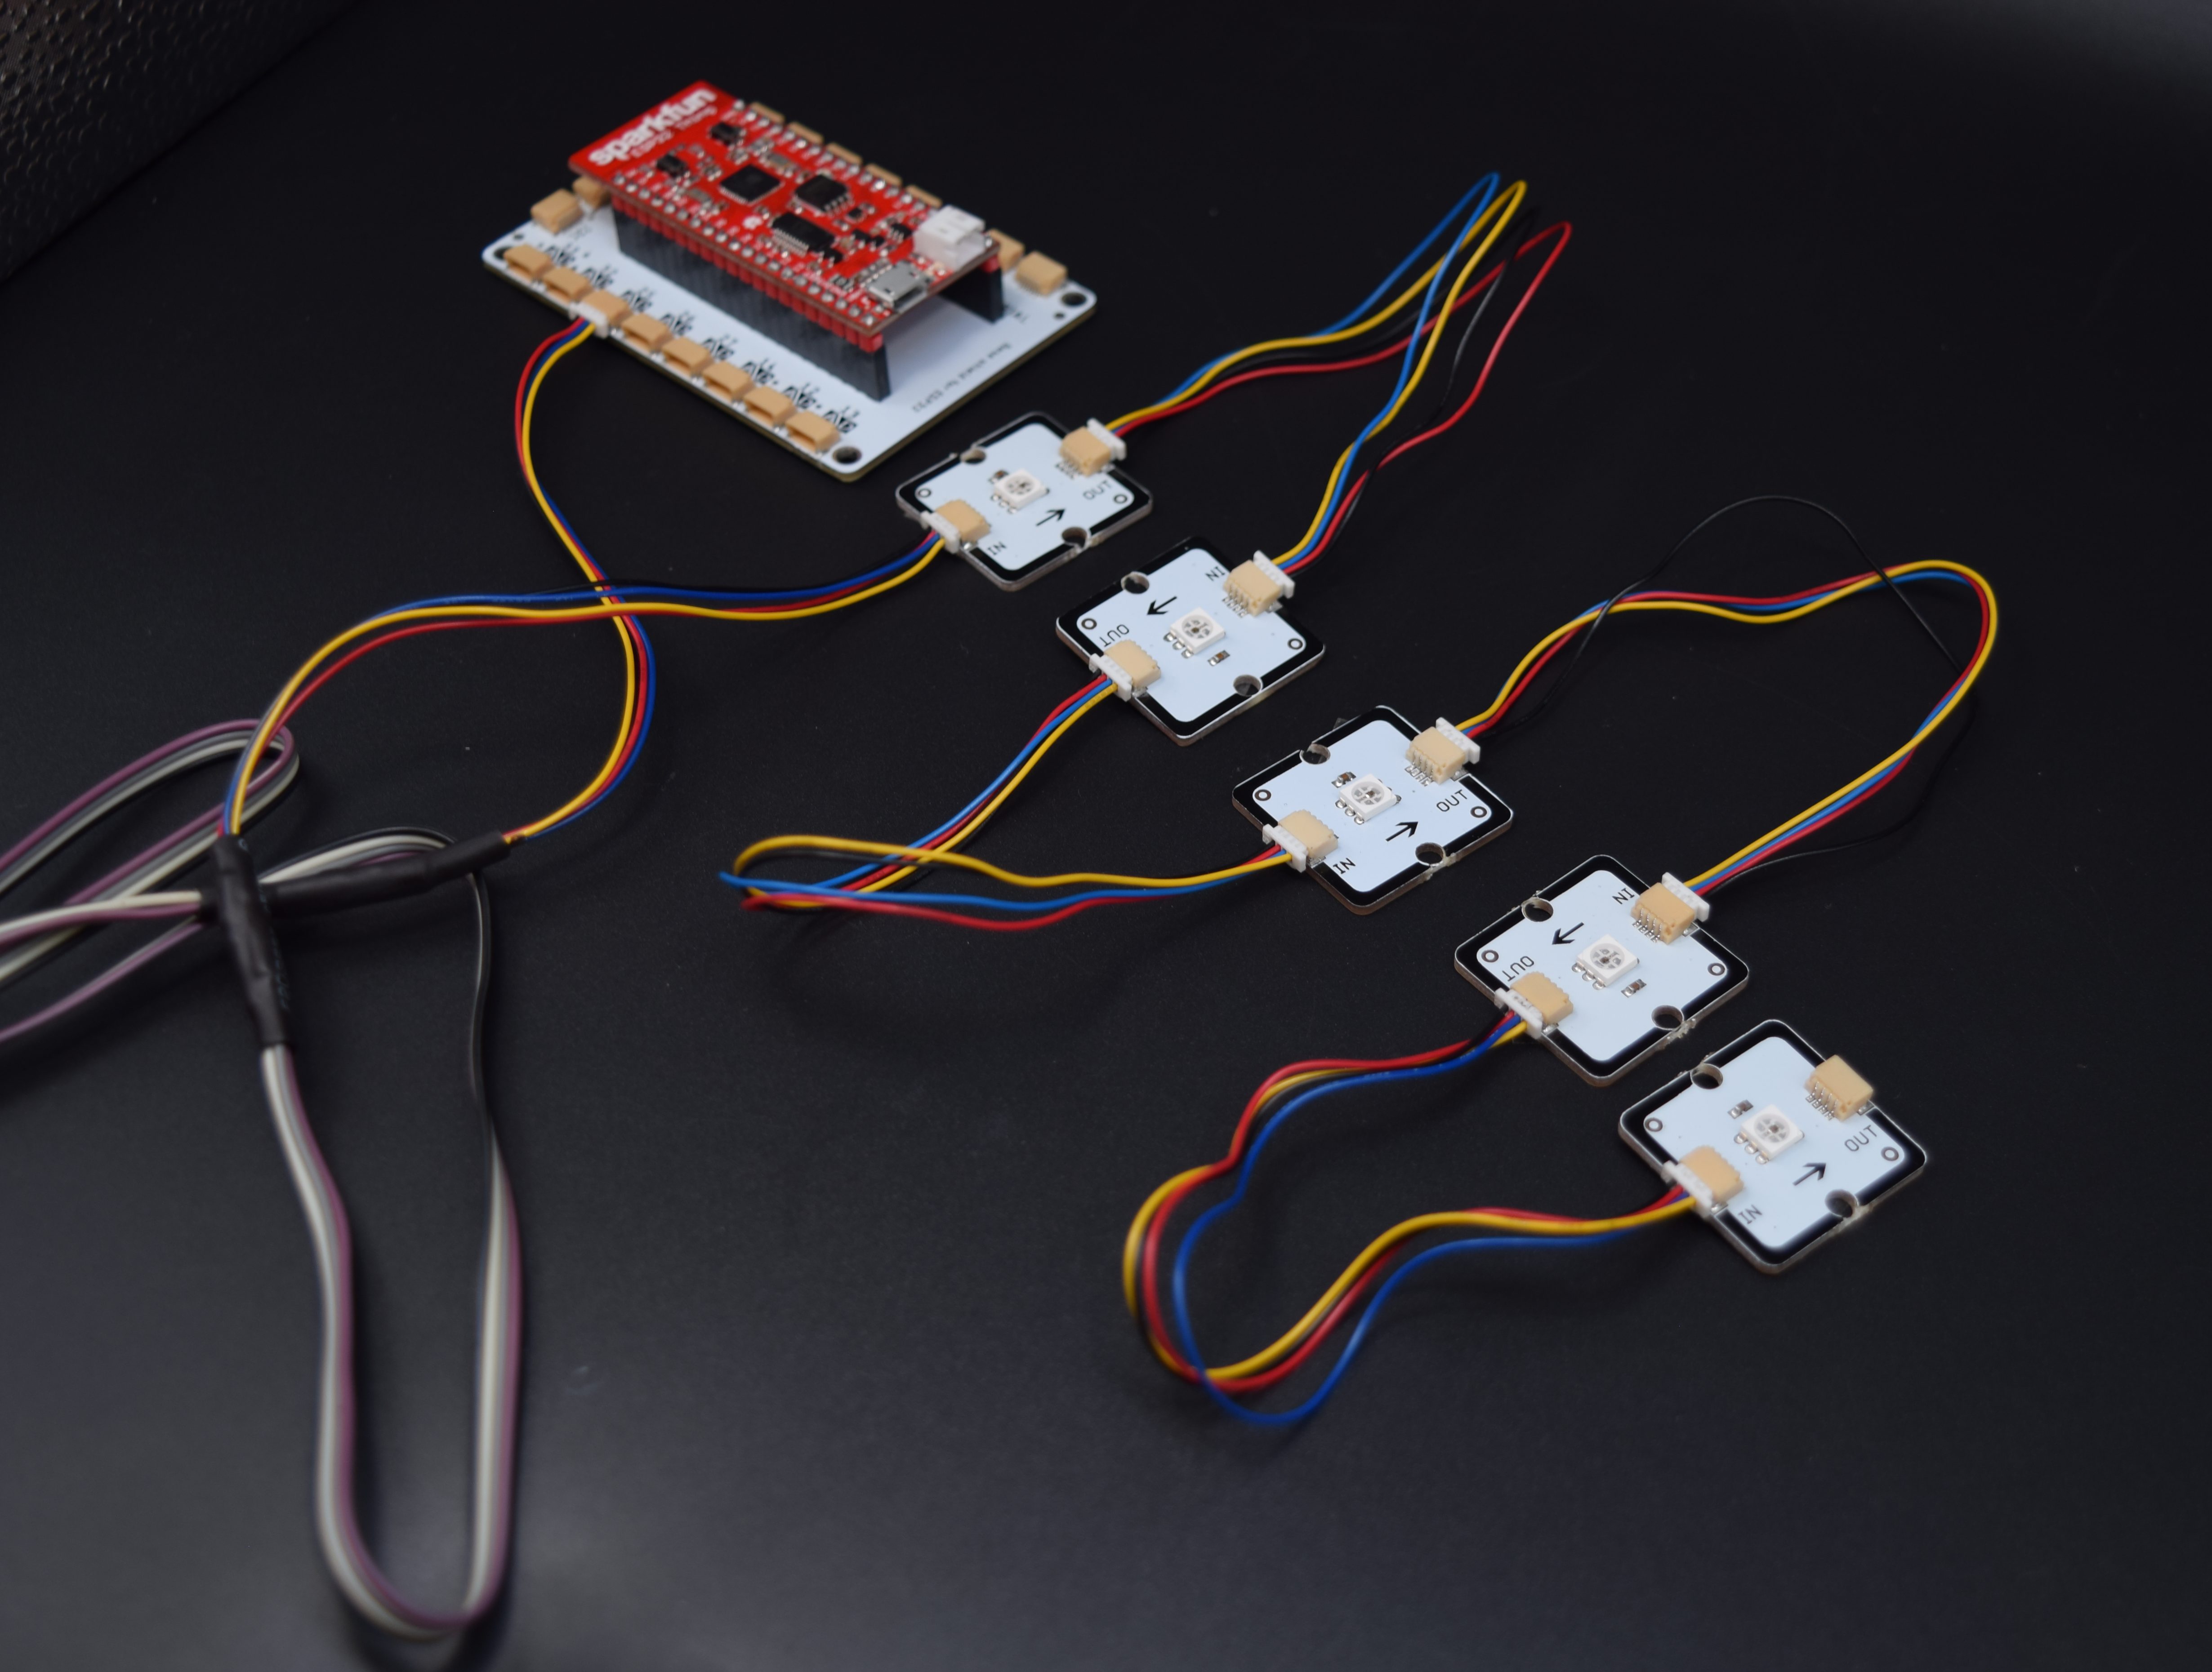
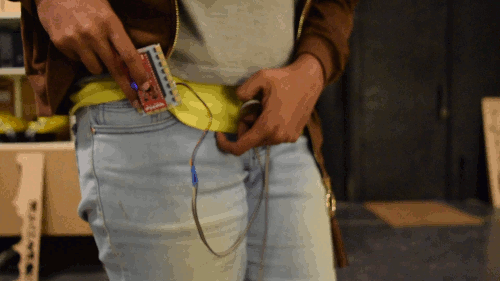
The Iron Man DIY Arc Reactor Set-ups
NOTE: During wiring, ensure that the OUT of the first LED goes to the IN of the next like as shown in the image below.
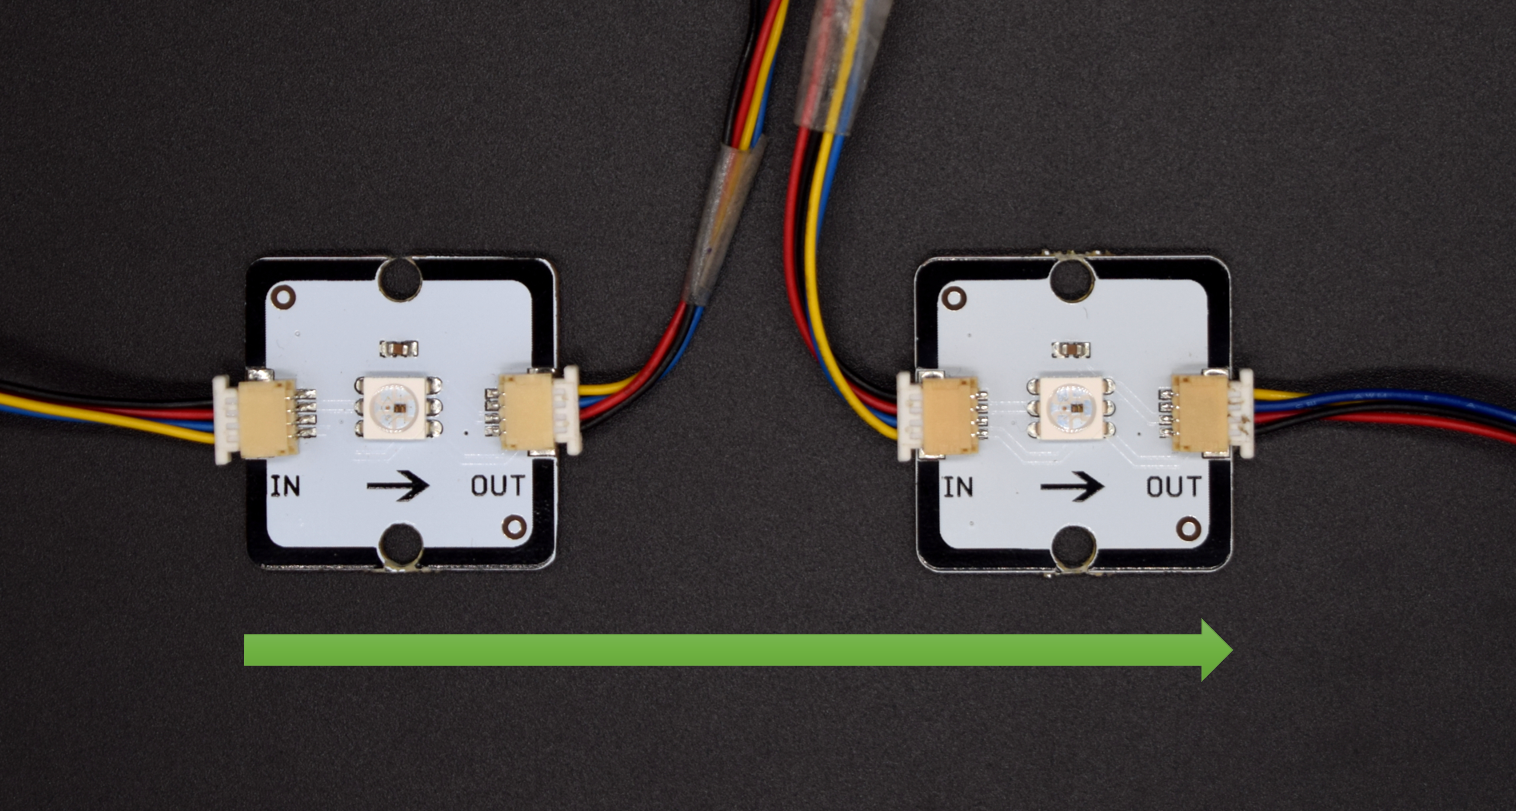
Medusa Addressable RGB LED connections
We will use simple Aurdino Code to Programme the setup, which you can refer to at the end of this post.
BUILDING INSTRUCTIONS
1. The first step is to make the cardboard cutout. Click here for the sample design of cardboard cutout, use a CD or go for a pattern of your choice.
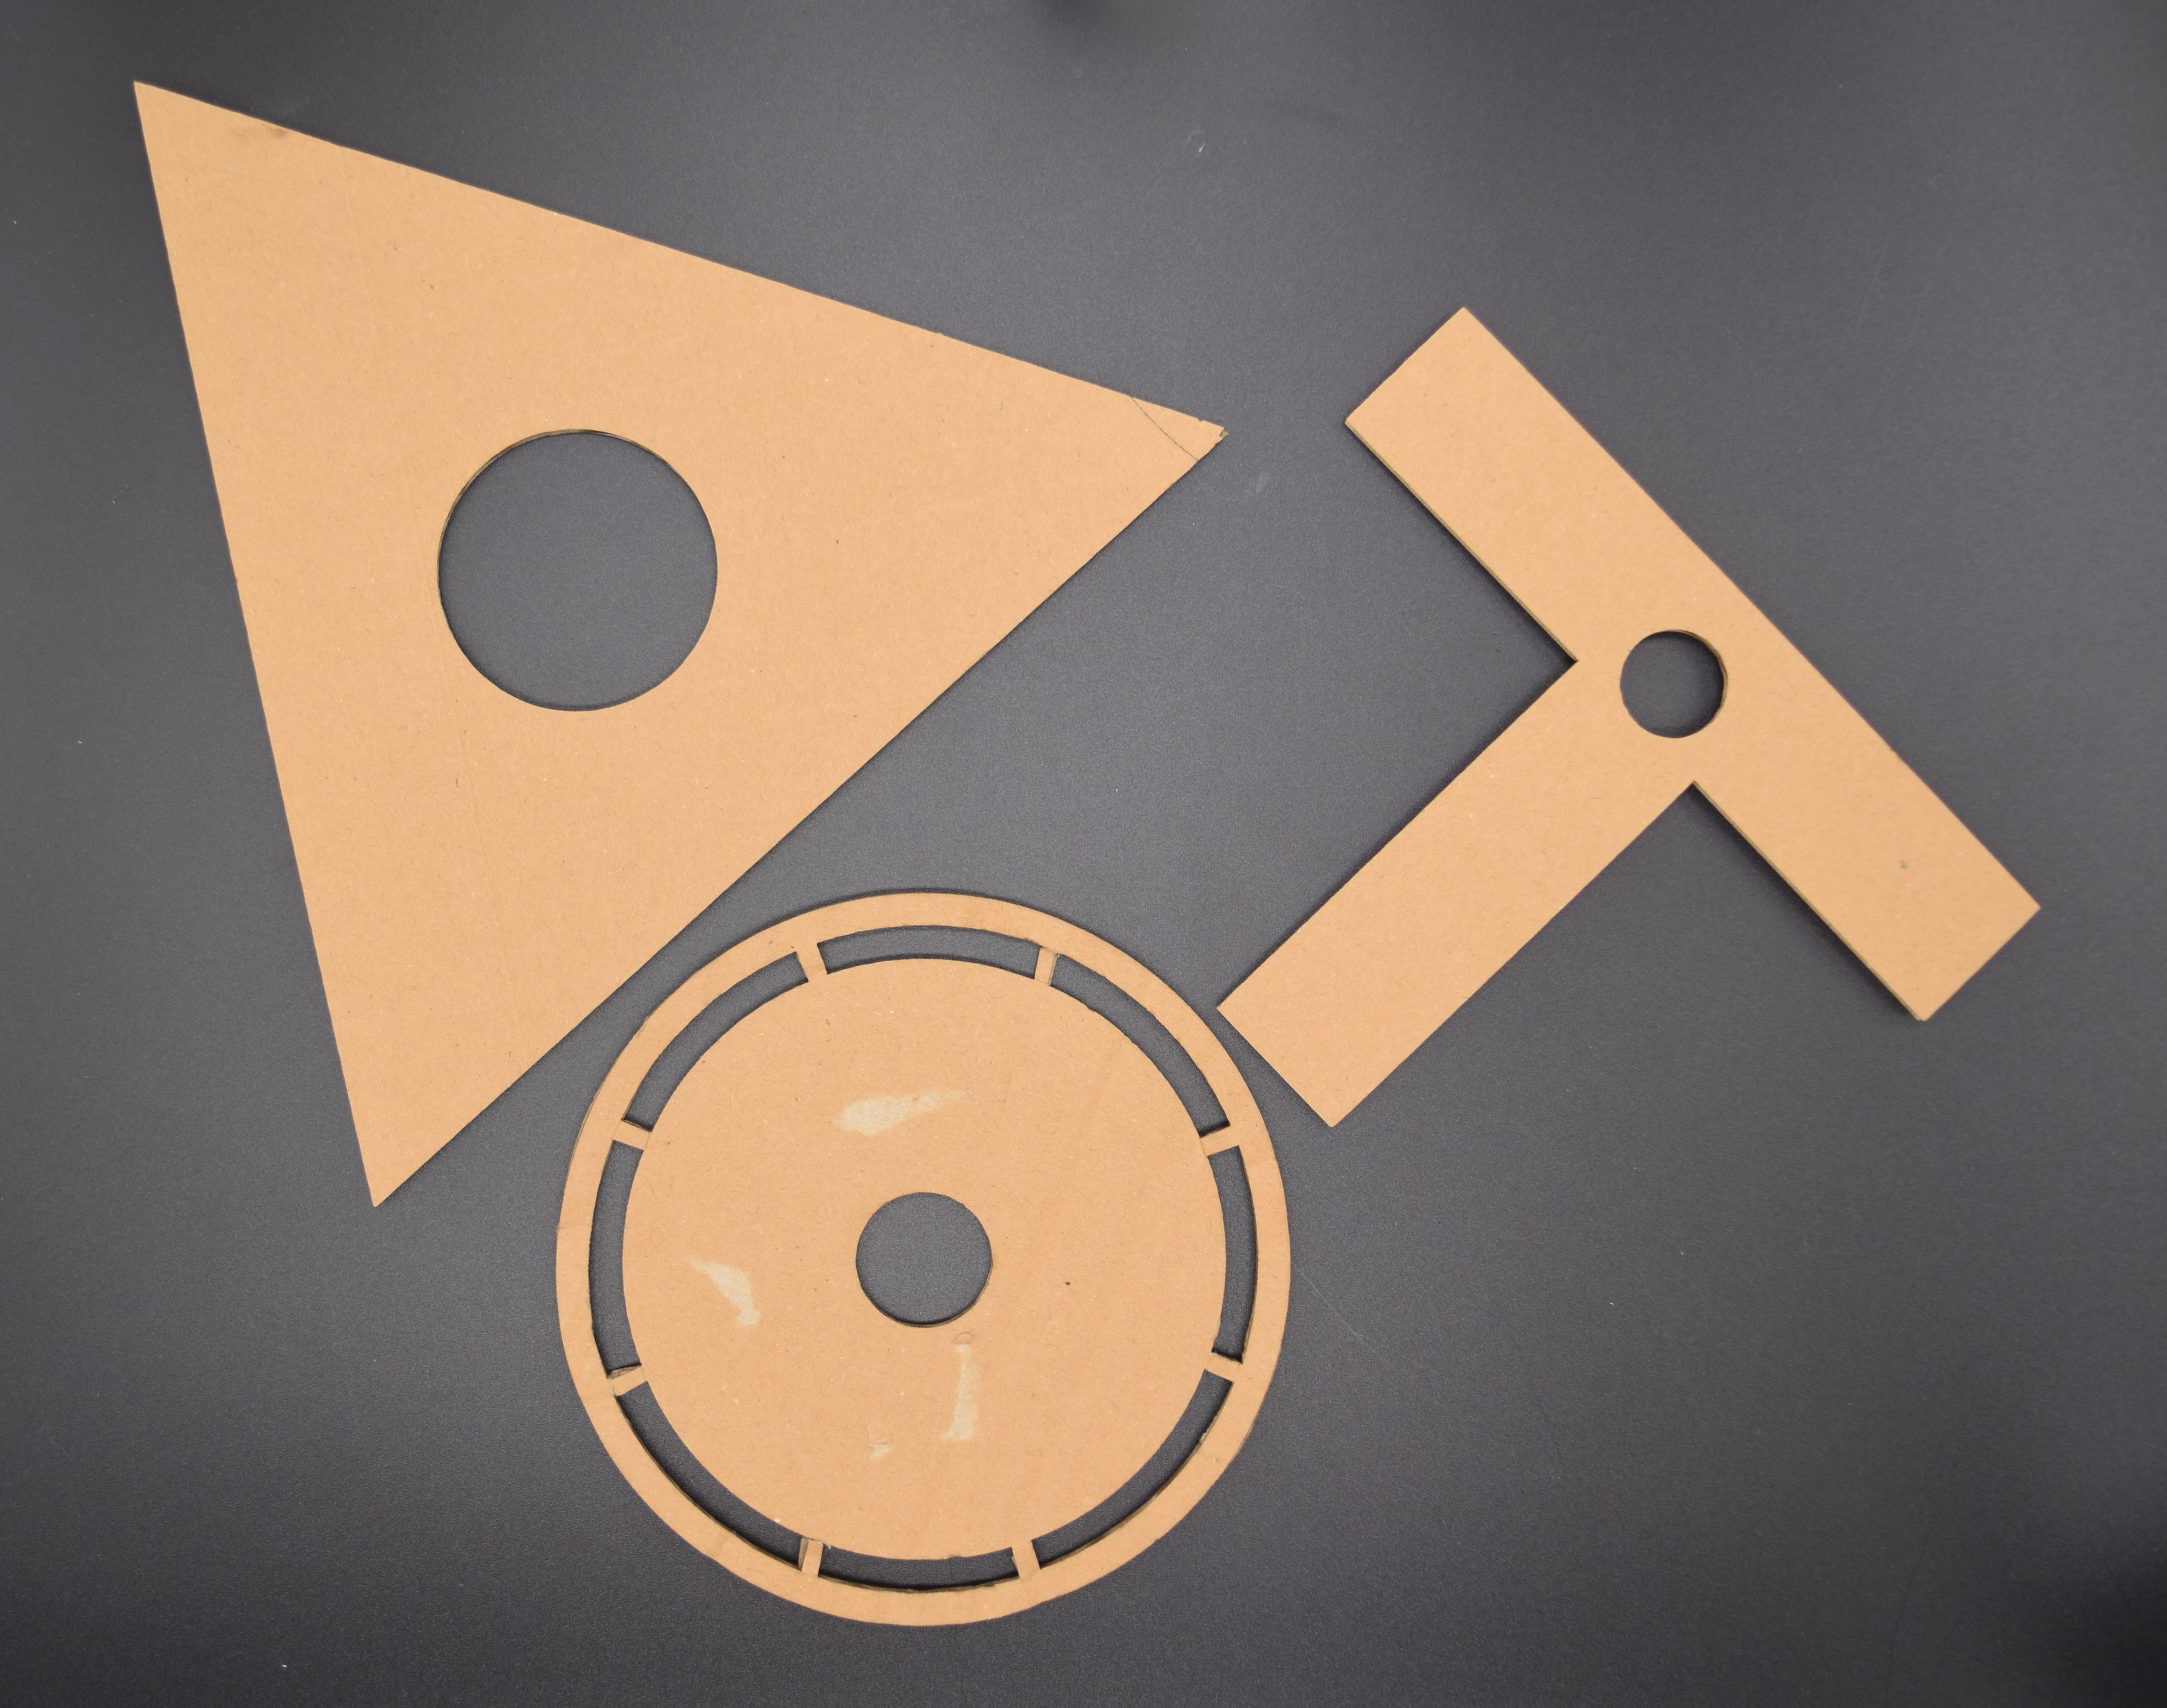
Cardboard Cutouts for Placing the Components to make DIY IronMan ARC generator
2. Take some double-sided tape and fix the LEDs.
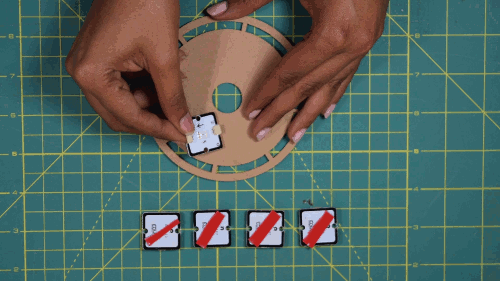
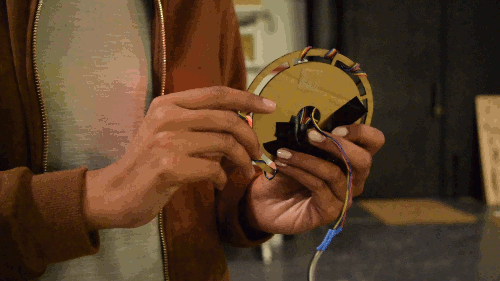
3. Next step is to connect the Medusa Addressable RGB LED together.
For this project, we are using 2 different Medusa Cables, the 15cm & the 1-meter variant. The 15cm variant is useful for daisy chaining the LED and the 1-meter variant to connect the first Medusa Addressable RGB LED to the Medusa Head for SparkFun ESP32 Thing.
The Medusa Addressable RGB LED are allow you to daisy chain (connect one board to the next) multiple boards to create a string of RGB LEDs using just one pin of the microcontroller.
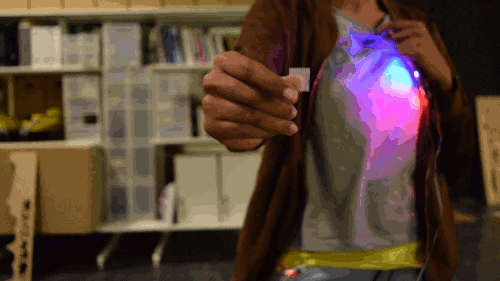
4. Using the Velcro/Double sided tape, fix the disk under your t-shirt.
5. The SparkFun ESP32 comes with an onboard LiPo charger and booster which makes it easy to power the project using a single cell LiPo battery, the lower capacity ones can even fit between the Medusa Head and the SparkFun ESP32 Thing for a compact solution. It can also be powered using a typical mobile phone power bank.

And insert the medusa head into your pocket.
SHOW OFF your IRON MAN ARC REACTOR!!!

#include <Adafruit_NeoPixel.h>

#define PIN 25

// Parameter 1 = number of pixels in strip
// Parameter 2 = Arduino pin number (most are valid)
// Parameter 3 = pixel type flags, add together as needed:
//   NEO_KHZ800  800 KHz bitstream (most NeoPixel products w/WS2812 LEDs)
//   NEO_KHZ400  400 KHz (classic 'v1' (not v2) FLORA pixels, WS2811 drivers)
//   NEO_GRB     Pixels are wired for GRB bitstream (most NeoPixel products)
//   NEO_RGB     Pixels are wired for RGB bitstream (v1 FLORA pixels, not v2)
//   NEO_RGBW    Pixels are wired for RGBW bitstream (NeoPixel RGBW products)
Adafruit_NeoPixel strip = Adafruit_NeoPixel(5, PIN, NEO_GRB + NEO_KHZ800);

// IMPORTANT: To reduce NeoPixel burnout risk, add 1000 uF capacitor across
// pixel power leads, add 300 - 500 Ohm resistor on first pixel's data input
// and minimize distance between Arduino and first pixel.  Avoid connecting
// on a live circuit...if you must, connect GND first.

void setup() {
  // This is for Trinket 5V 16MHz, you can remove these three lines if you are not using a Trinket
  #if defined (__AVR_ATtiny85__)
    if (F_CPU == 16000000) clock_prescale_set(clock_div_1);
  #endif
  // End of trinket special code

  strip.begin();
  strip.show(); // Initialize all pixels to 'off'
}

void loop() {
  colorWipe(strip.Color(0, 0,255), 60); // Blue
  colorWipe(strip.Color(0, 0,0), 60); // Black
  delay(25);
  colorWipe(strip.Color(0, 0,255), 60); // Blue
  colorWipe(strip.Color(0, 0,0), 60); // Black
  delay(25);
  colorWipe(strip.Color(0, 0,255), 60); // Blue
  colorWipe(strip.Color(0, 0,0), 60); // Black
  delay(25);
  fadeIn();
  fadeOut();
}

// Fill the dots one after the other with a color
void colorWipe(uint32_t c, uint8_t wait) {
  for(uint16_t i=0; i<strip.numPixels(); i++) {
    strip.setPixelColor(i, c);
    strip.show();
    delay(wait);
  }
}

void fadeIn()
{
  for (int i = 0;i<256;i++)
  {
    for(int led = 0;led<strip.numPixels();led++)
    {
      strip.setPixelColor(led,strip.Color(0, 0,i));
      strip.show();
      delay(1);
    }
  }
}

void fadeOut()
{
  for (int i = 255;i>=0;i--)
  {
    for(int led = 0;led<strip.numPixels();led++)
    {
      strip.setPixelColor(led,strip.Color(0, 0,i));
      strip.show();
      delay(1);
    }
  }
}