Assembling the Minecraft Torch
In order to get started with the assembly ensure you have the following items:
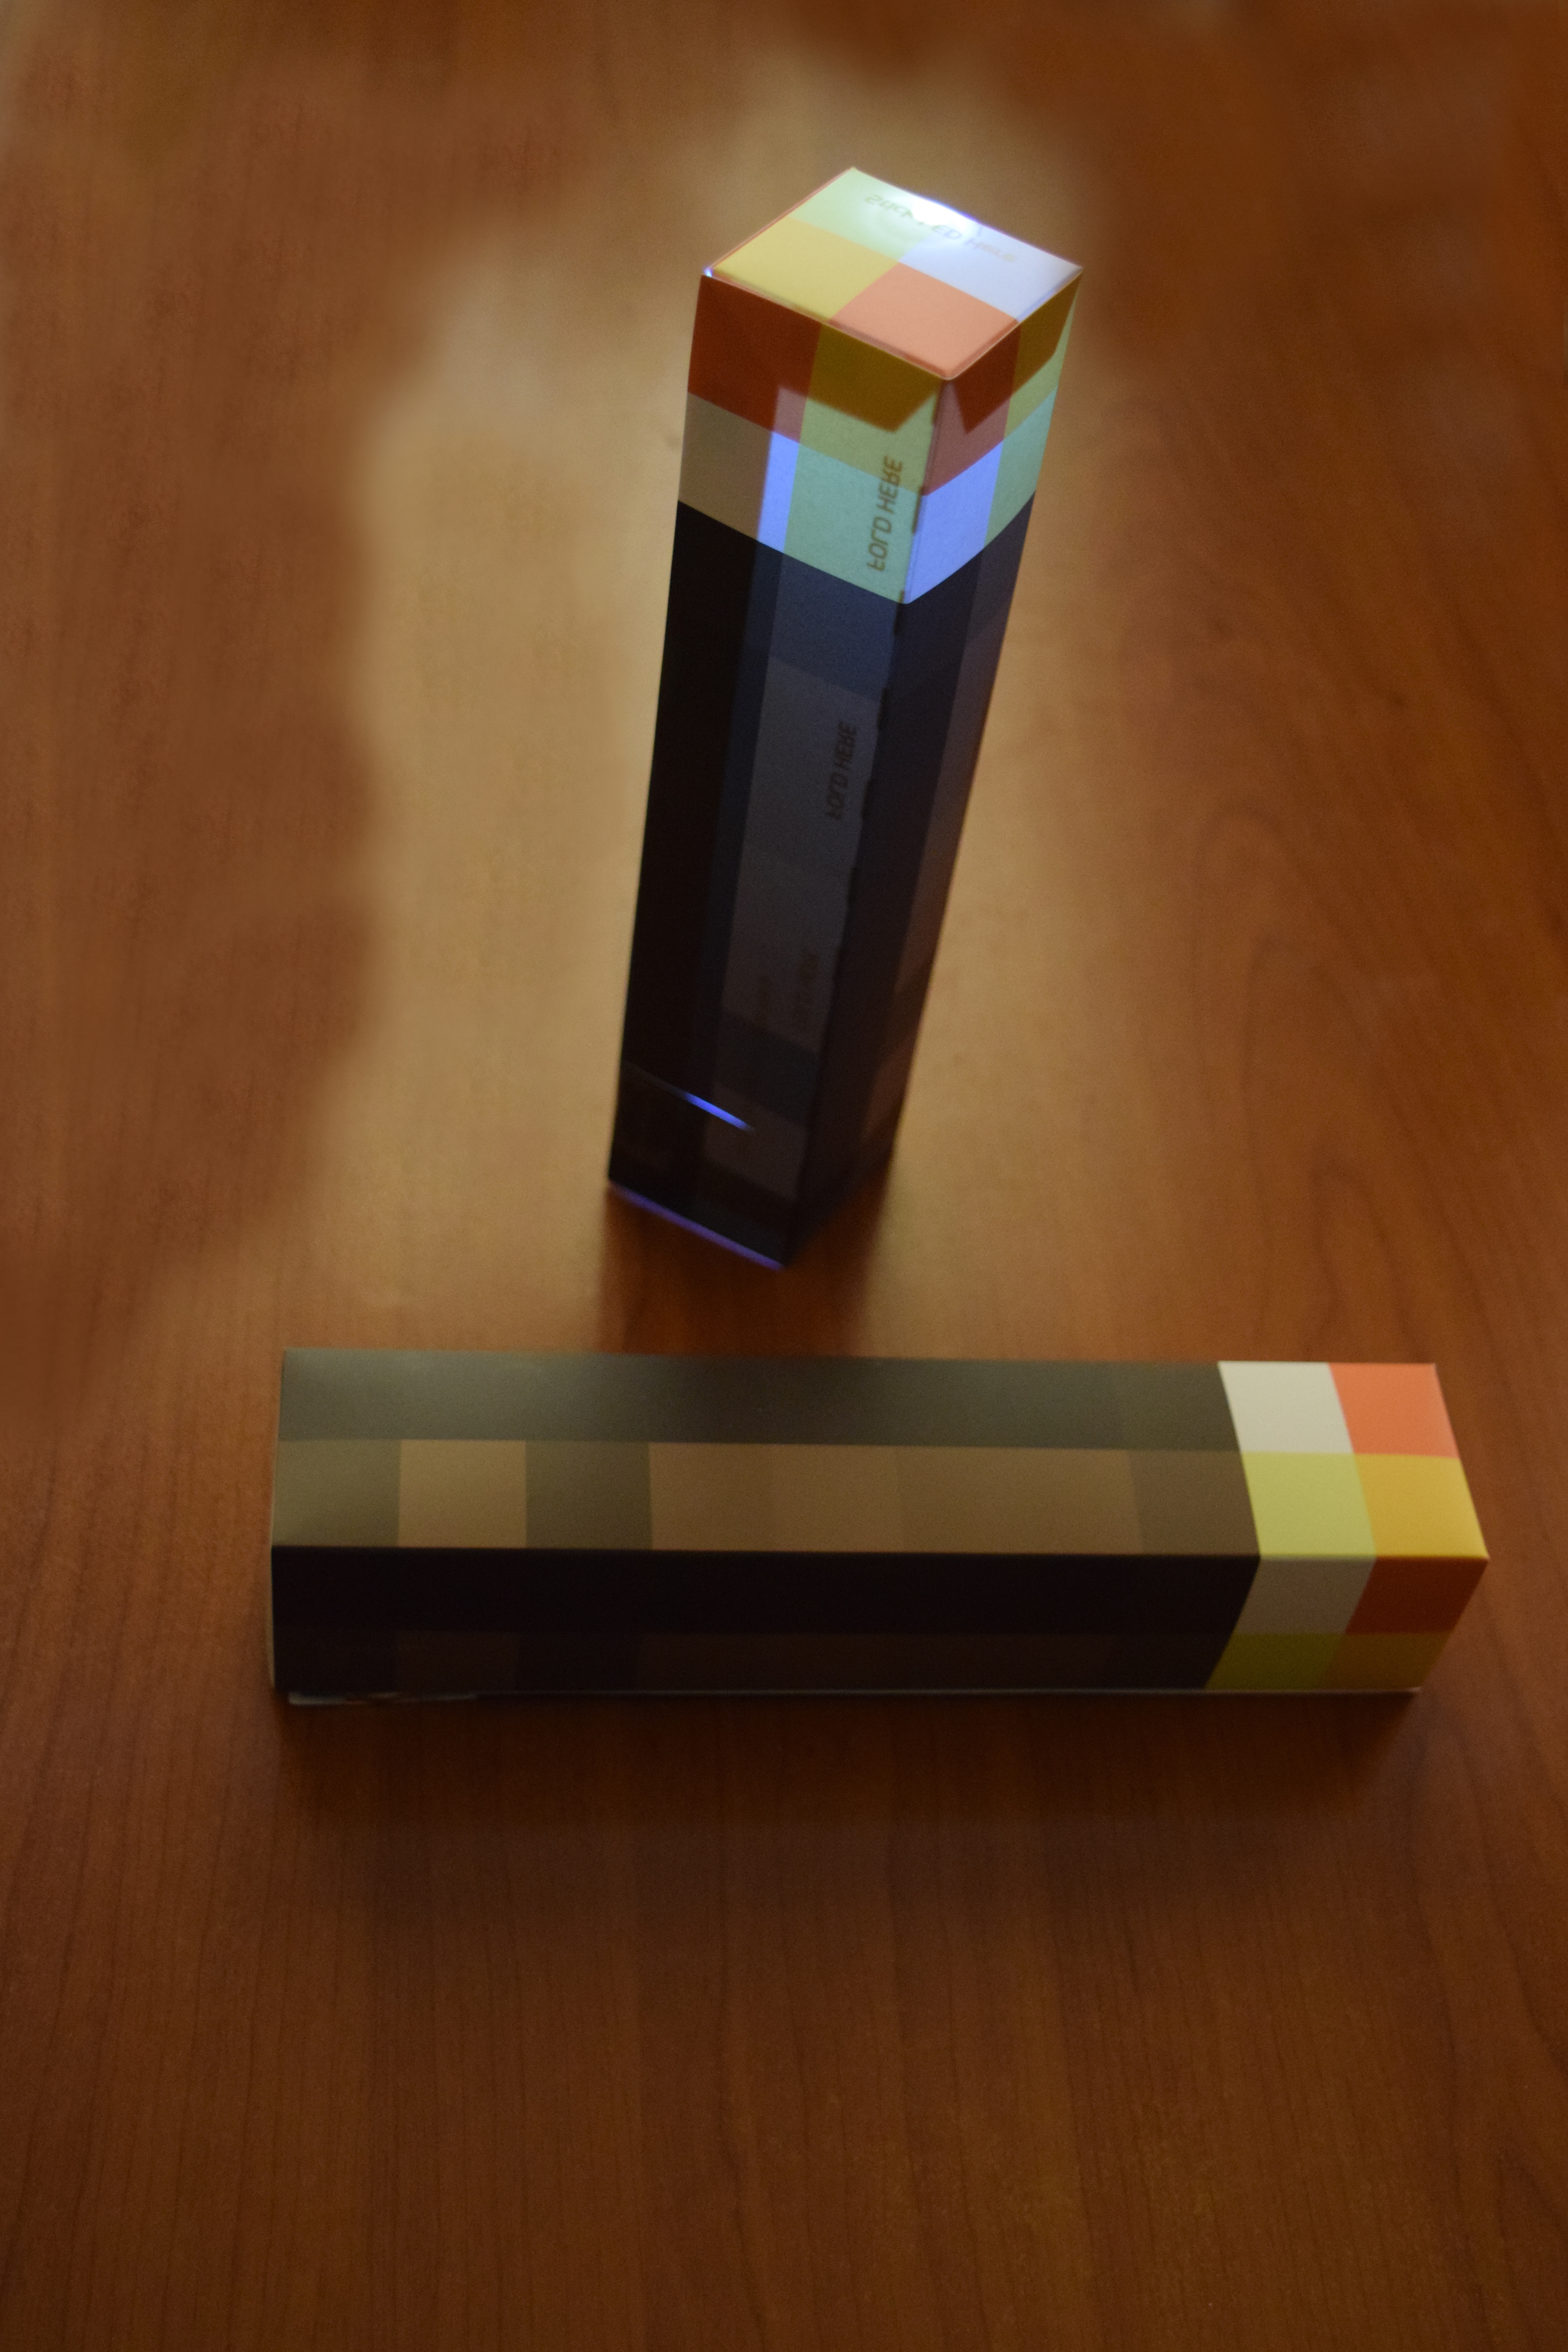
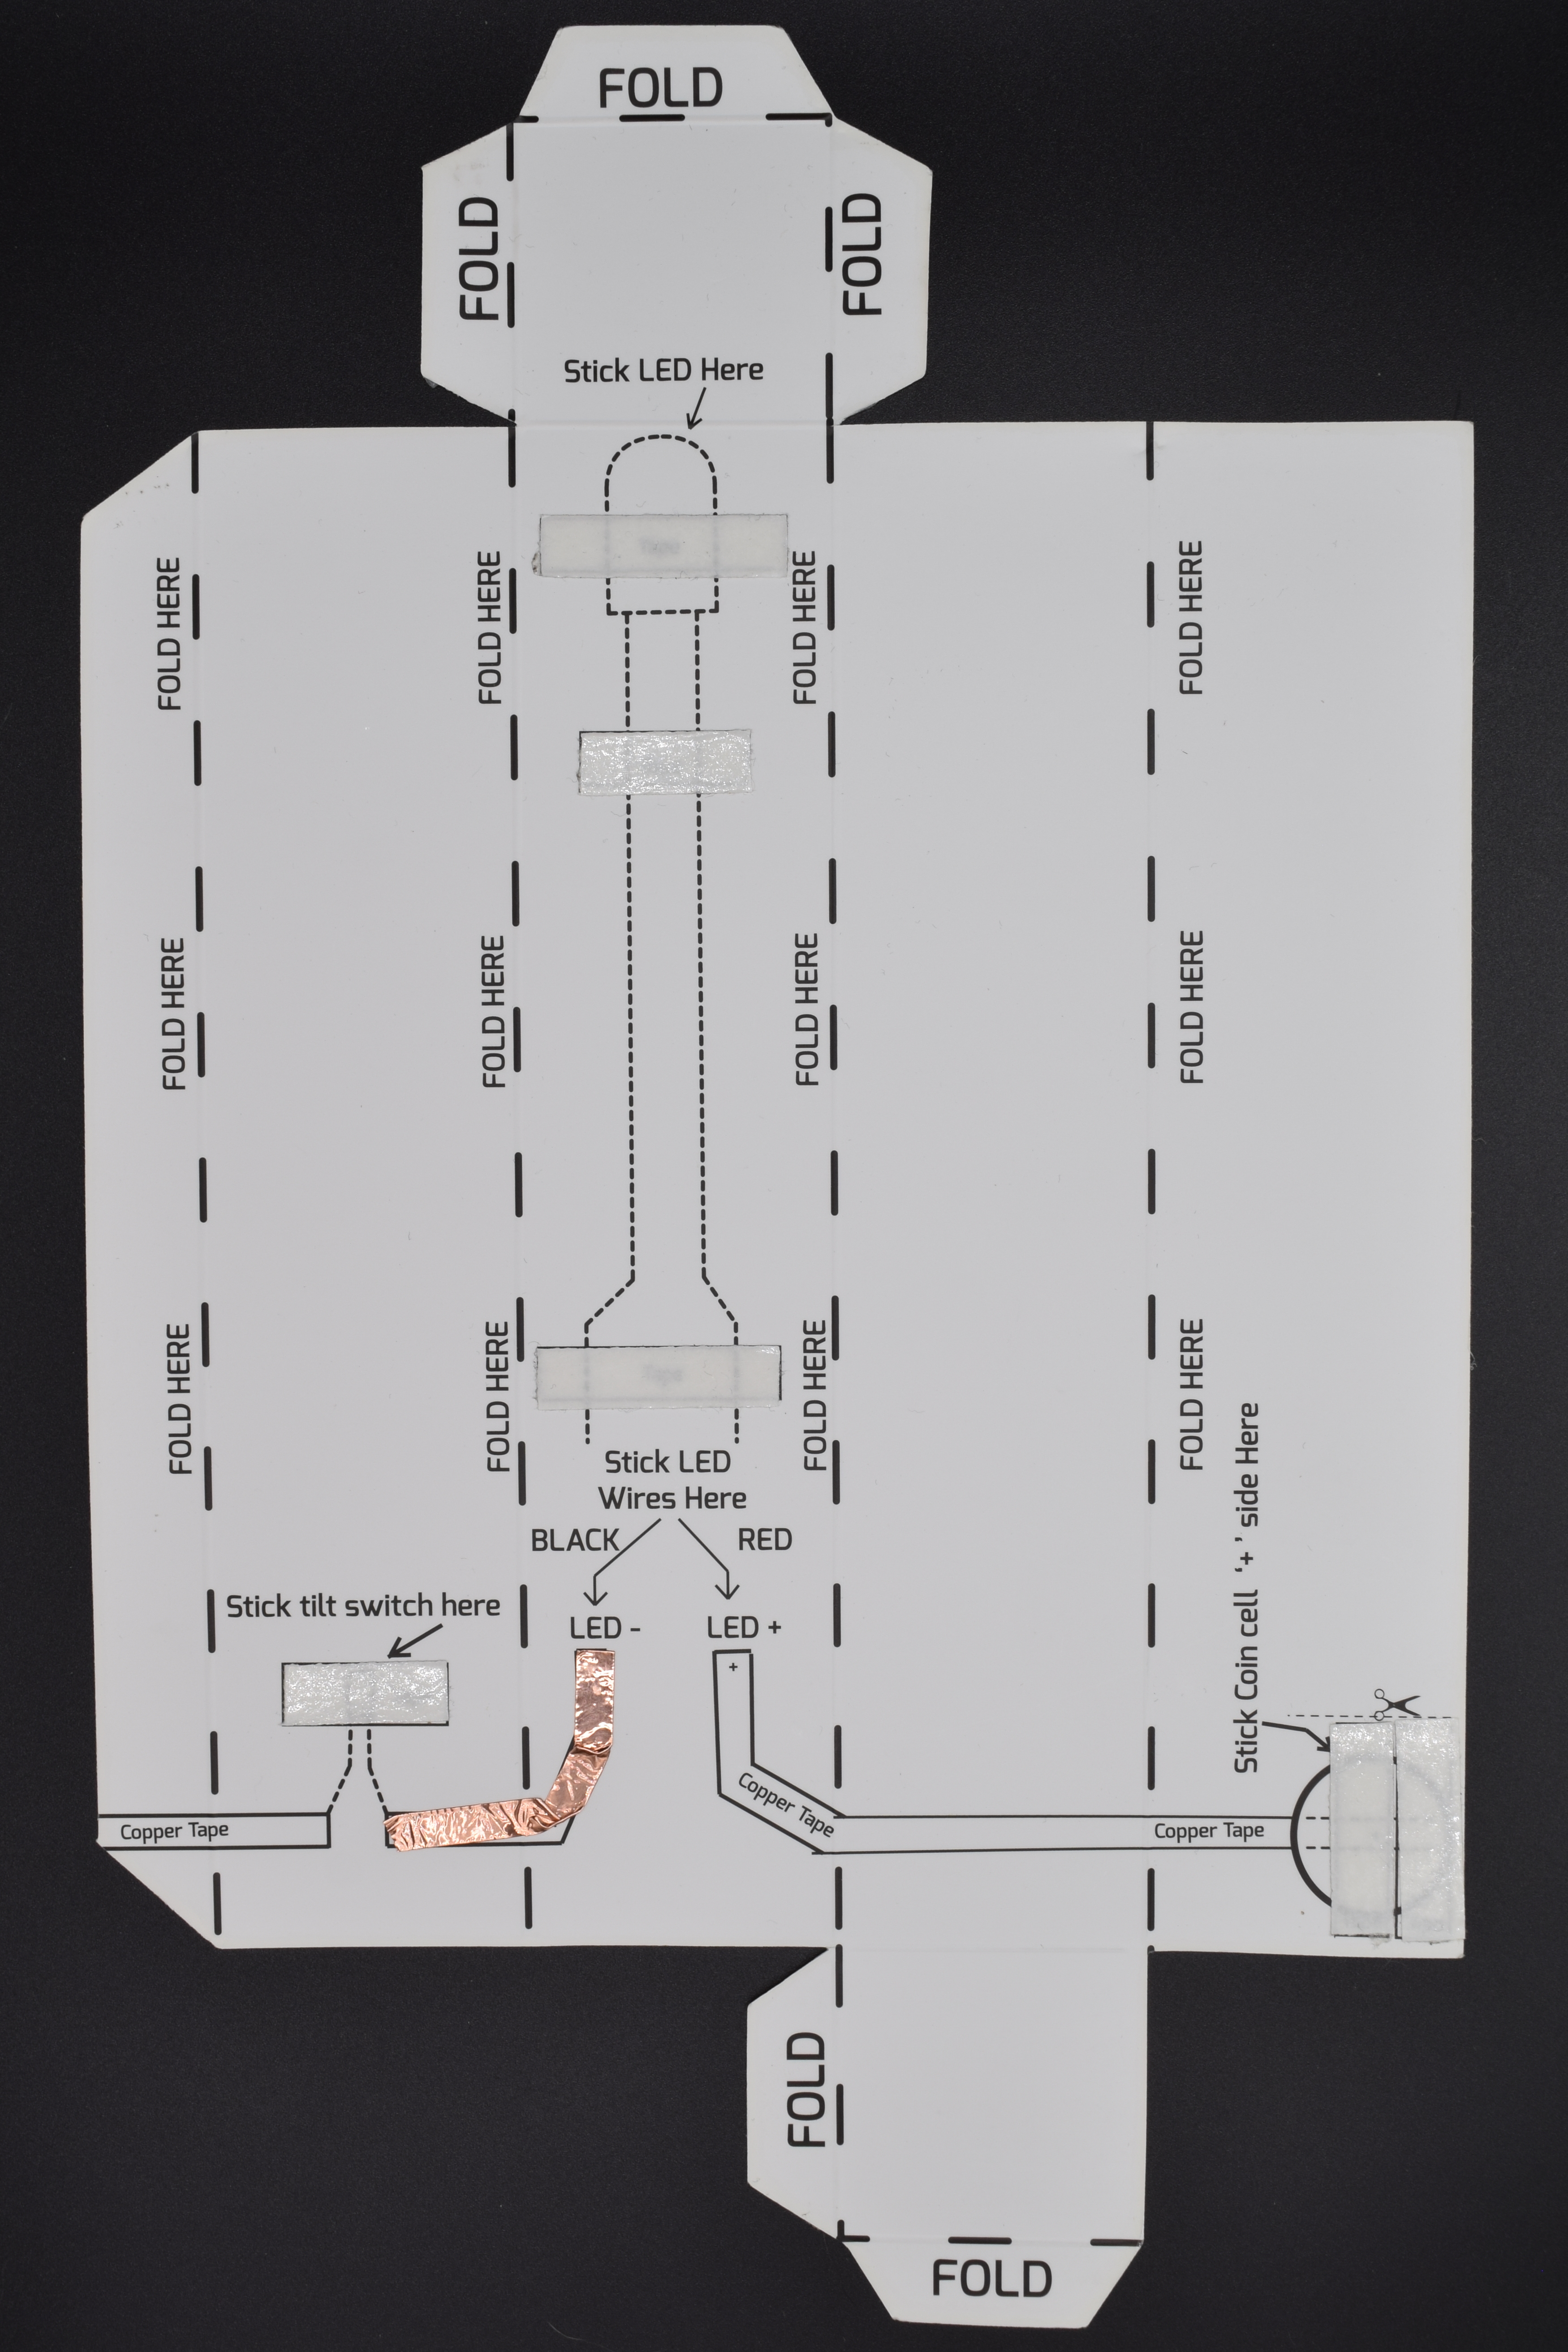
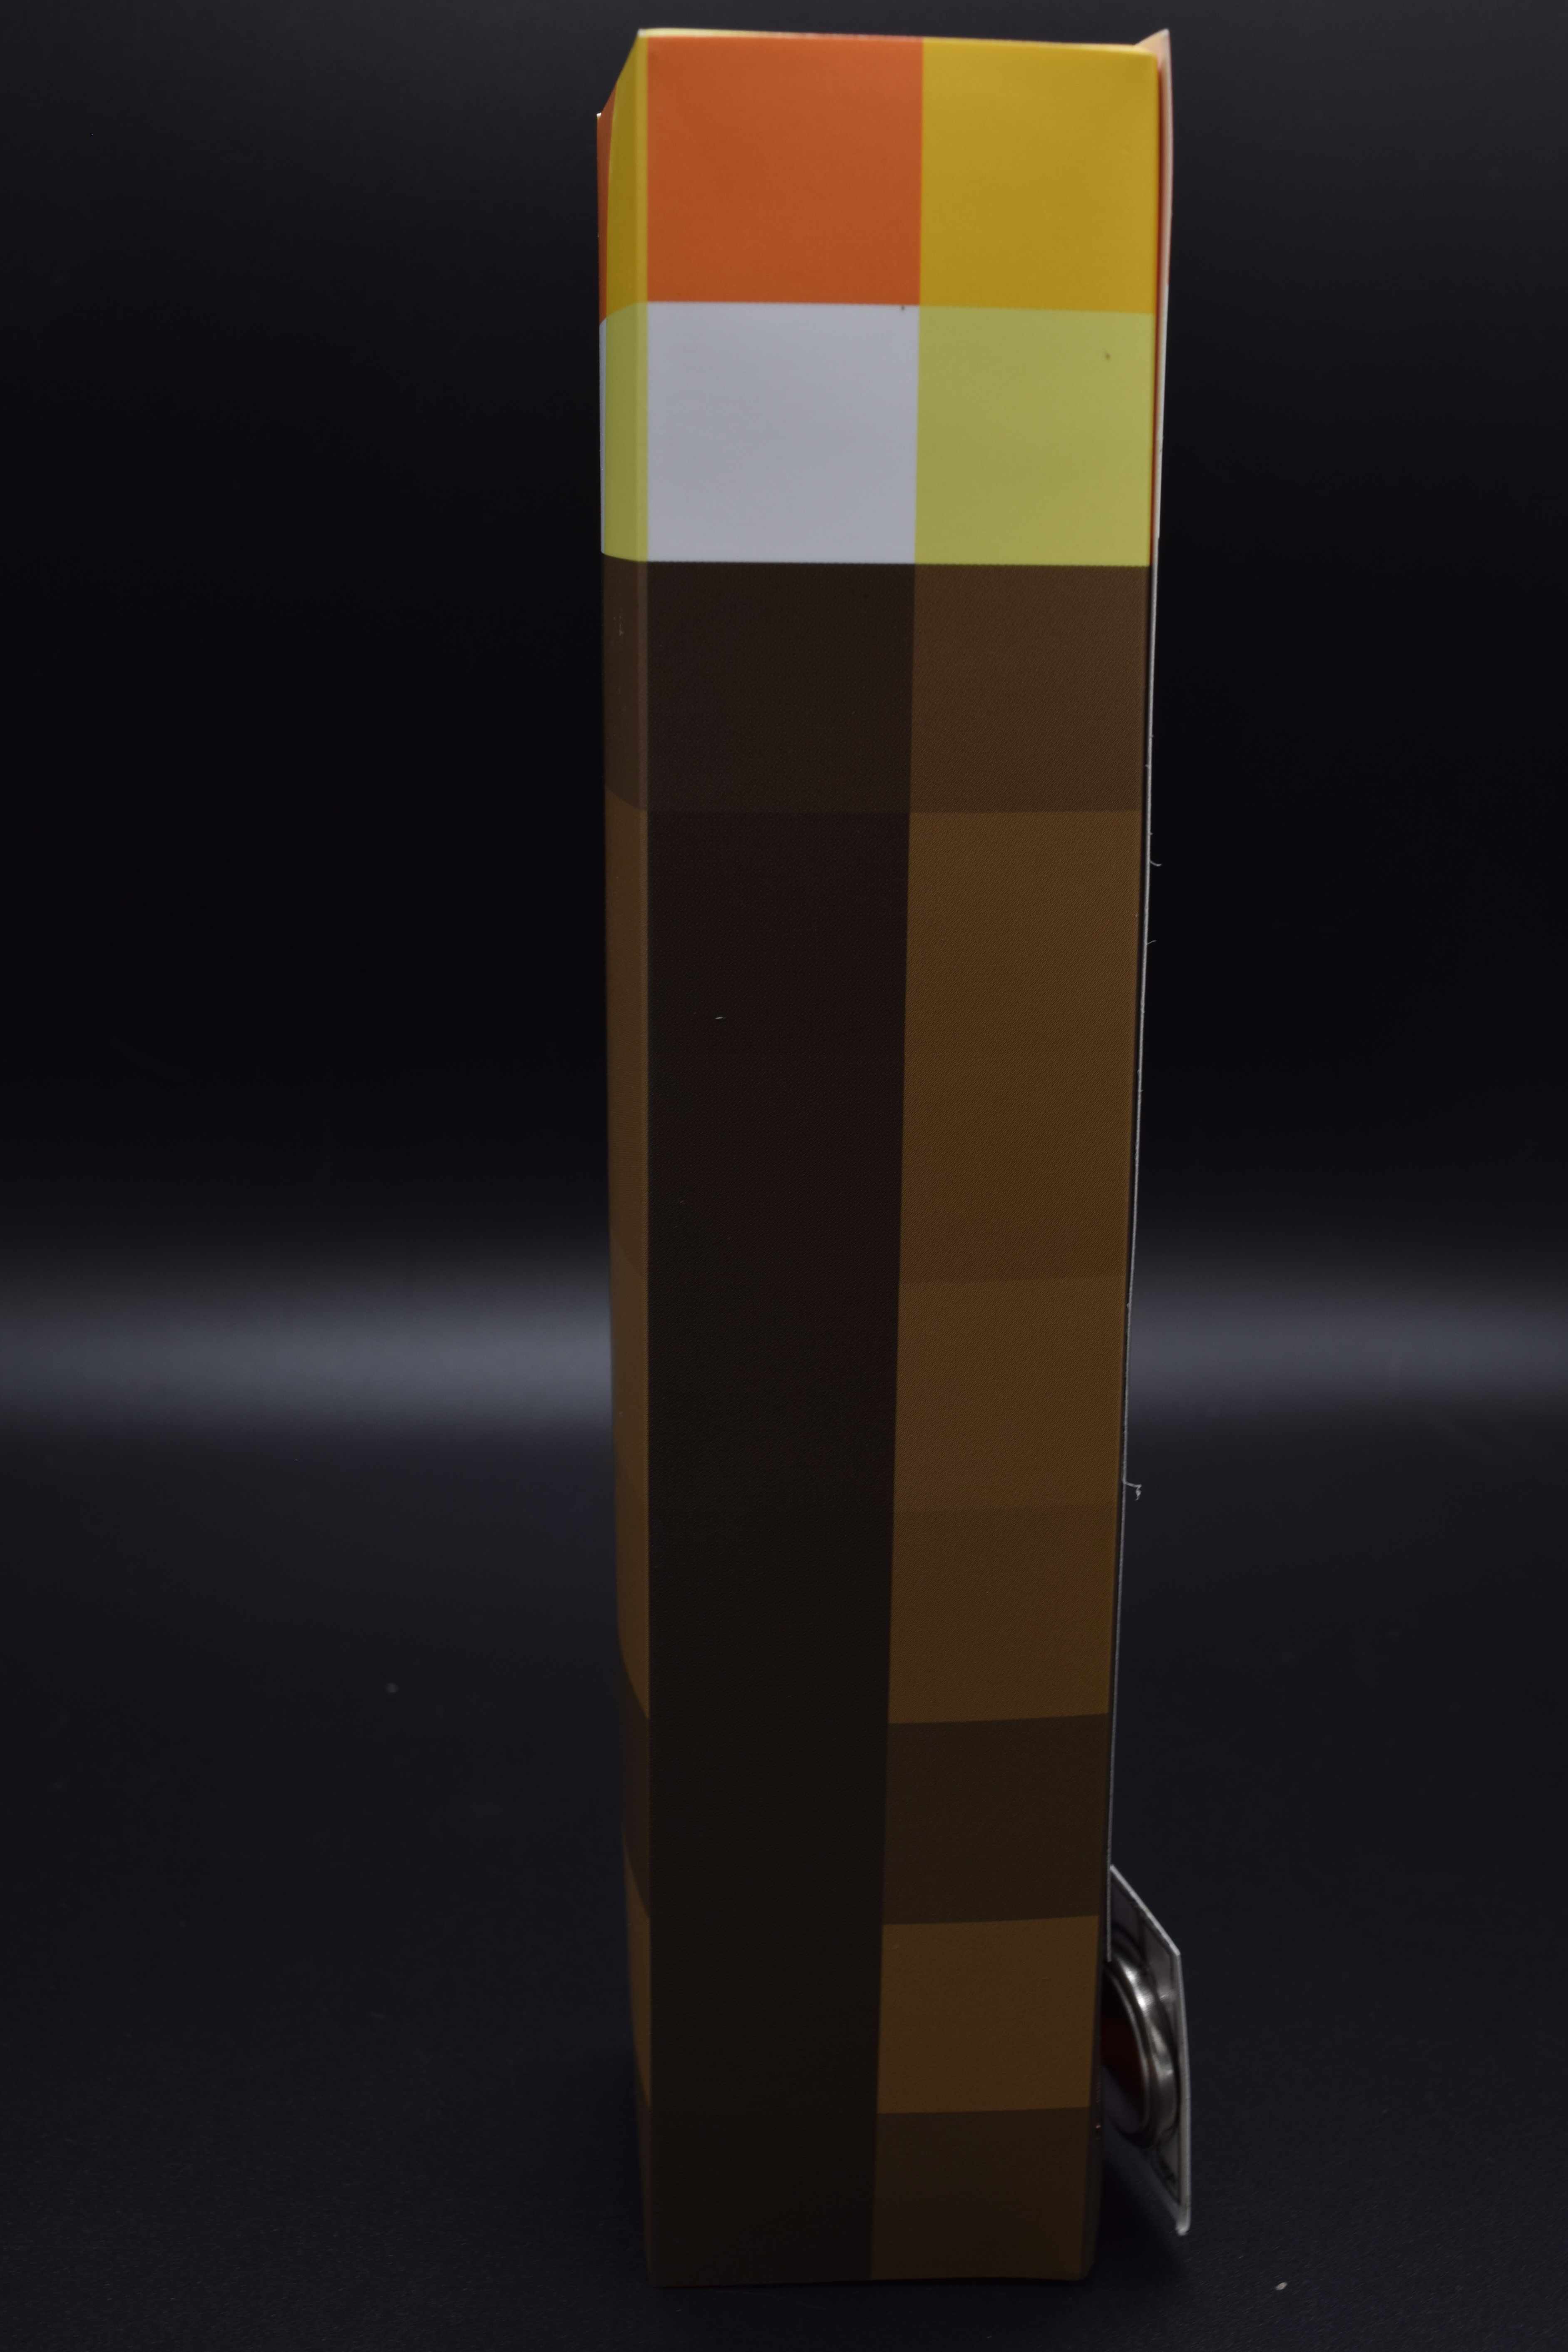
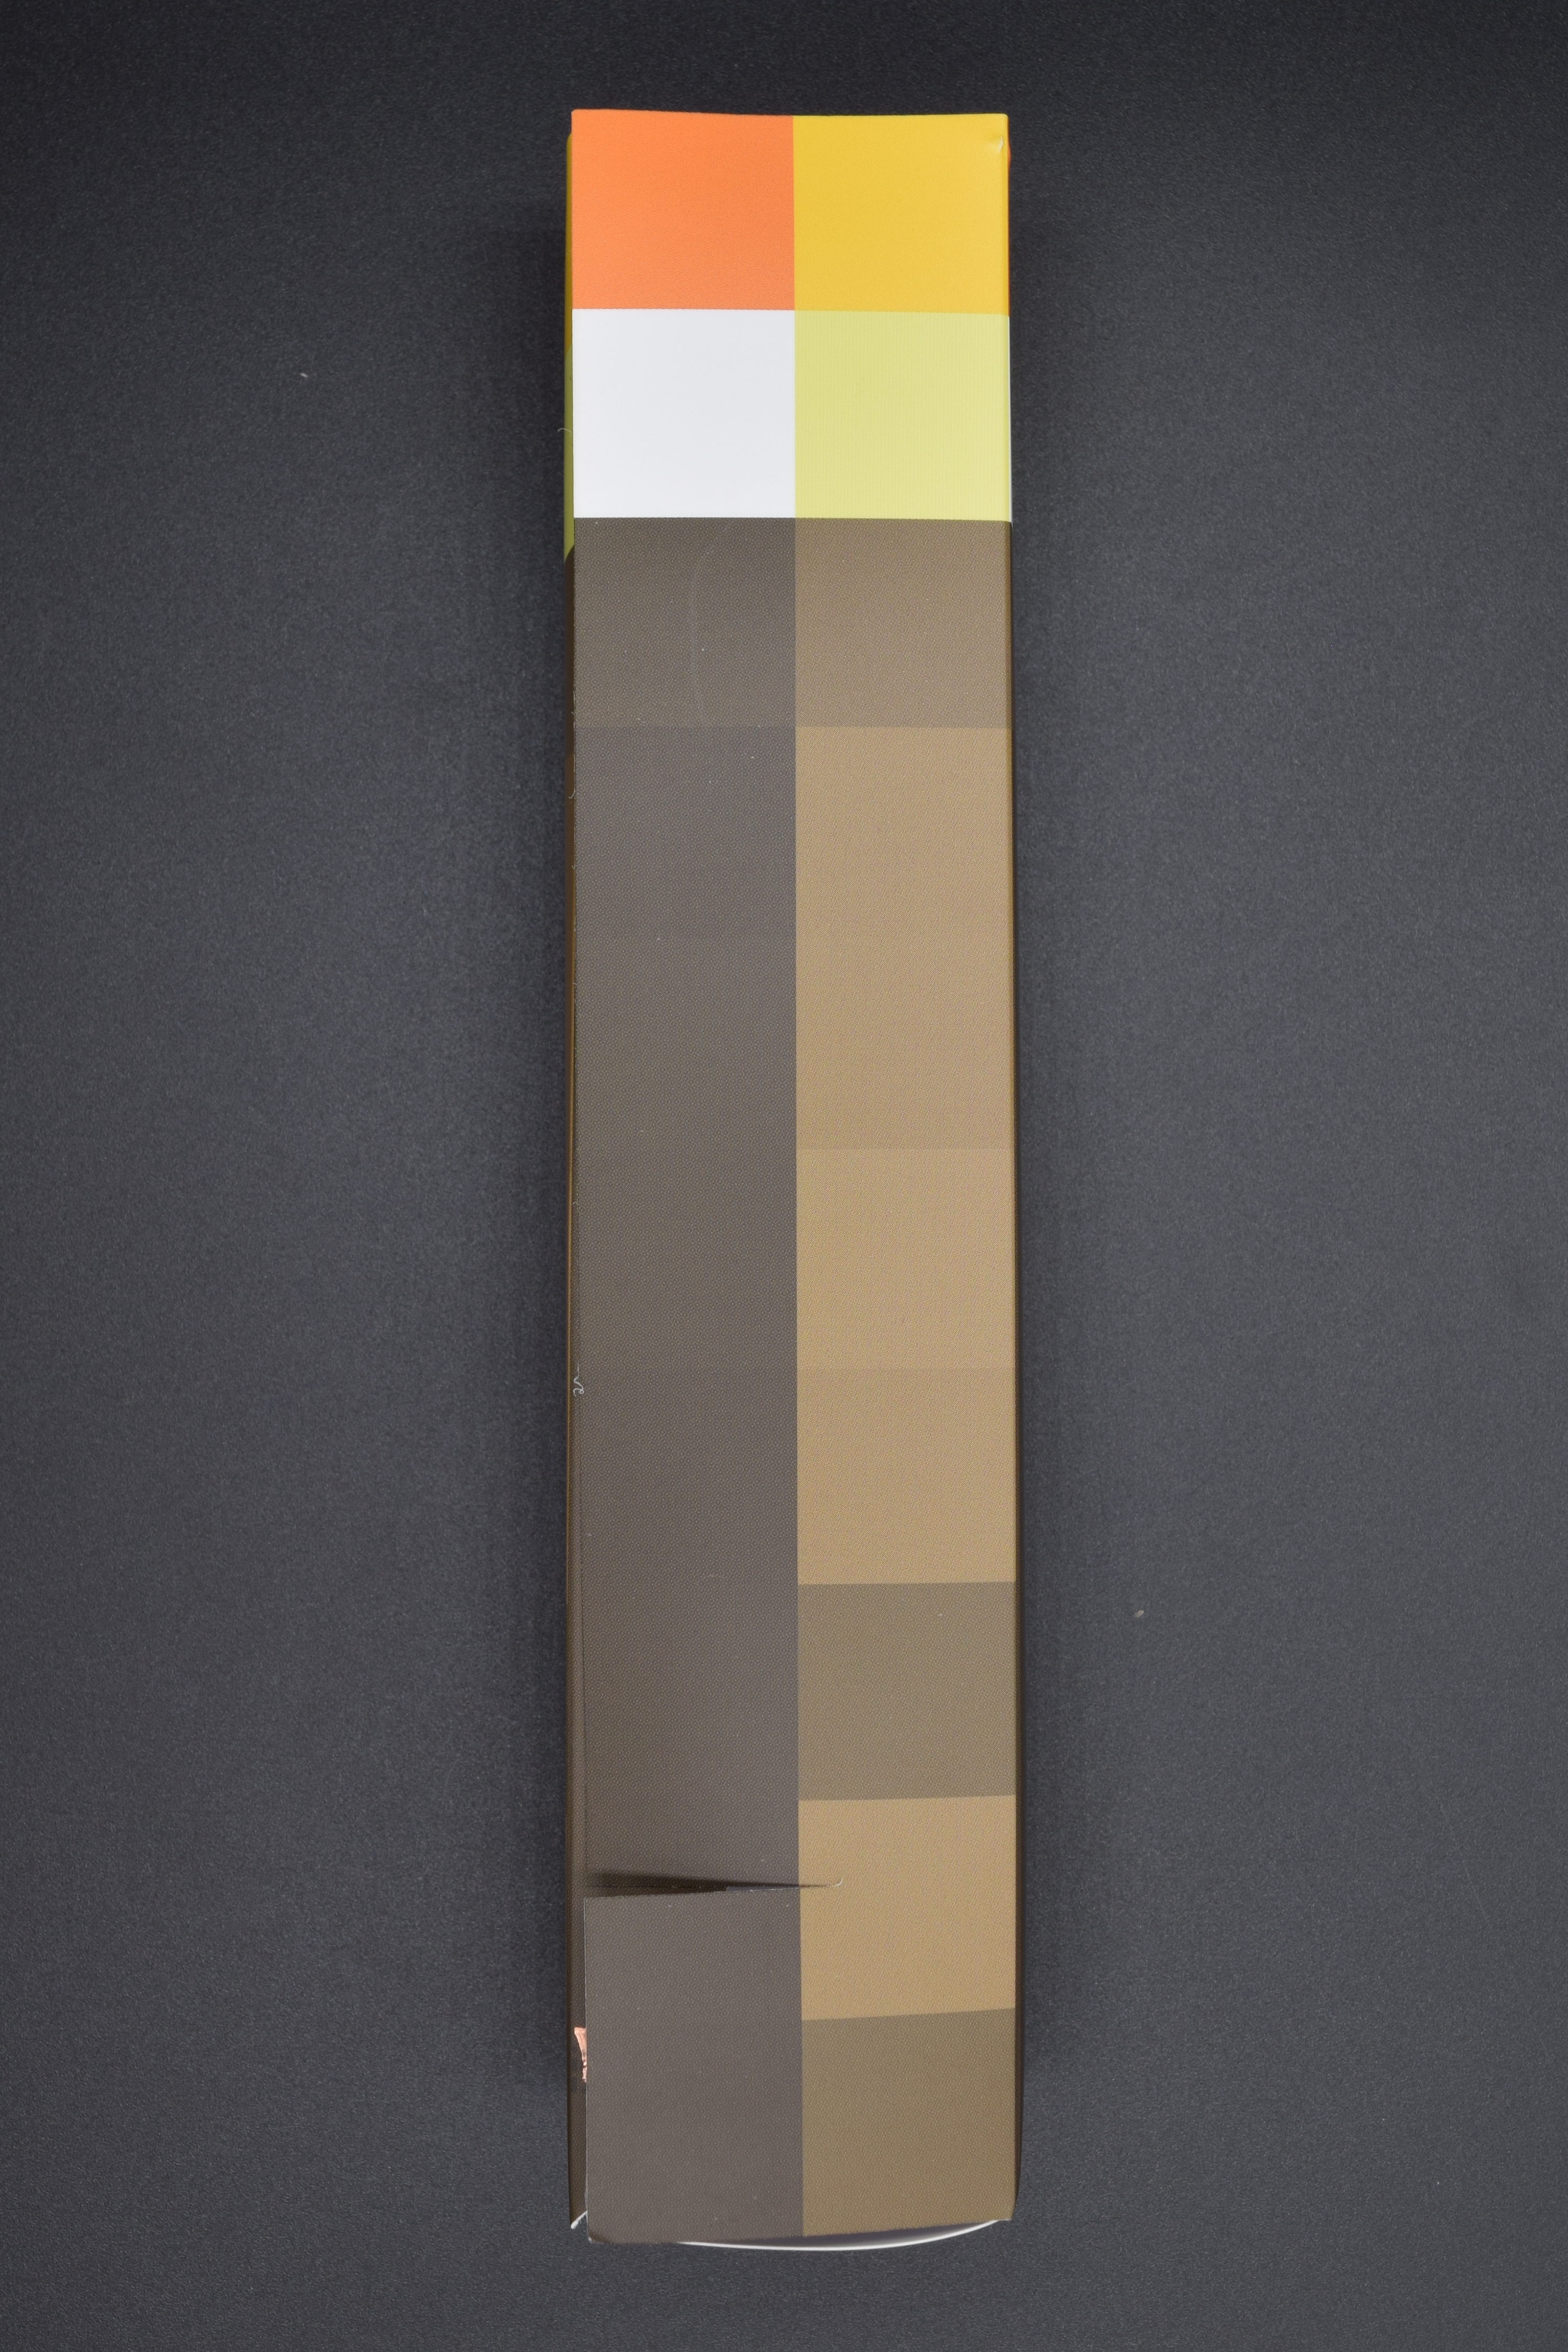
Let us have a look at the torch base, it is made up of 350gsm Matt Art paper with added tape on to it. We had added most of the instructions on the torch itself for simplicity.
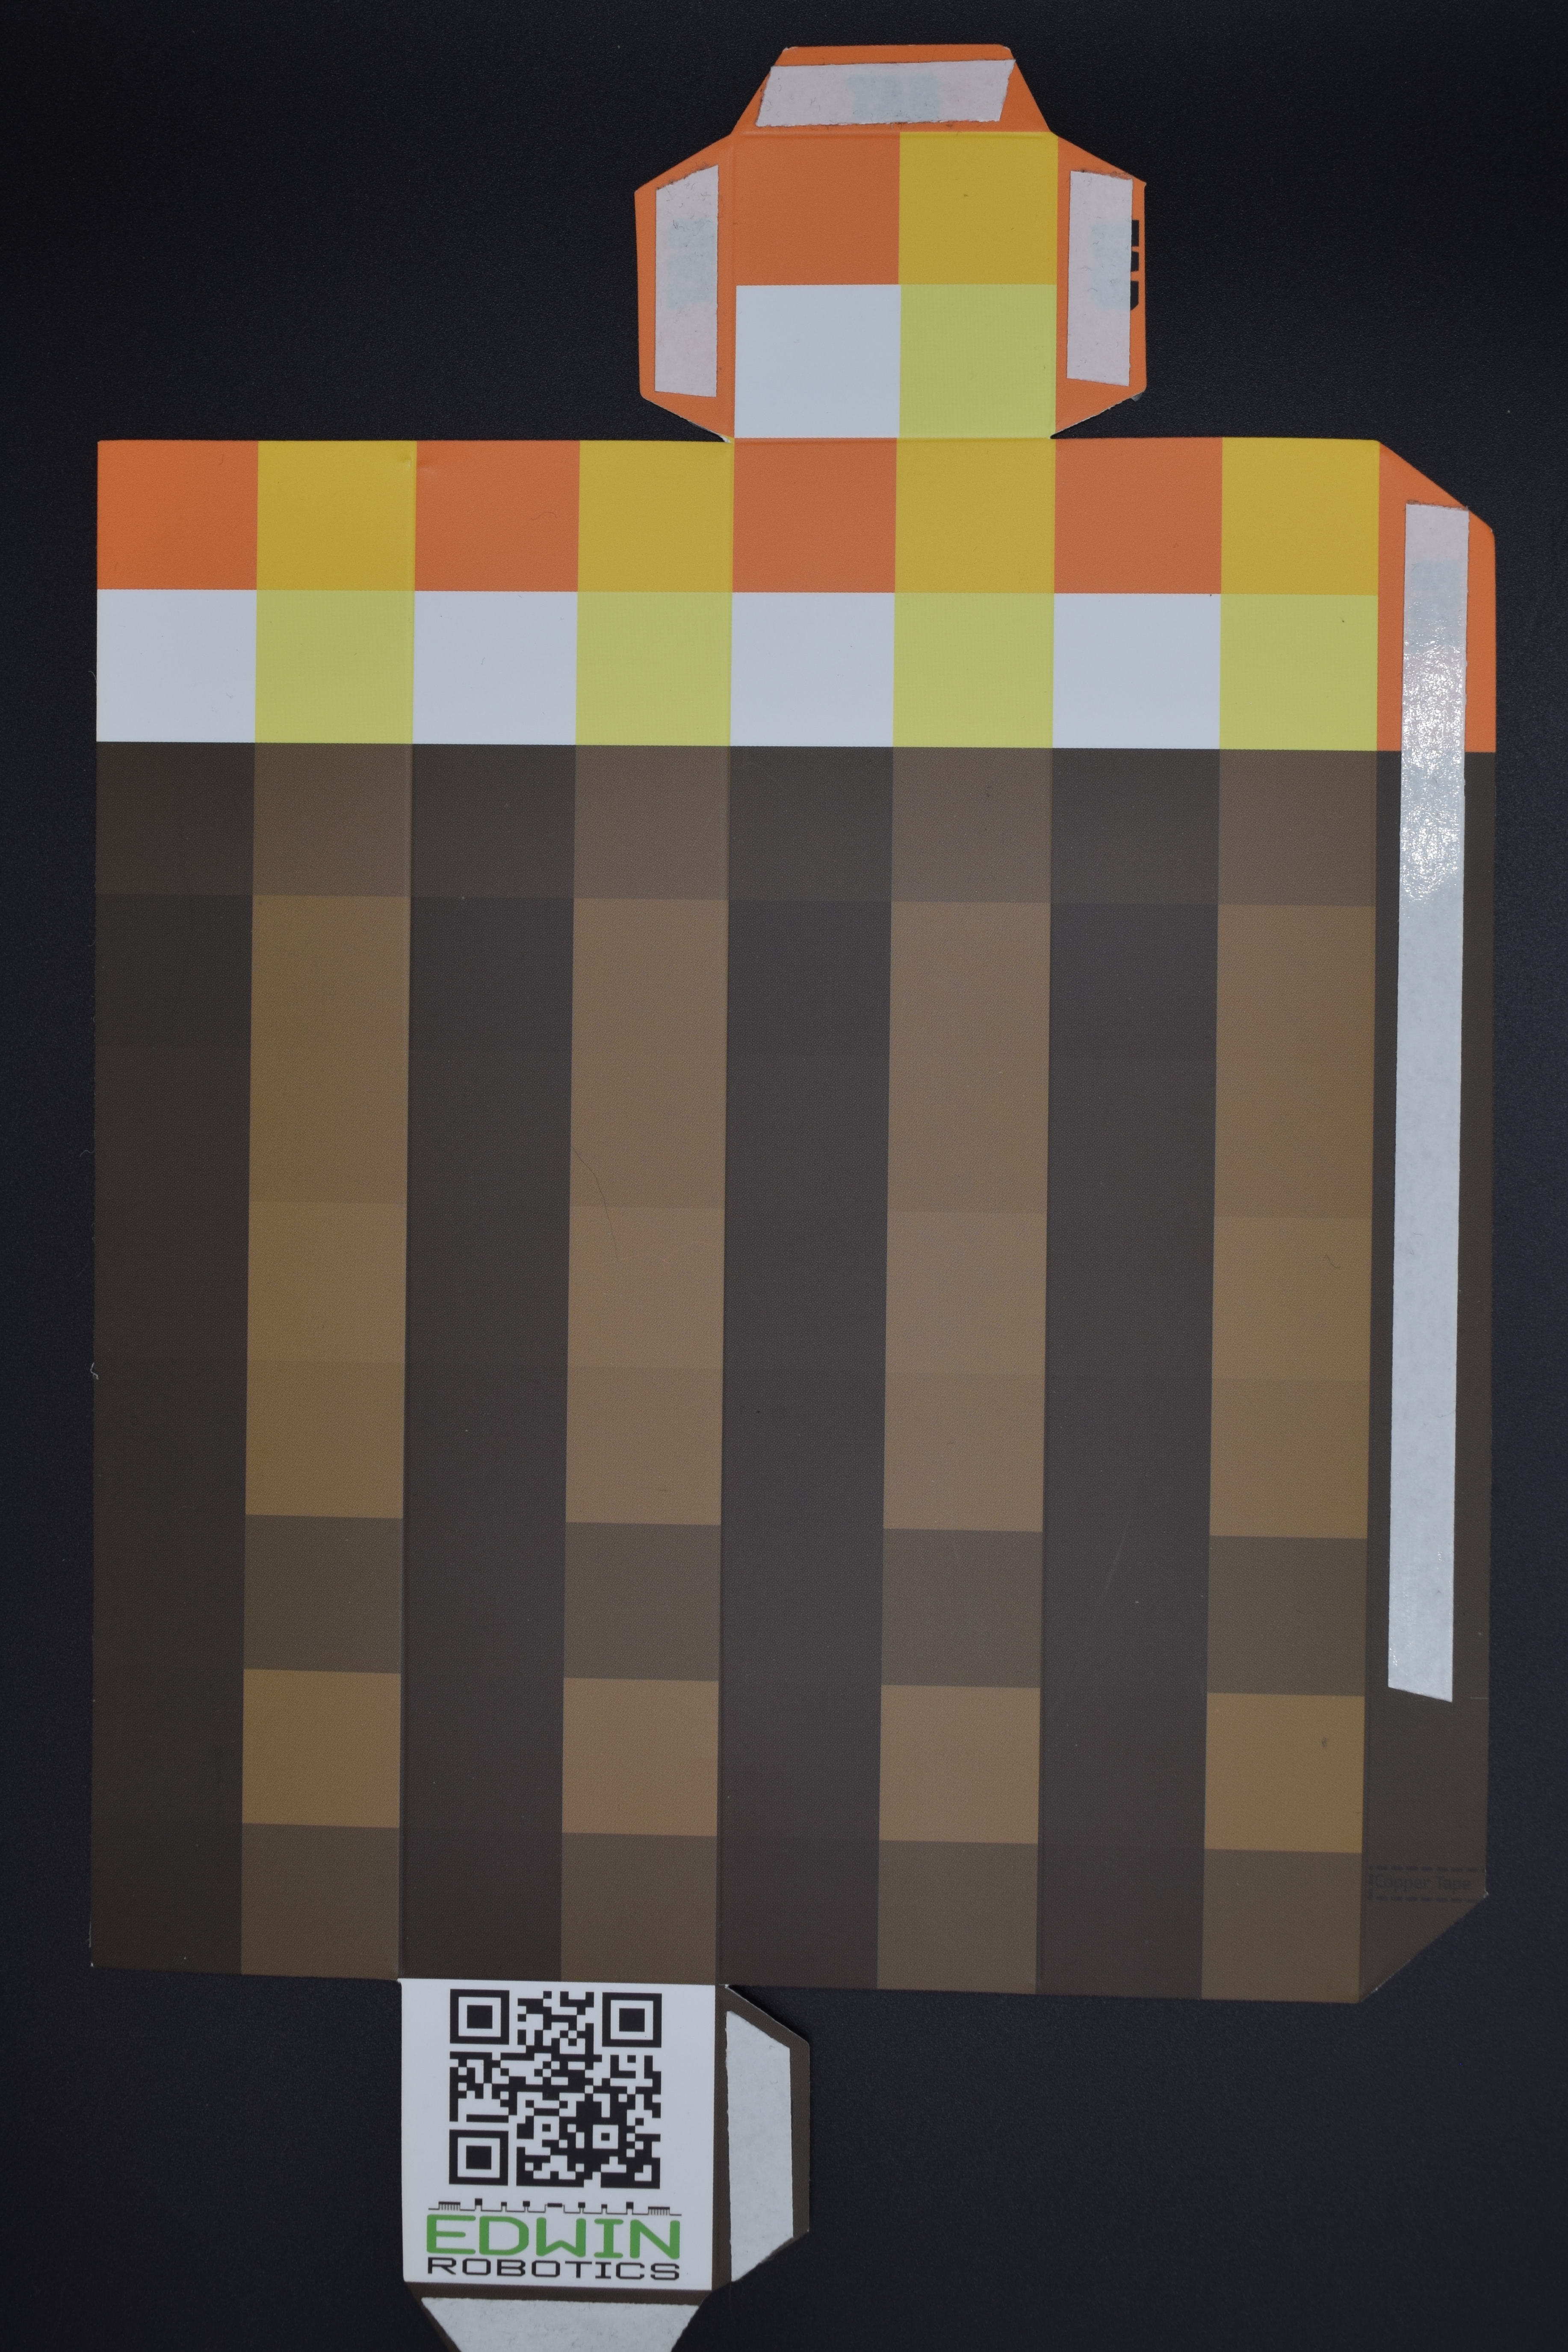
Torch Front
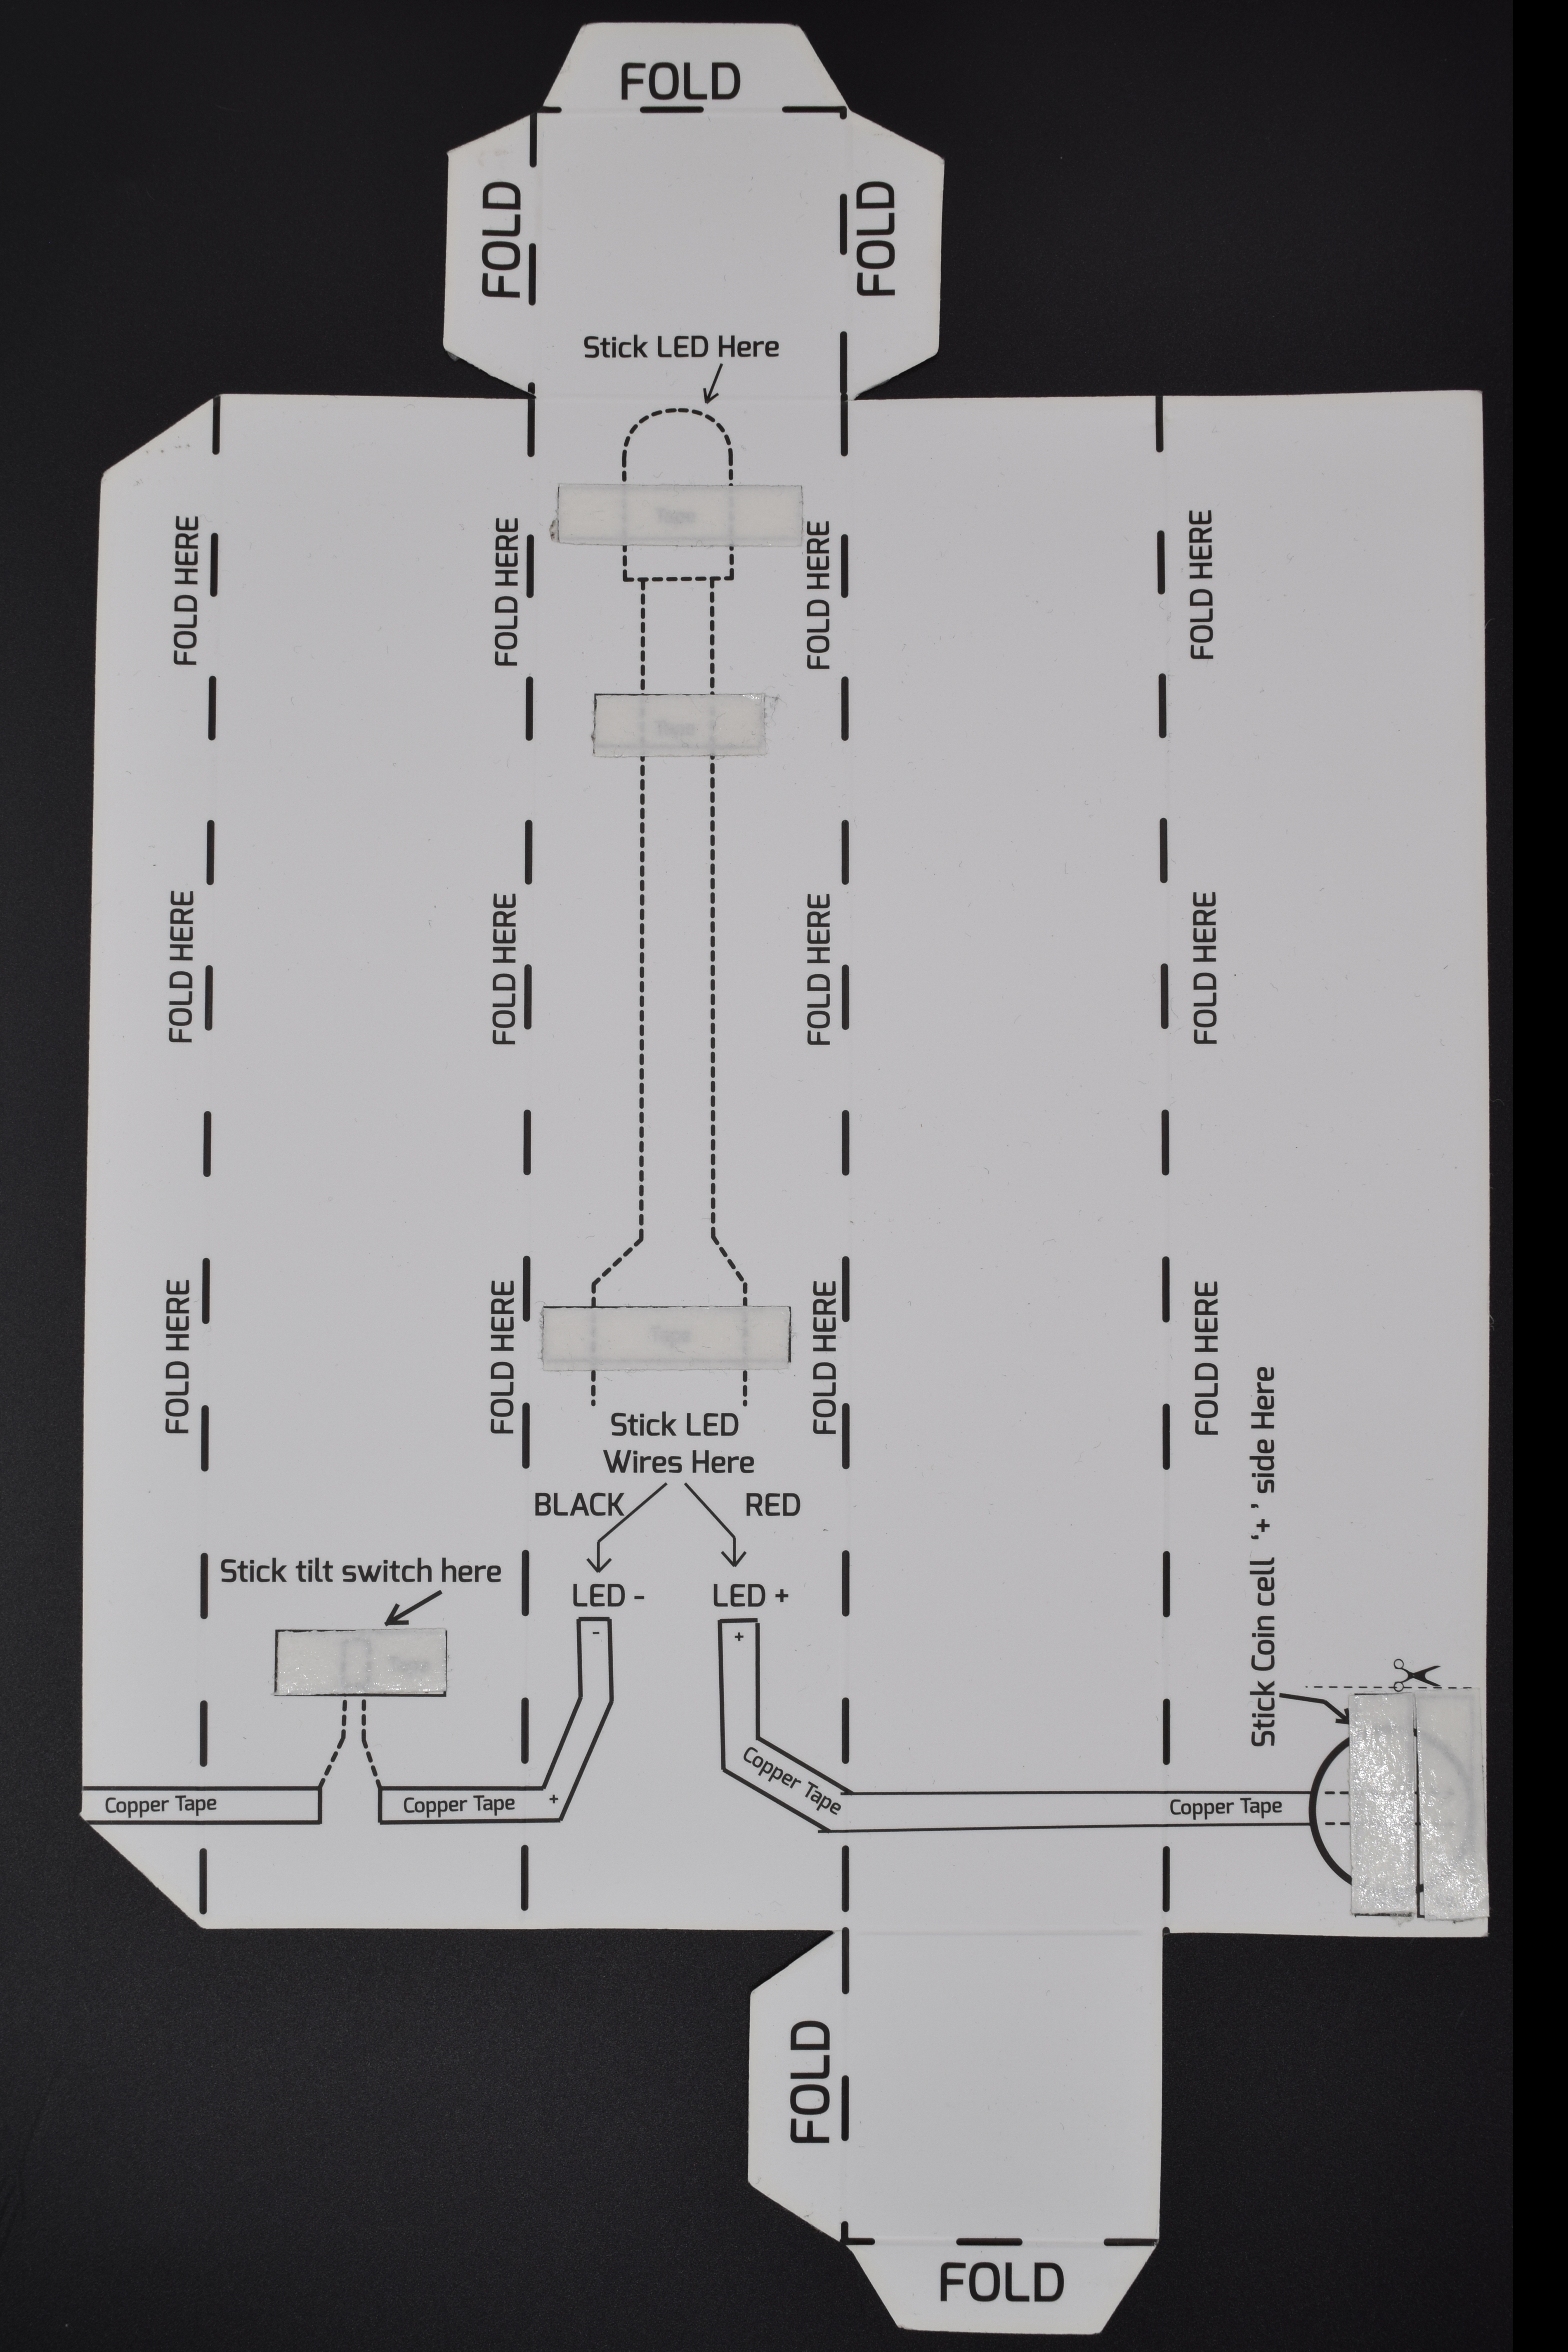
Torch Back
Let us have a look at the components we need to build this torch, check the image below :
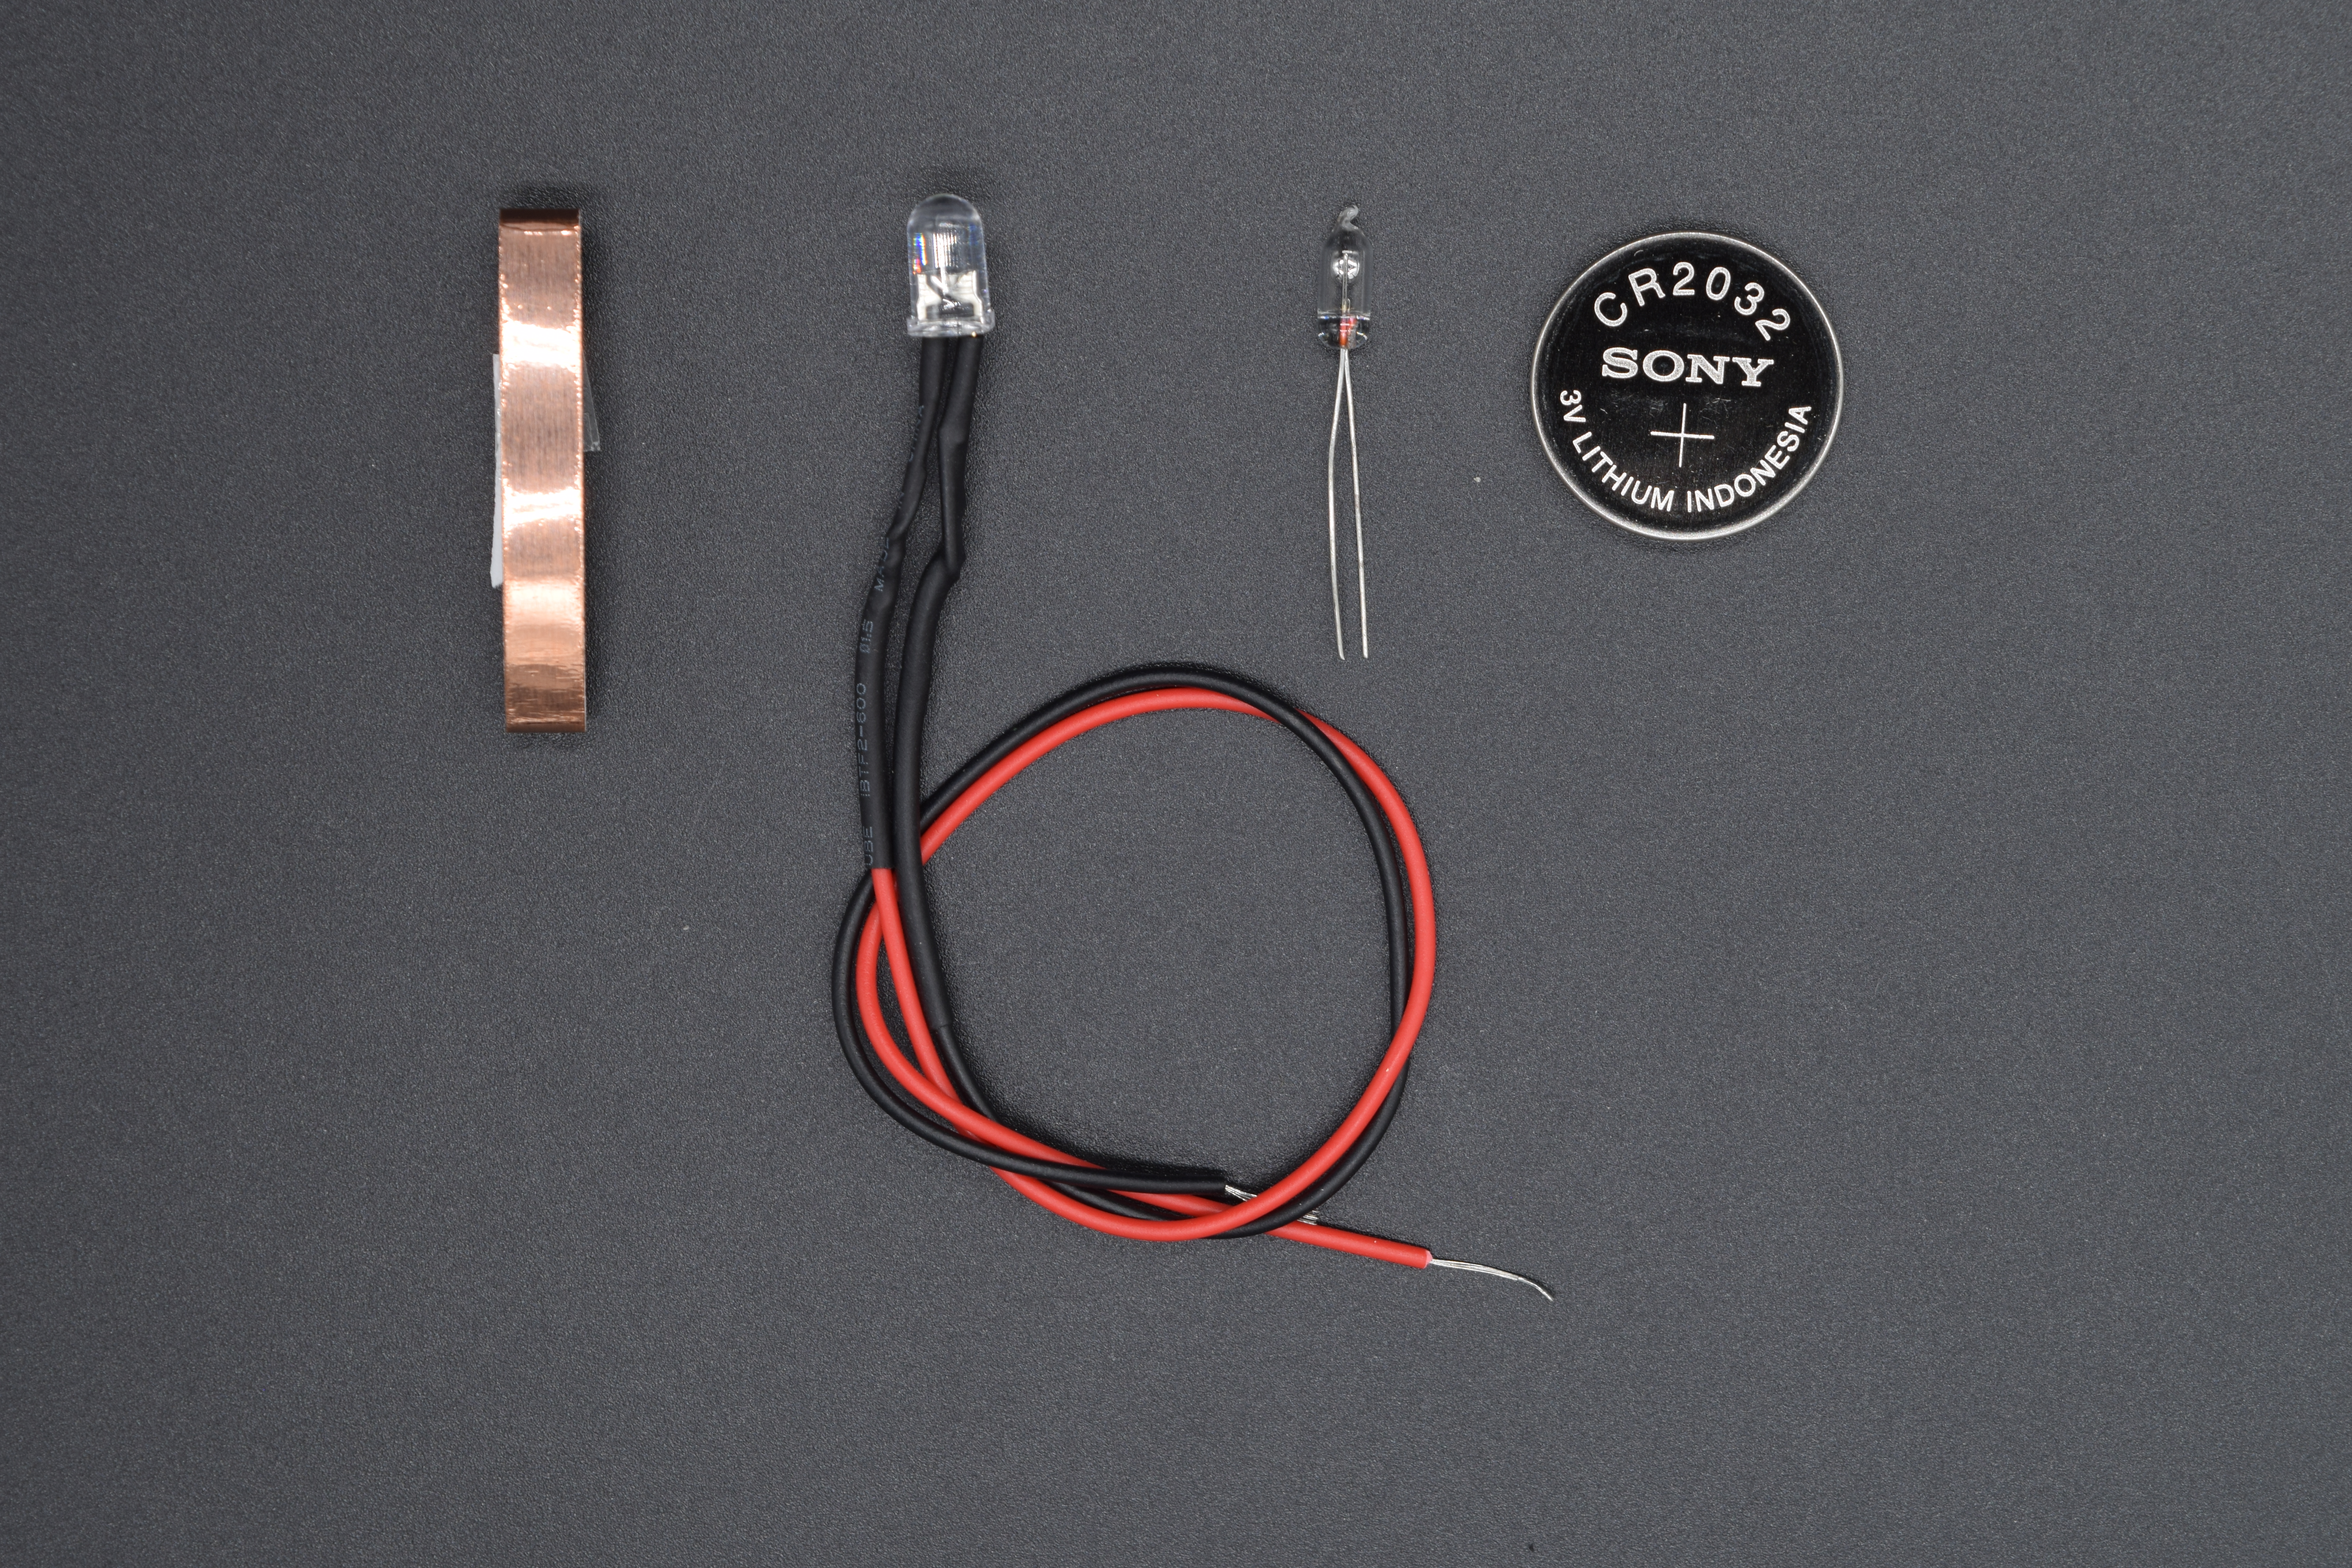
Components
All these items are included in the torch Kit we are providing. You can visit the products links(Check the getting started Part in the begining) to check the detailed description about each item.
Step 1:
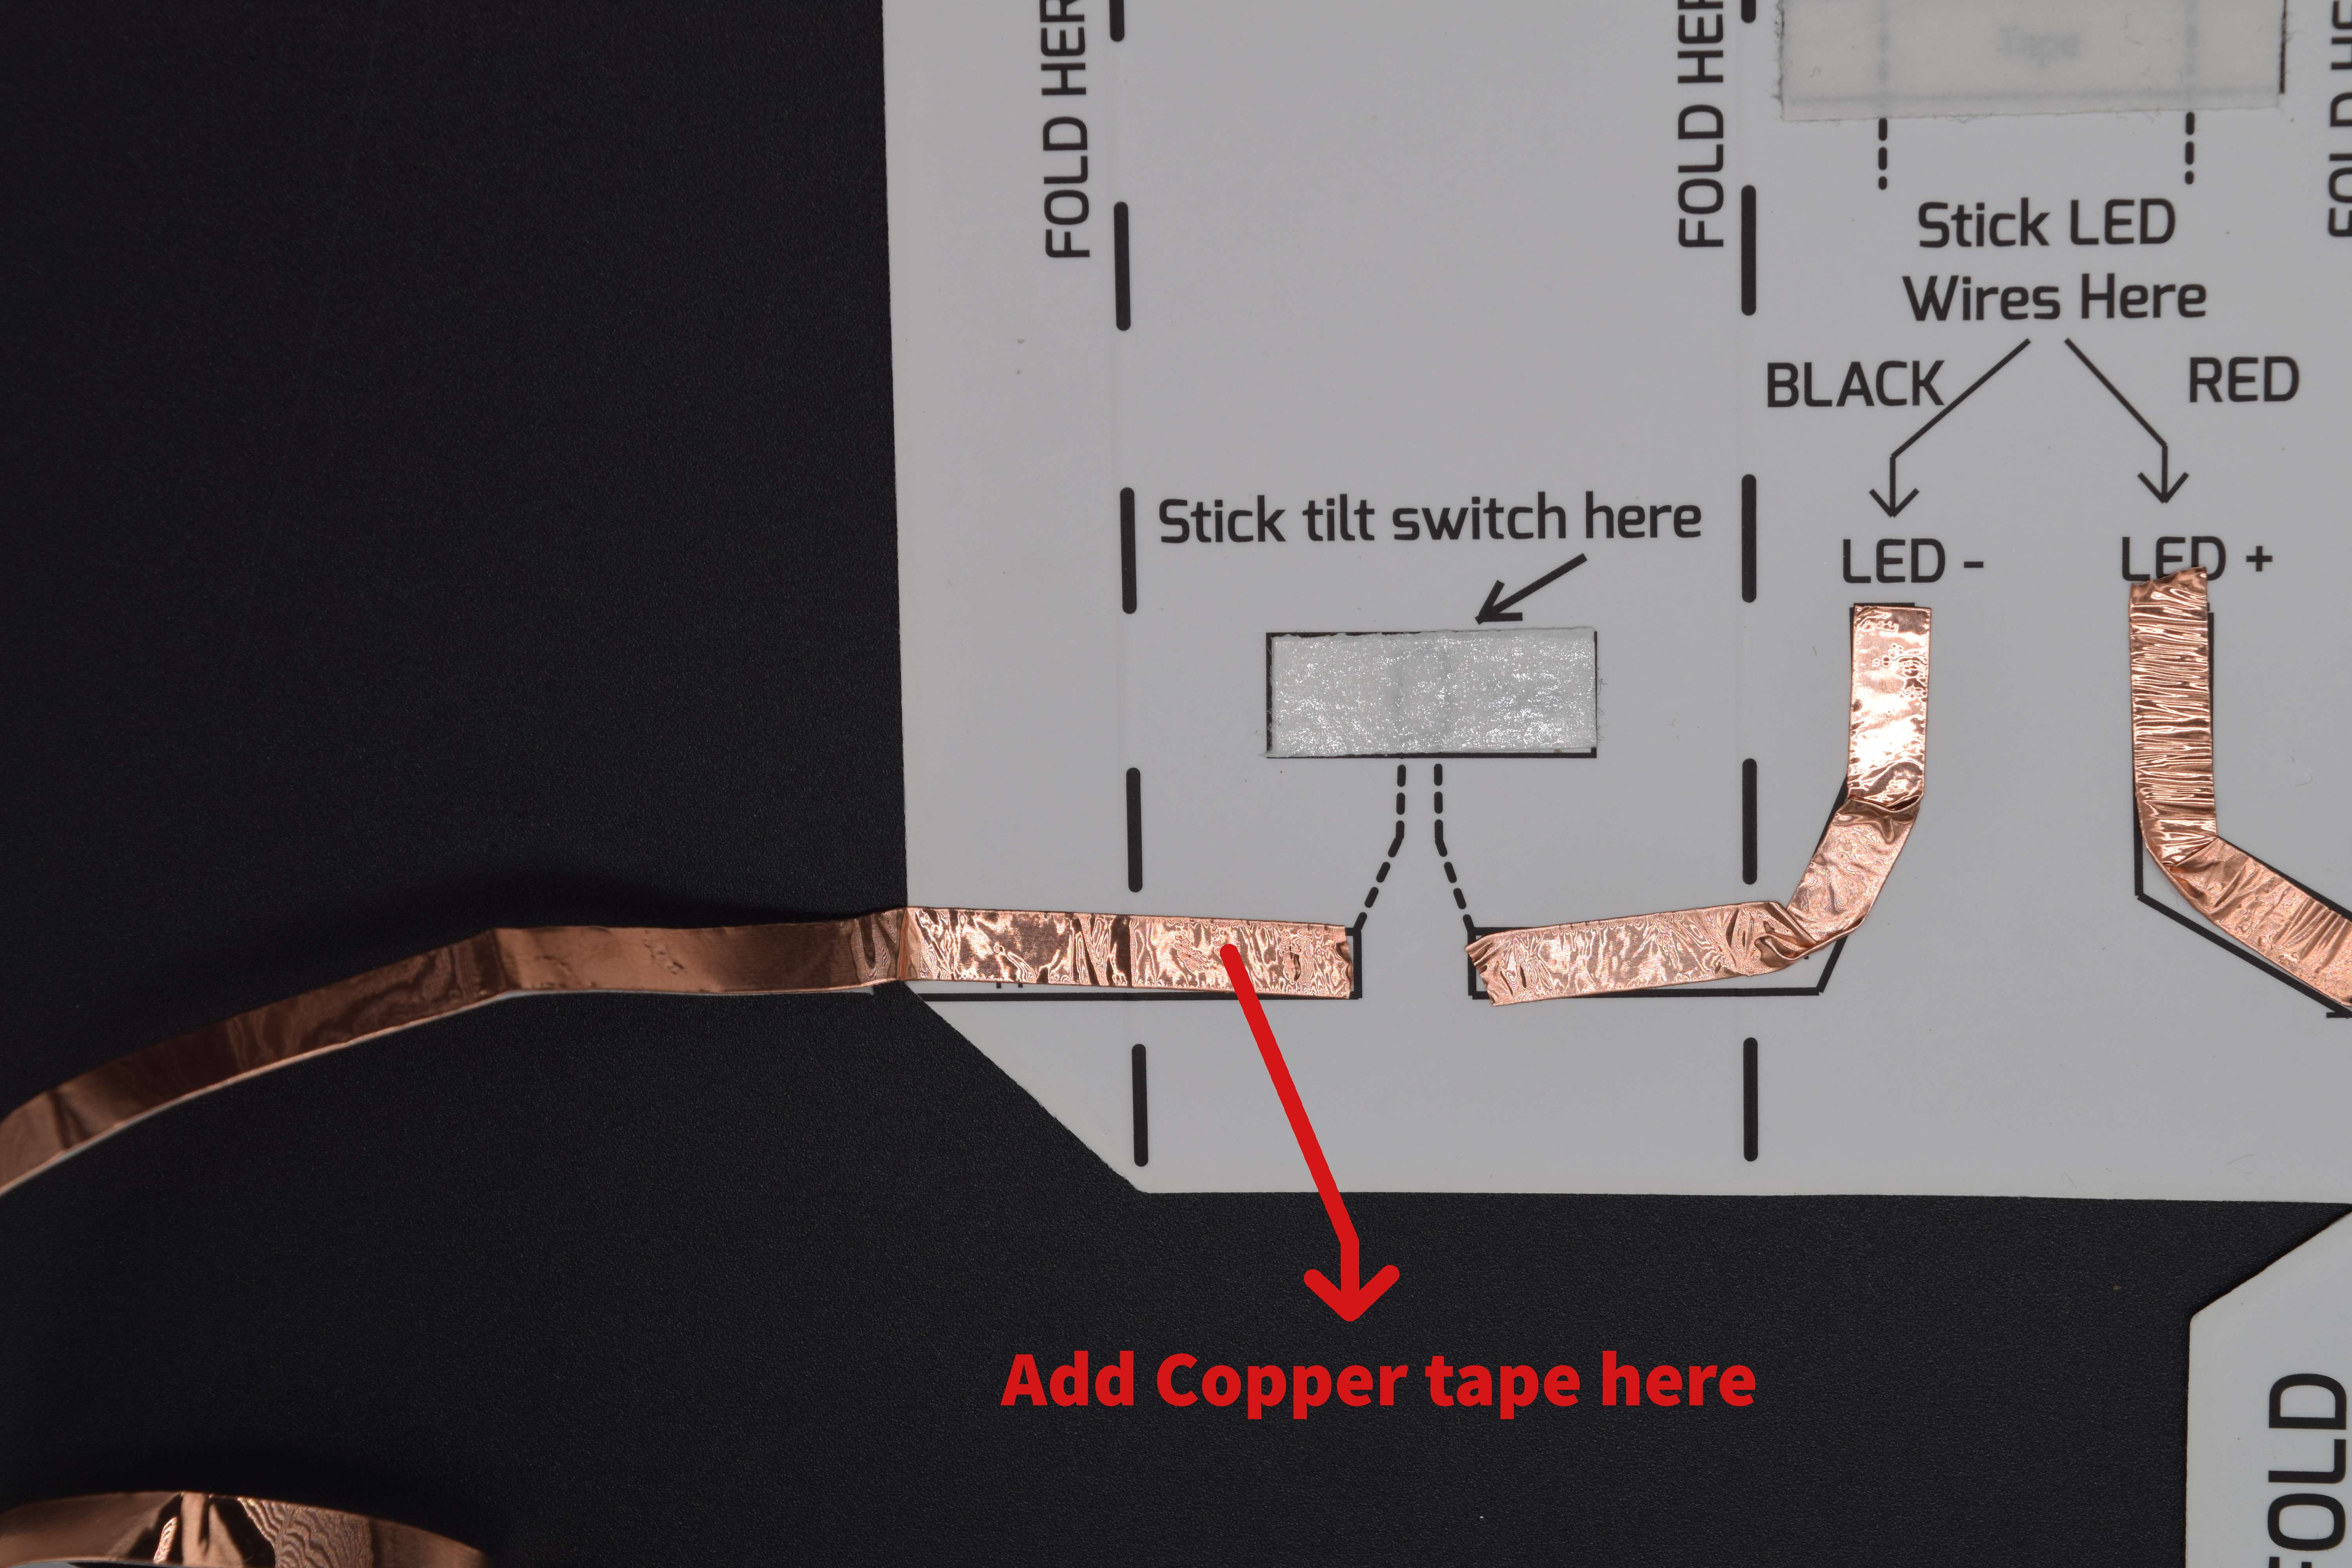
- Peel a very small amount of Copper tape from the paper and start sticking it to the track where LED- is mentioned.
- Now start sticking it along track till the end of the track (Refer the Image below)
- Cut the Copper trace either from scissors or tear it with hands.
Add Copper tape to the track between LED- and Tilt Switch
Lets have another look at how to add the copper tape to the track, refer the image below:
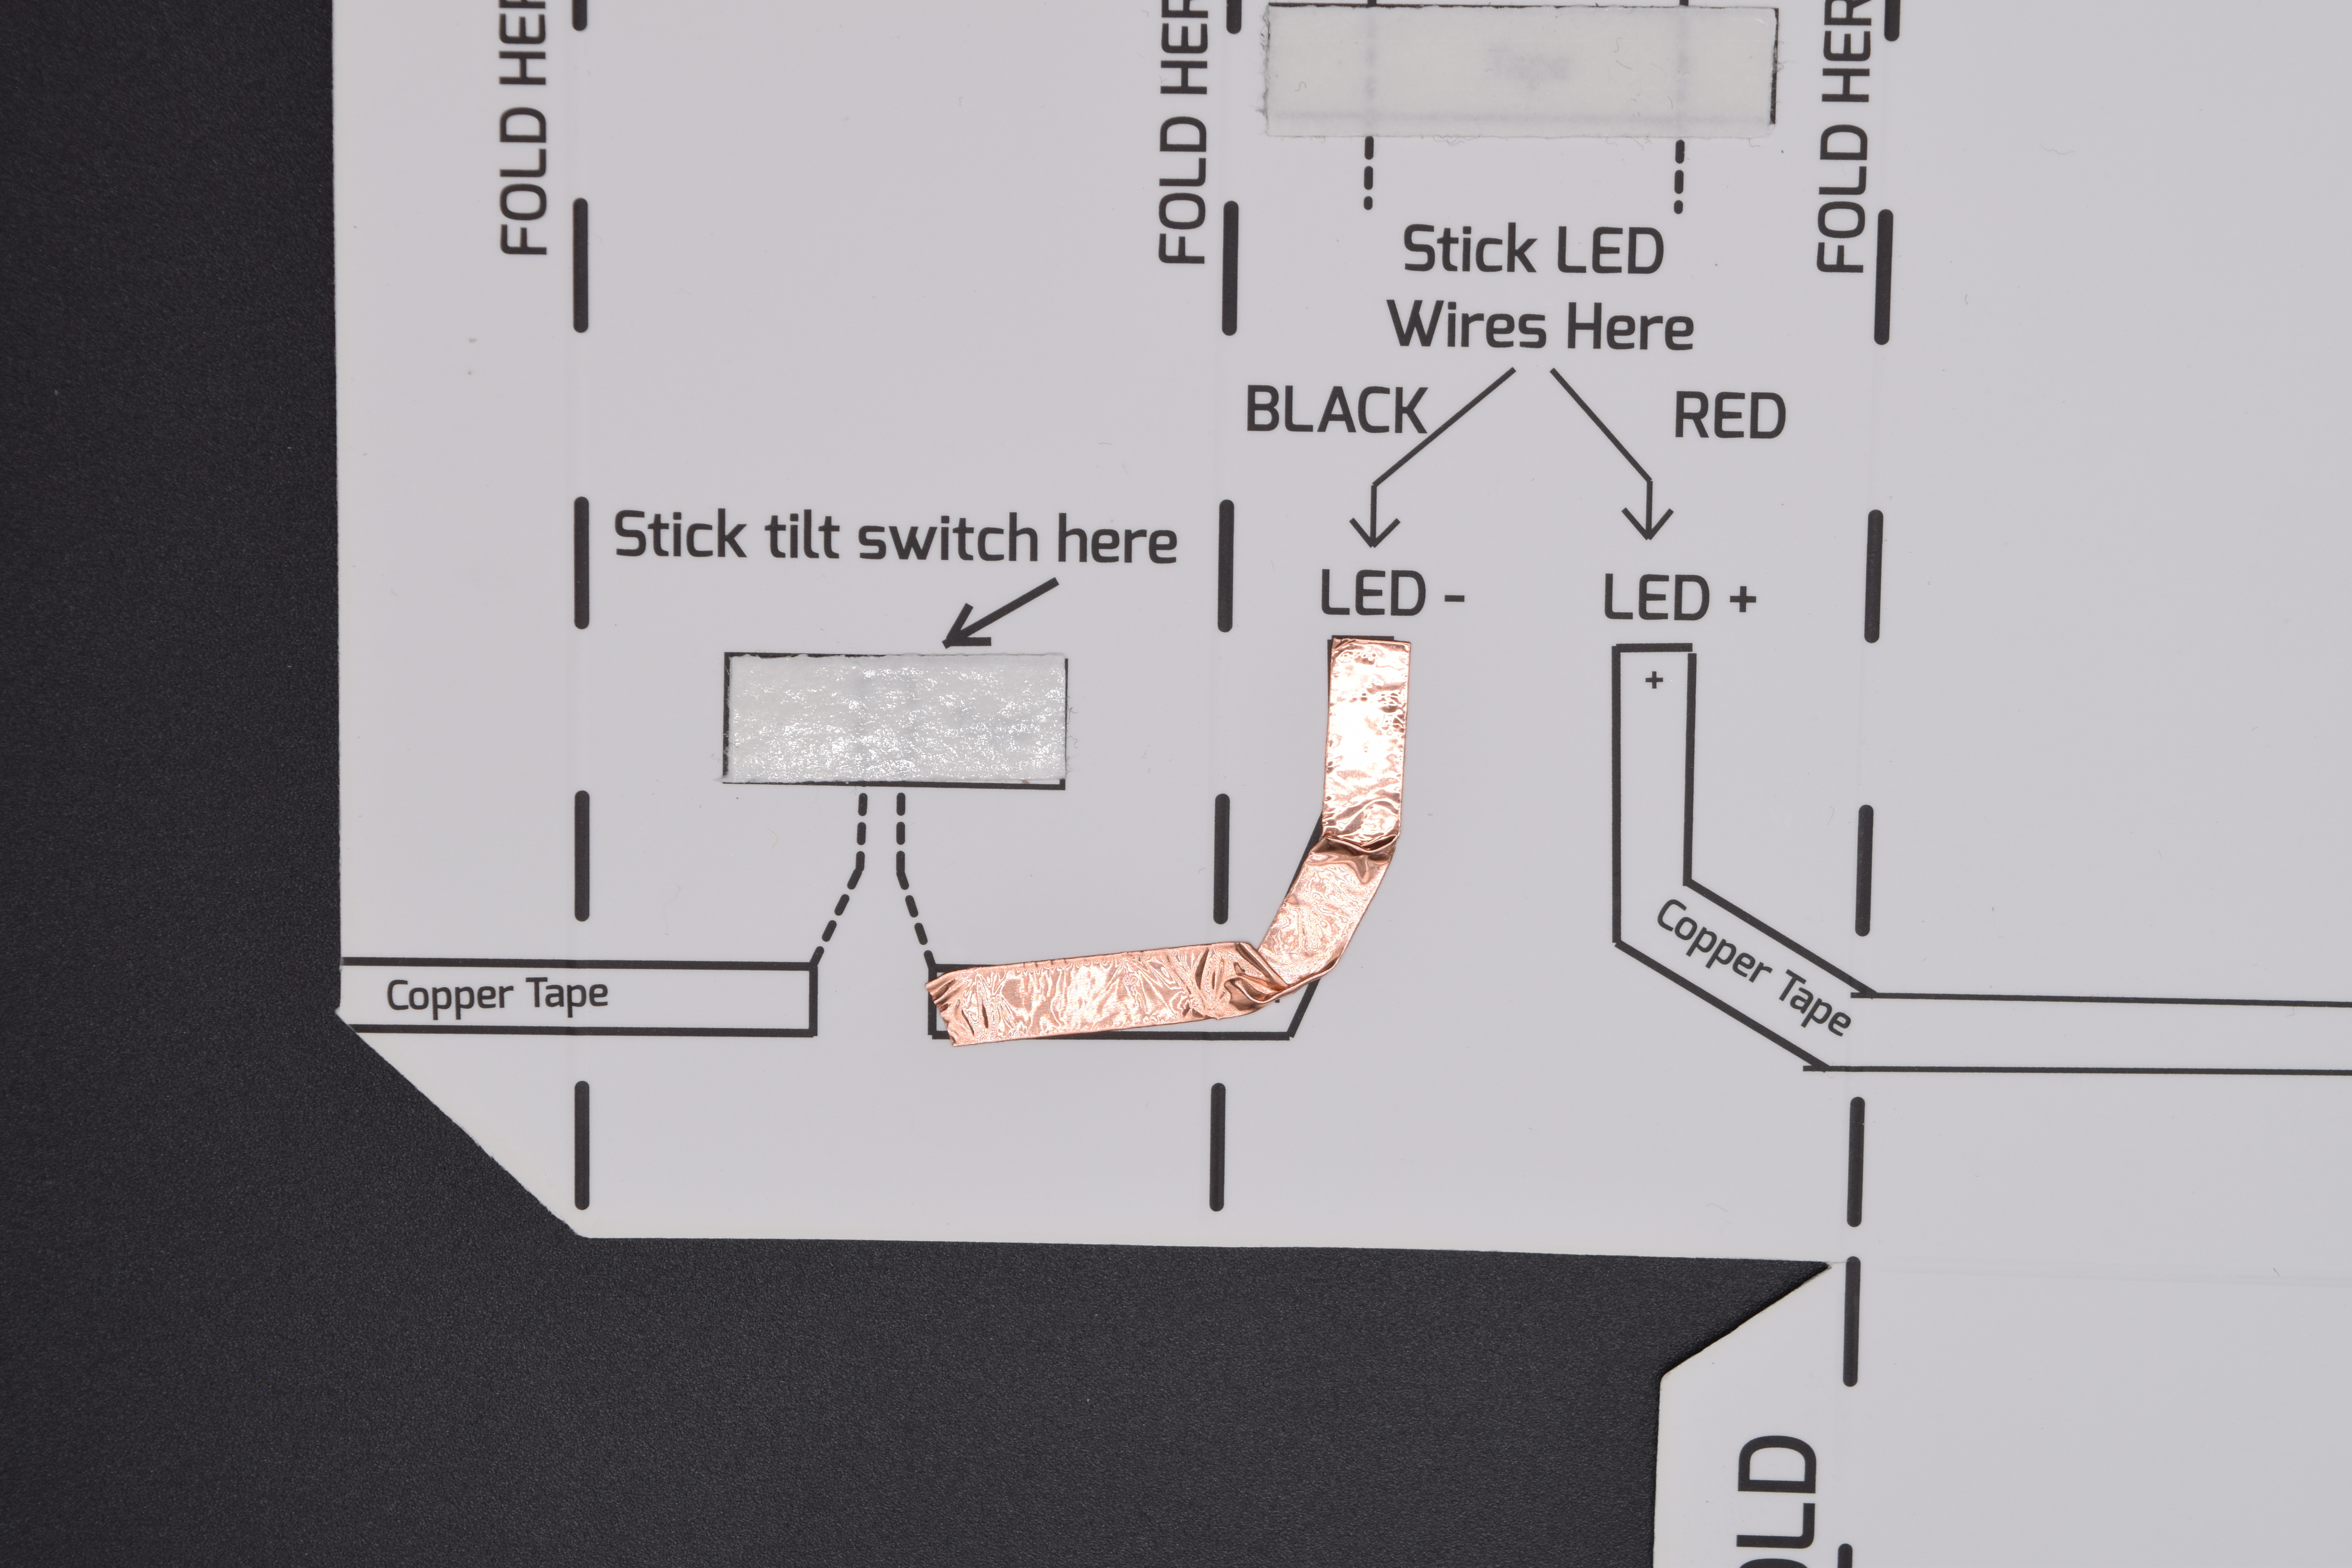
Added Copper tape
Step 2:
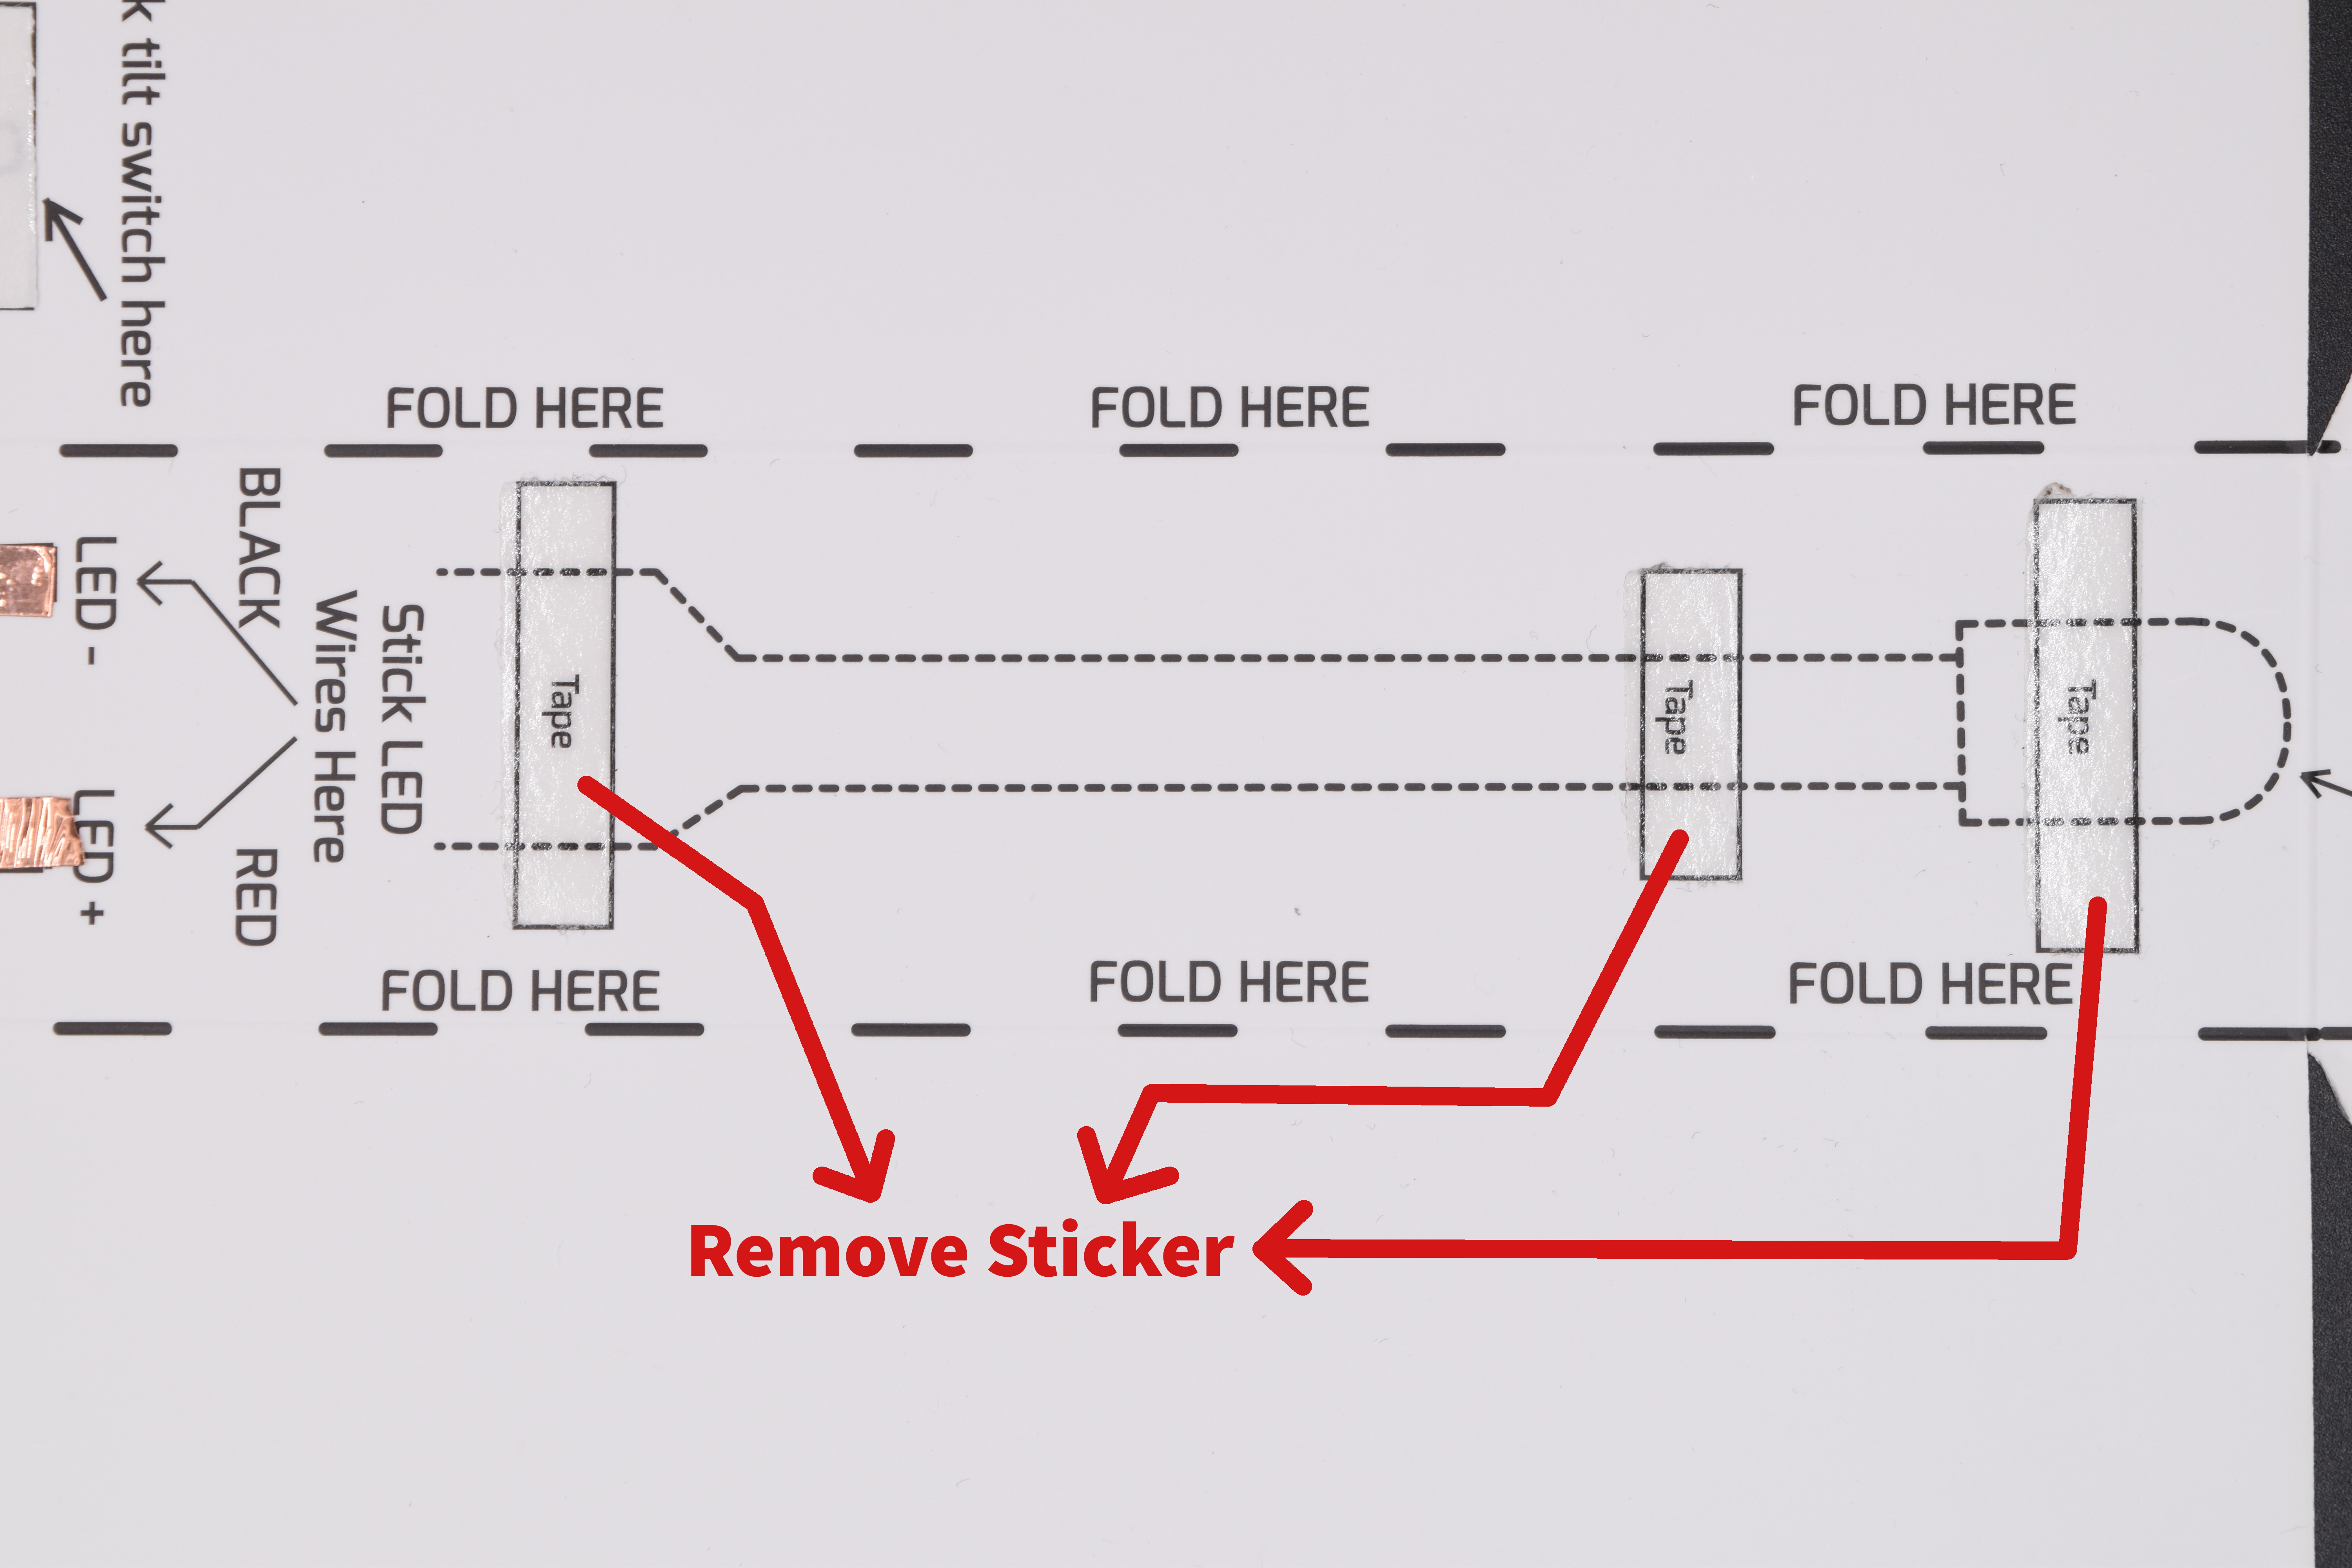
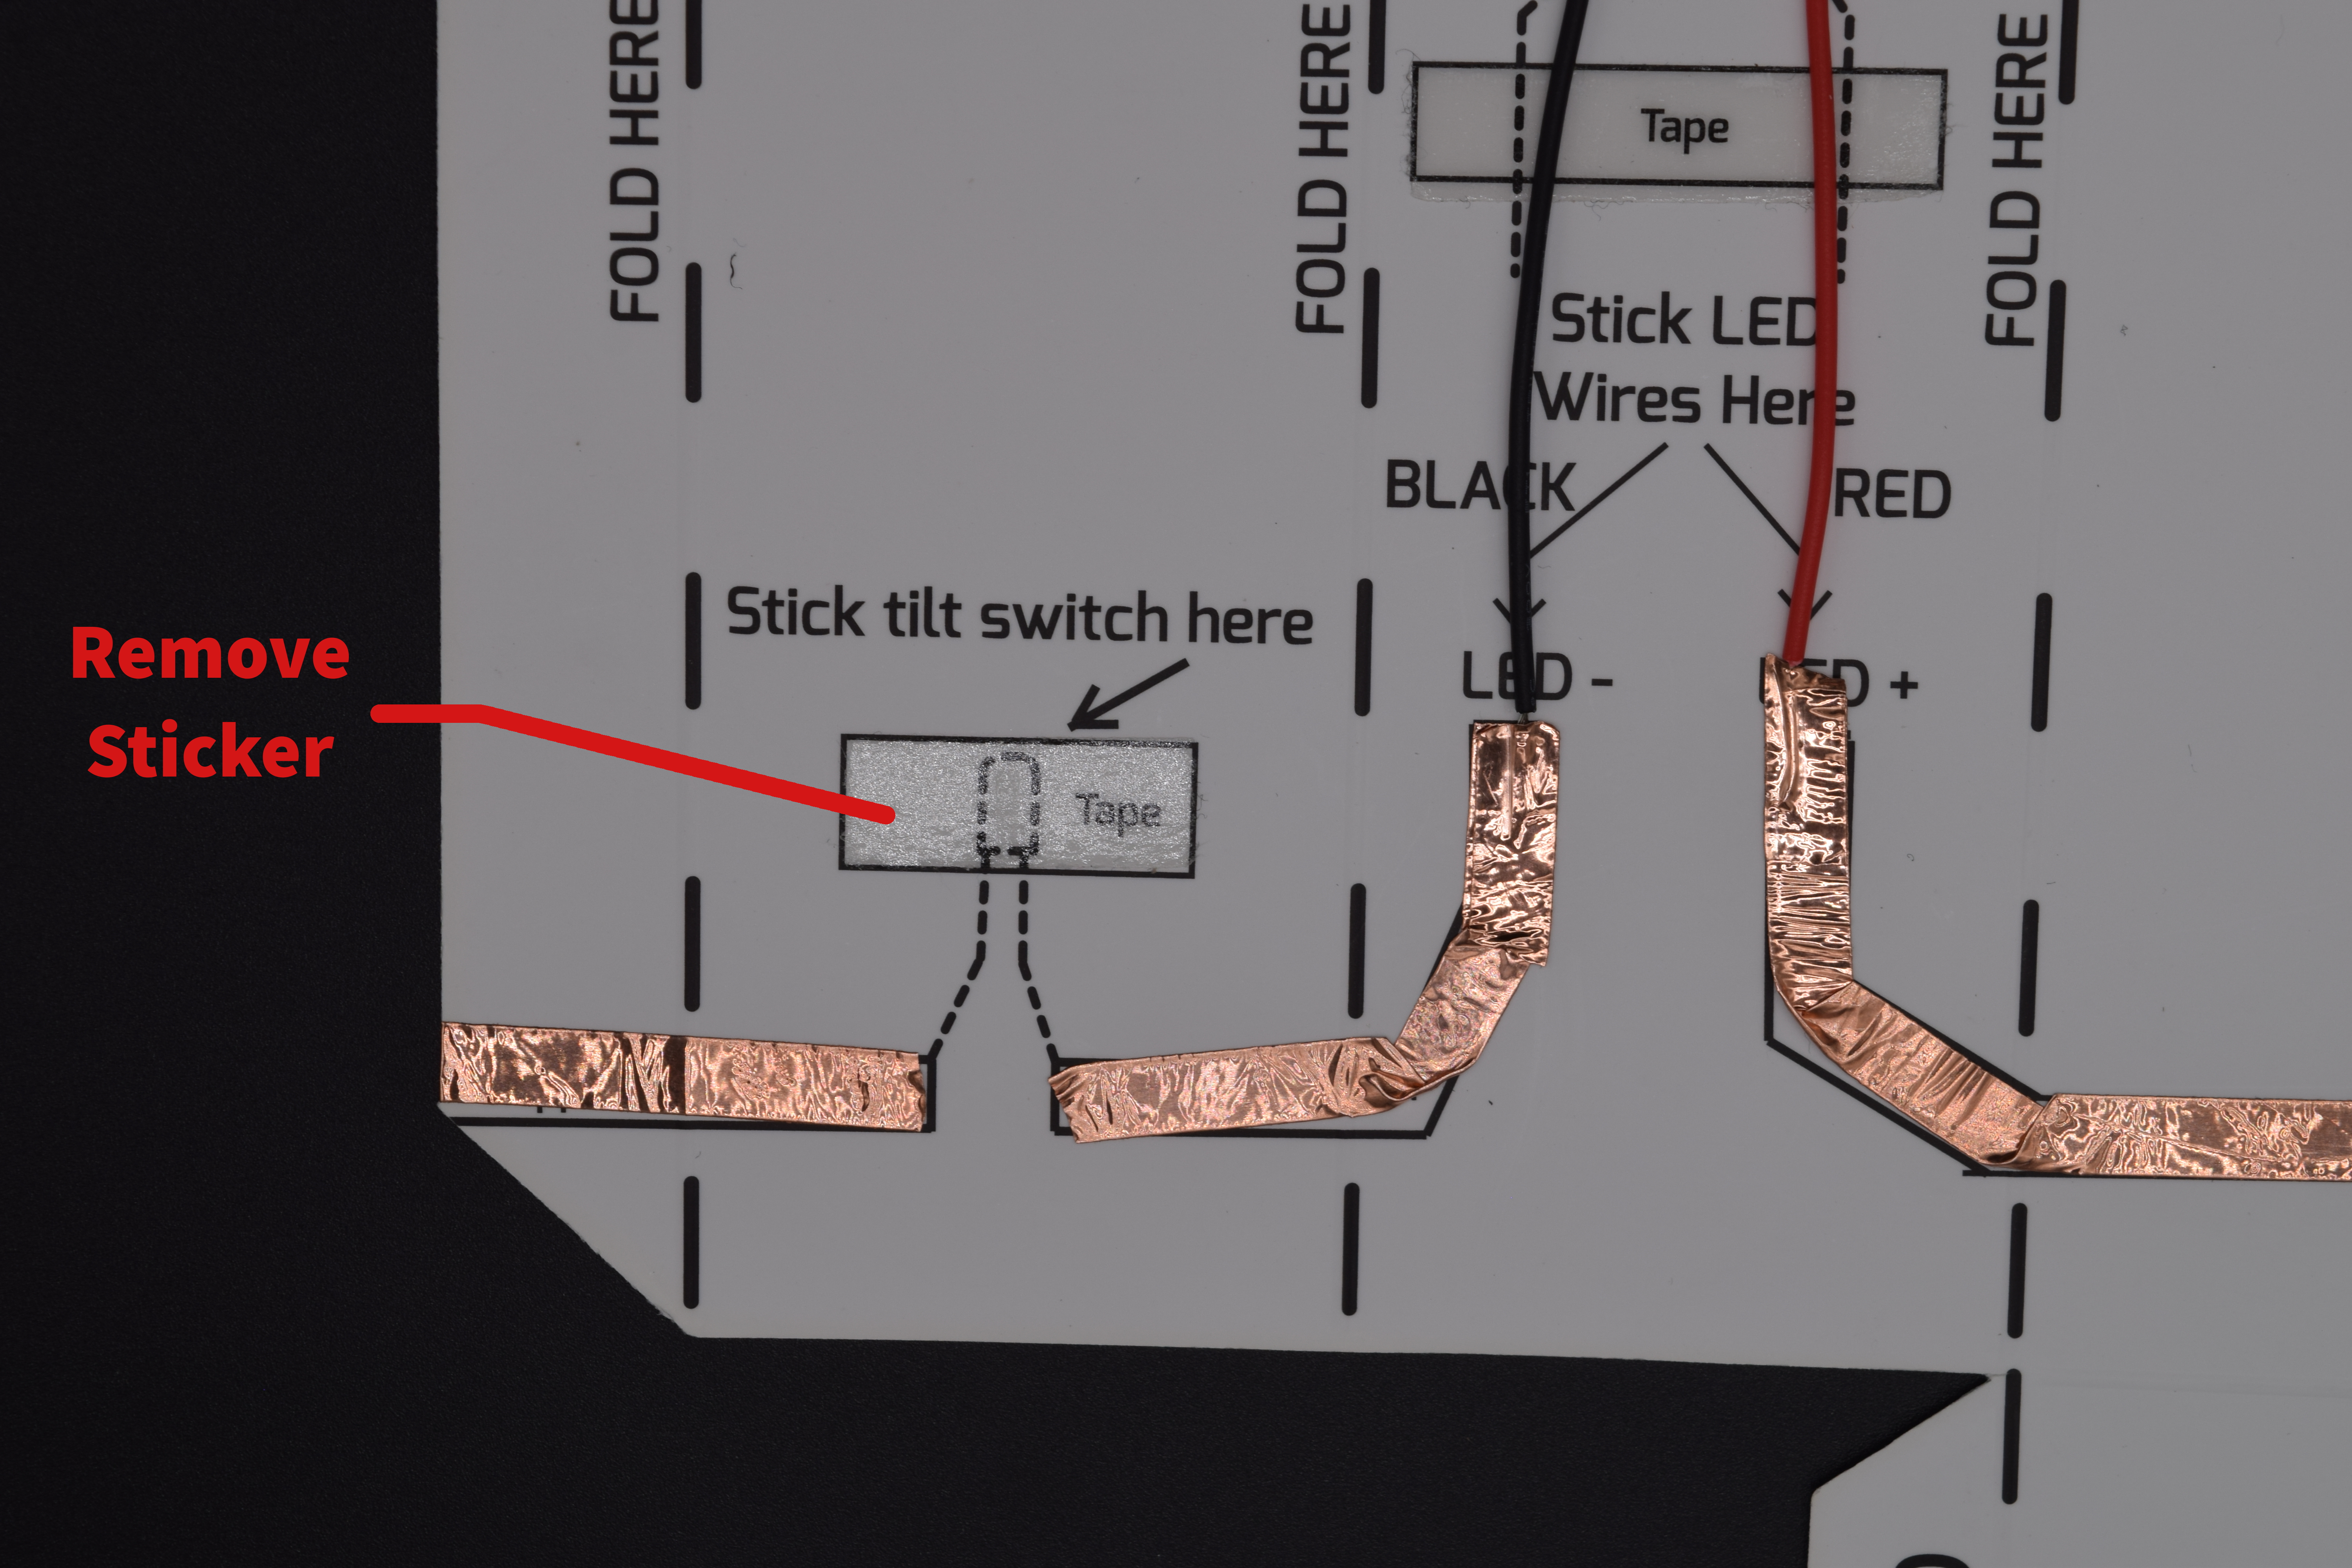
- Remove the Sticker from the tape above the coin cell battery area, check the below image for better idea:
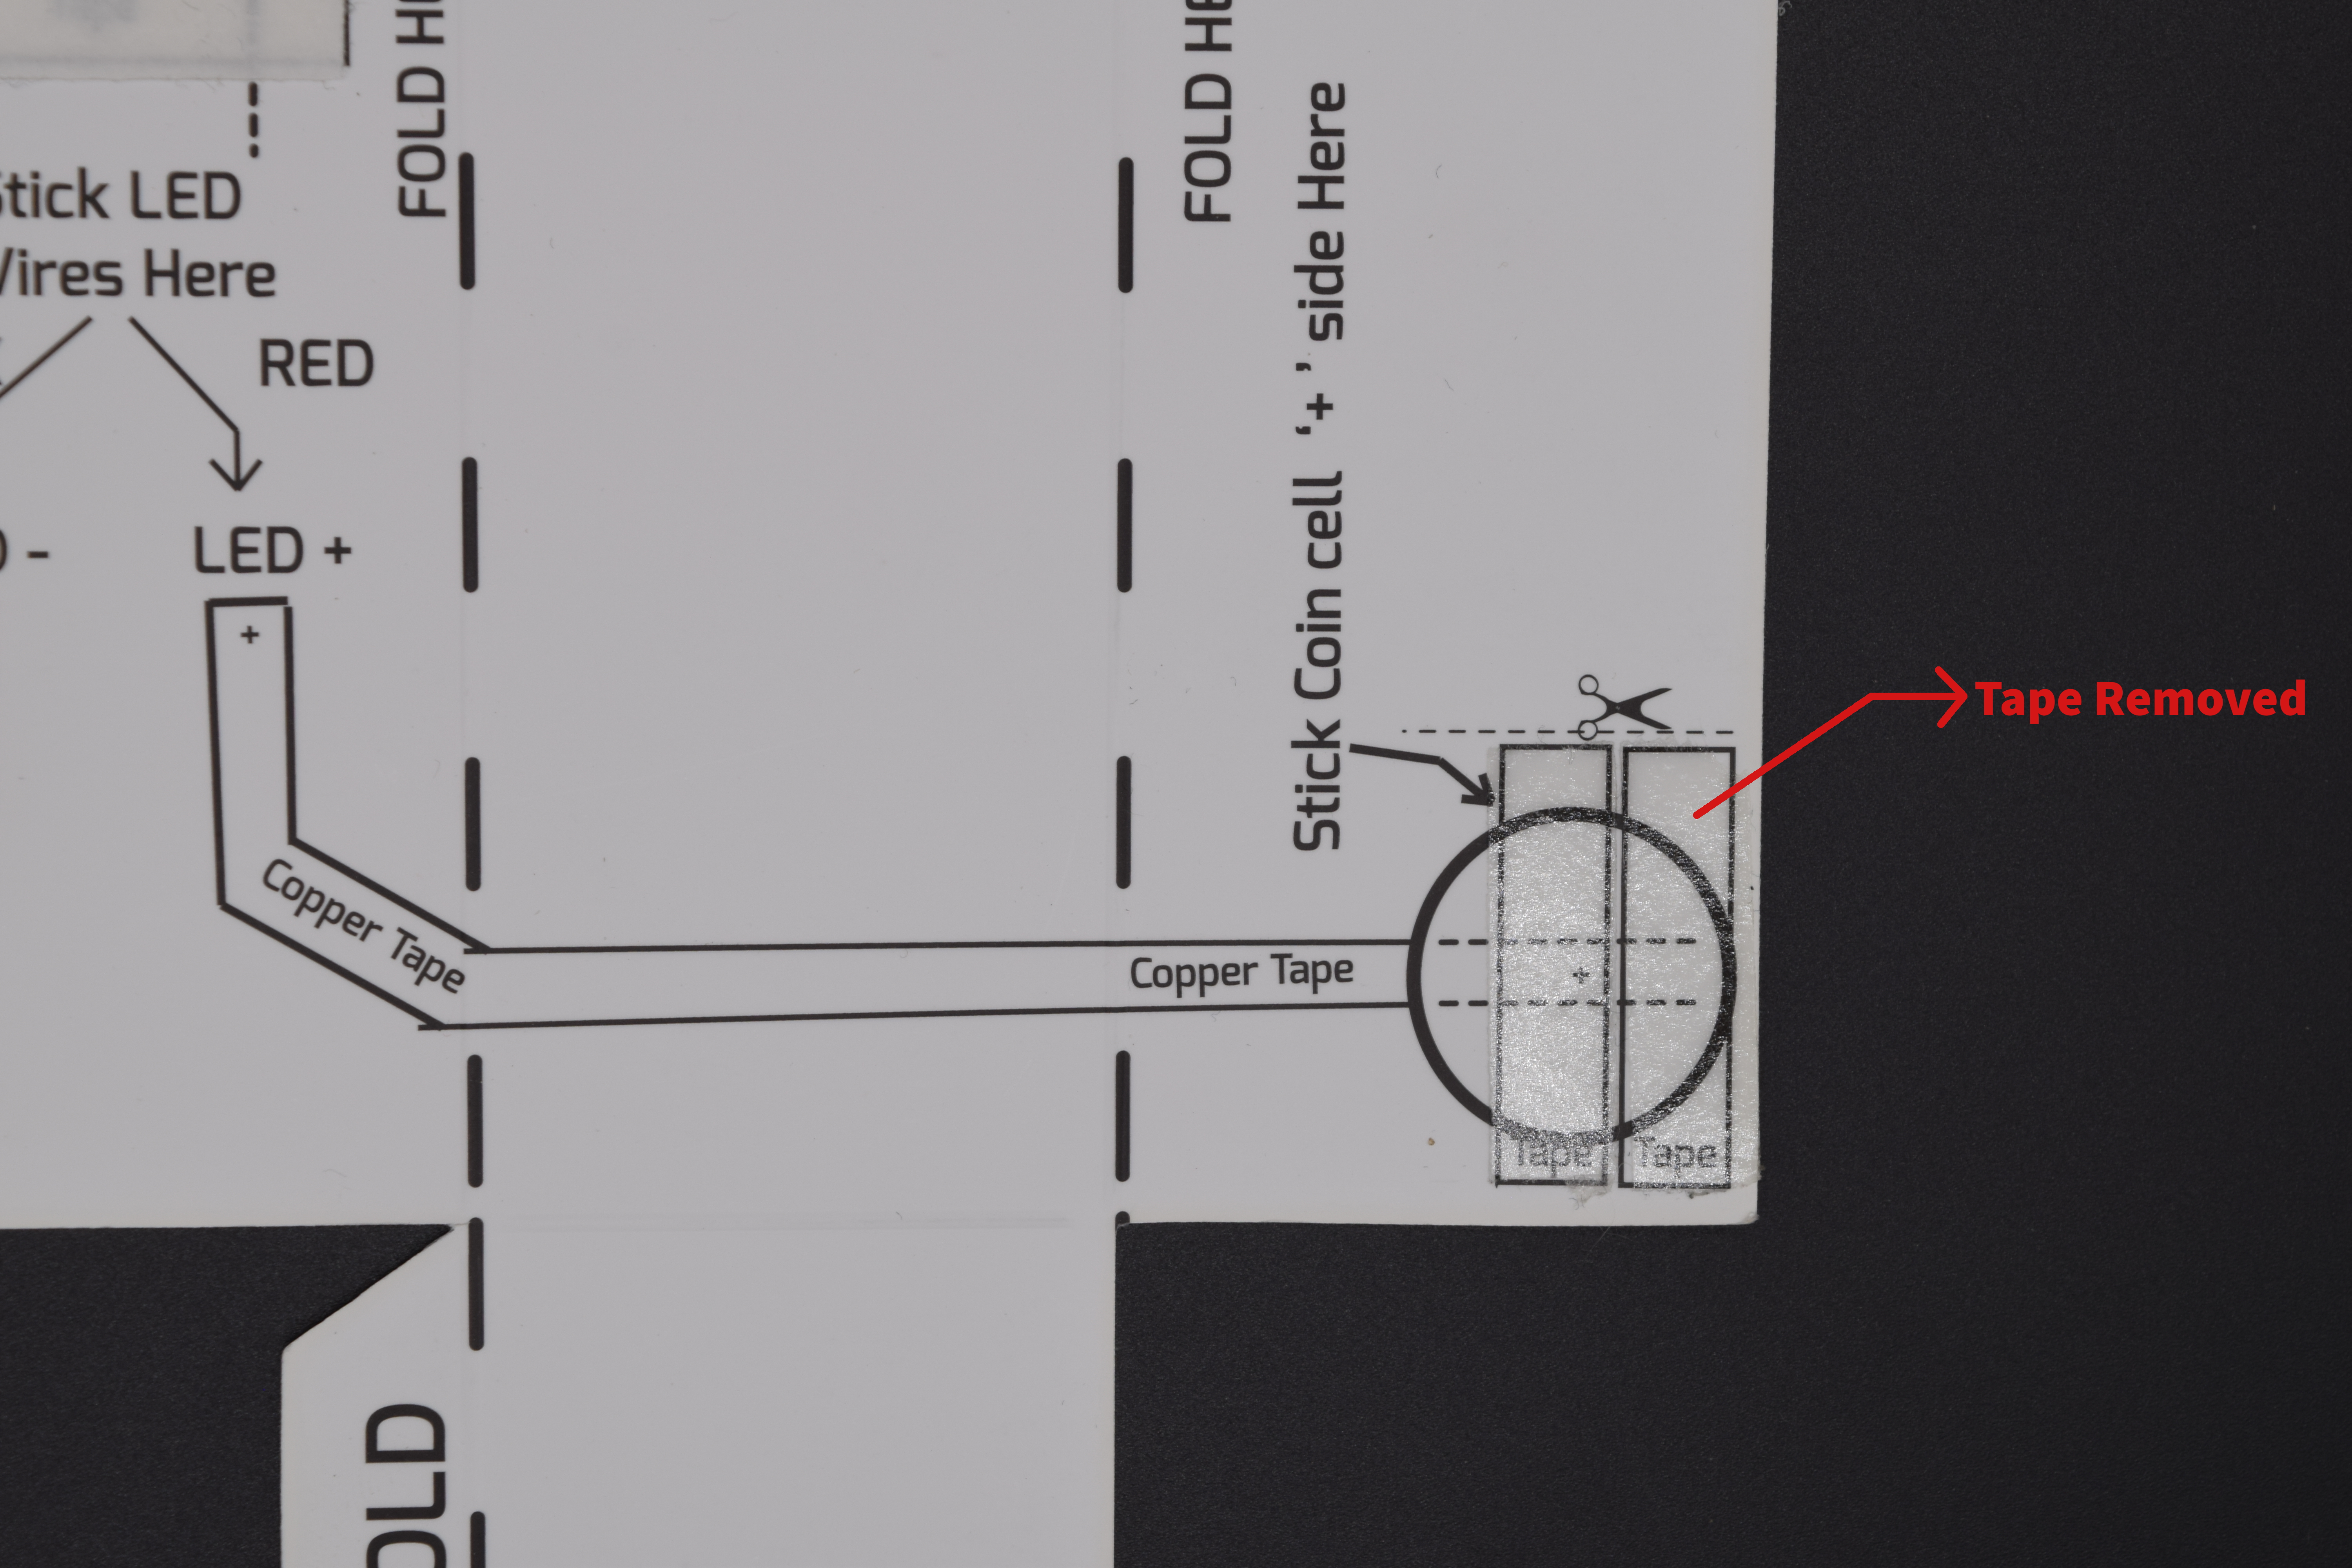
Peel the Sticker from the Tape
- Add copper tape to the LED+ track shown below:
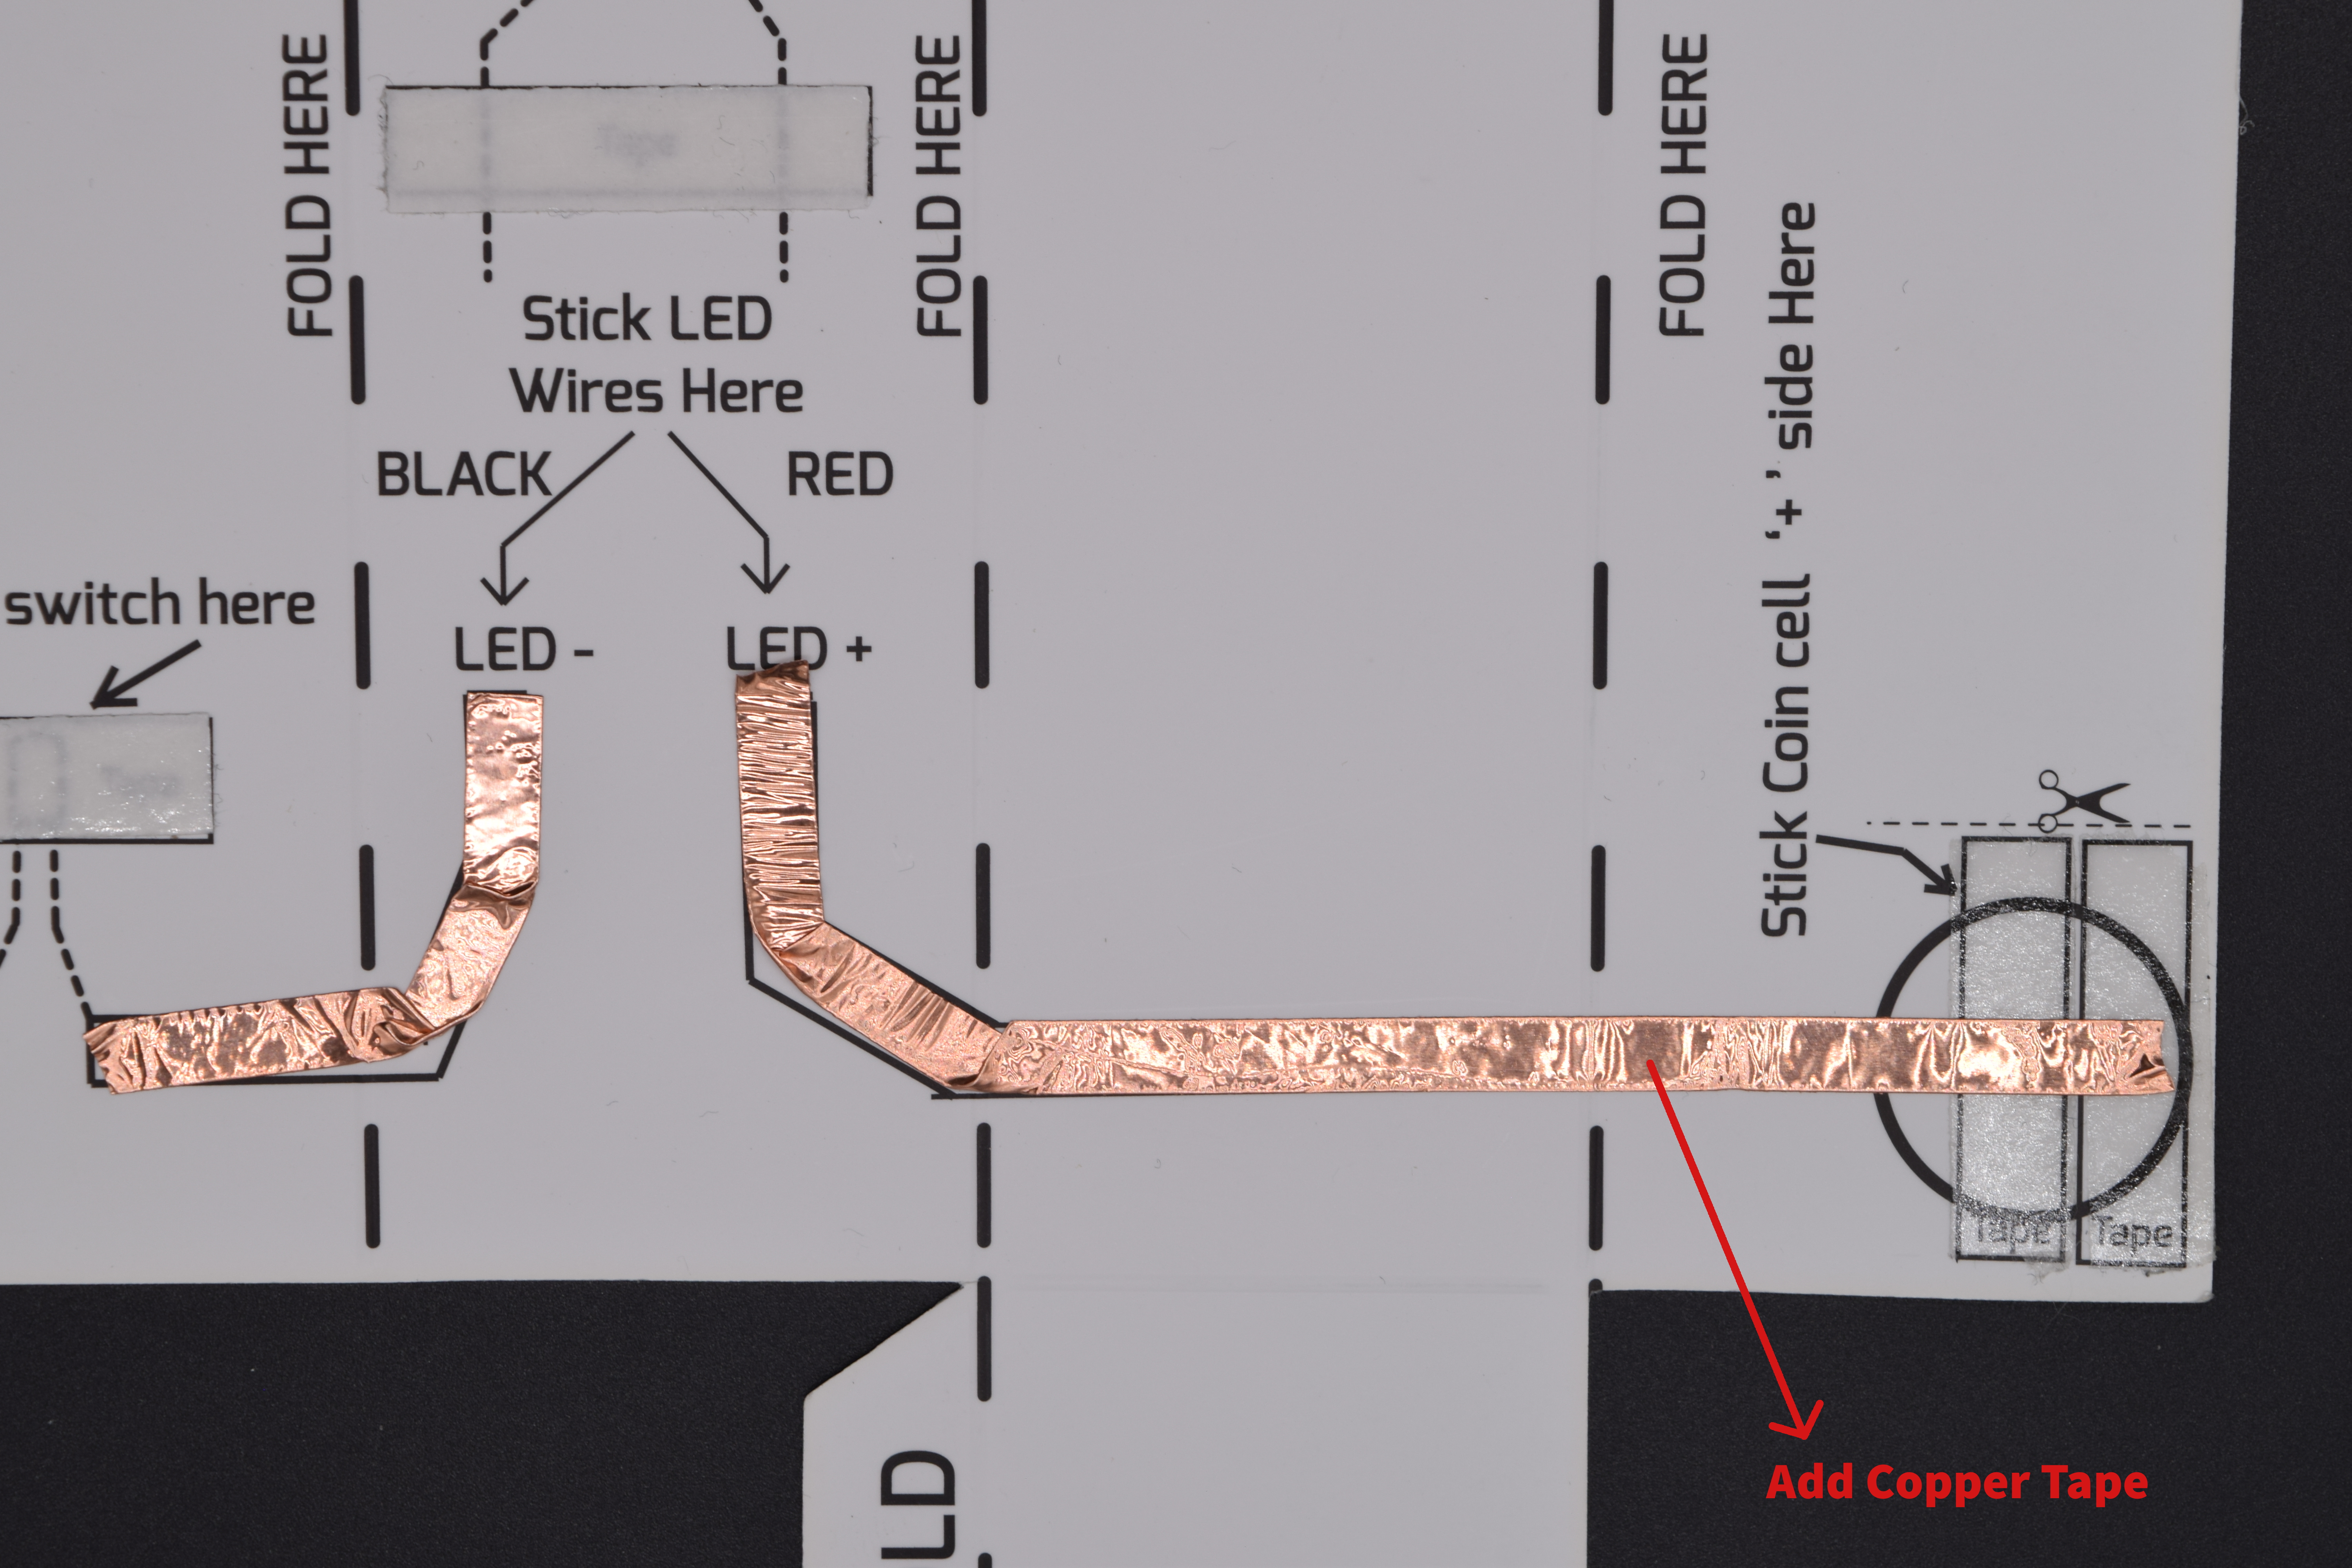
Add Copper tape to LED+ track
Step 3:
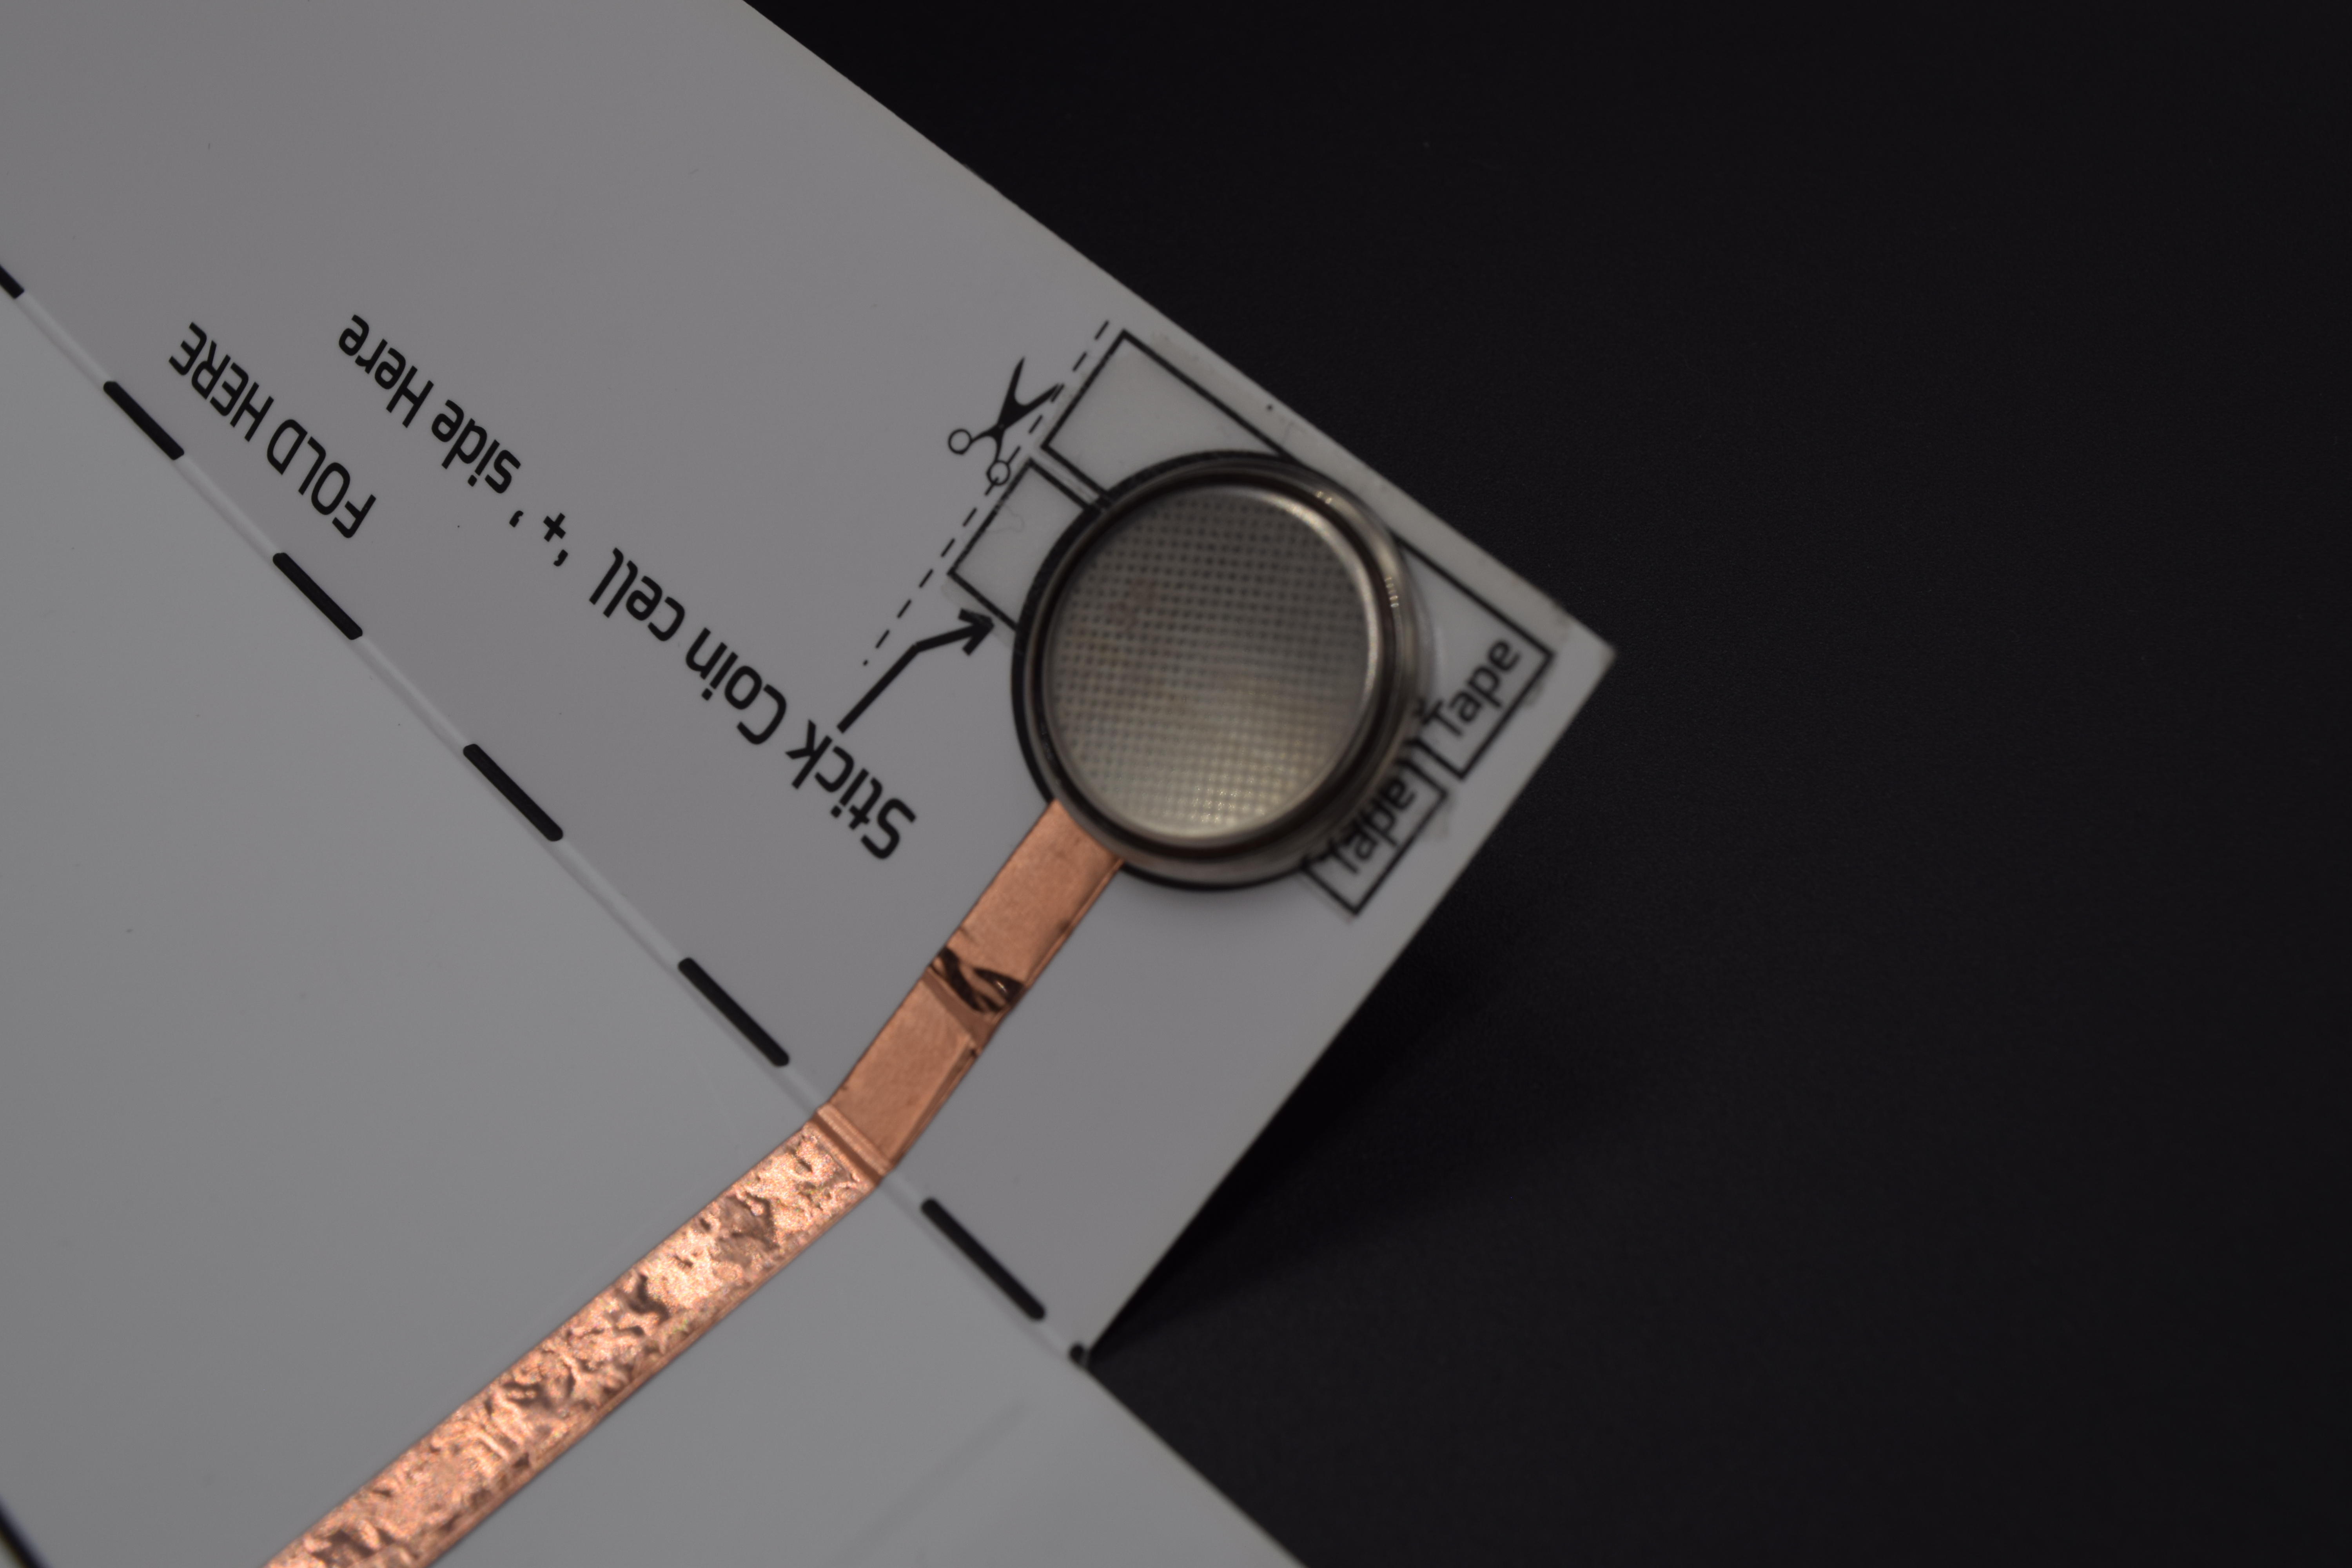
- Now take out your battery and stick it to the marked area for coin cell in the sheet, make sure that coin cell is not placed inverted. Refer the below image:
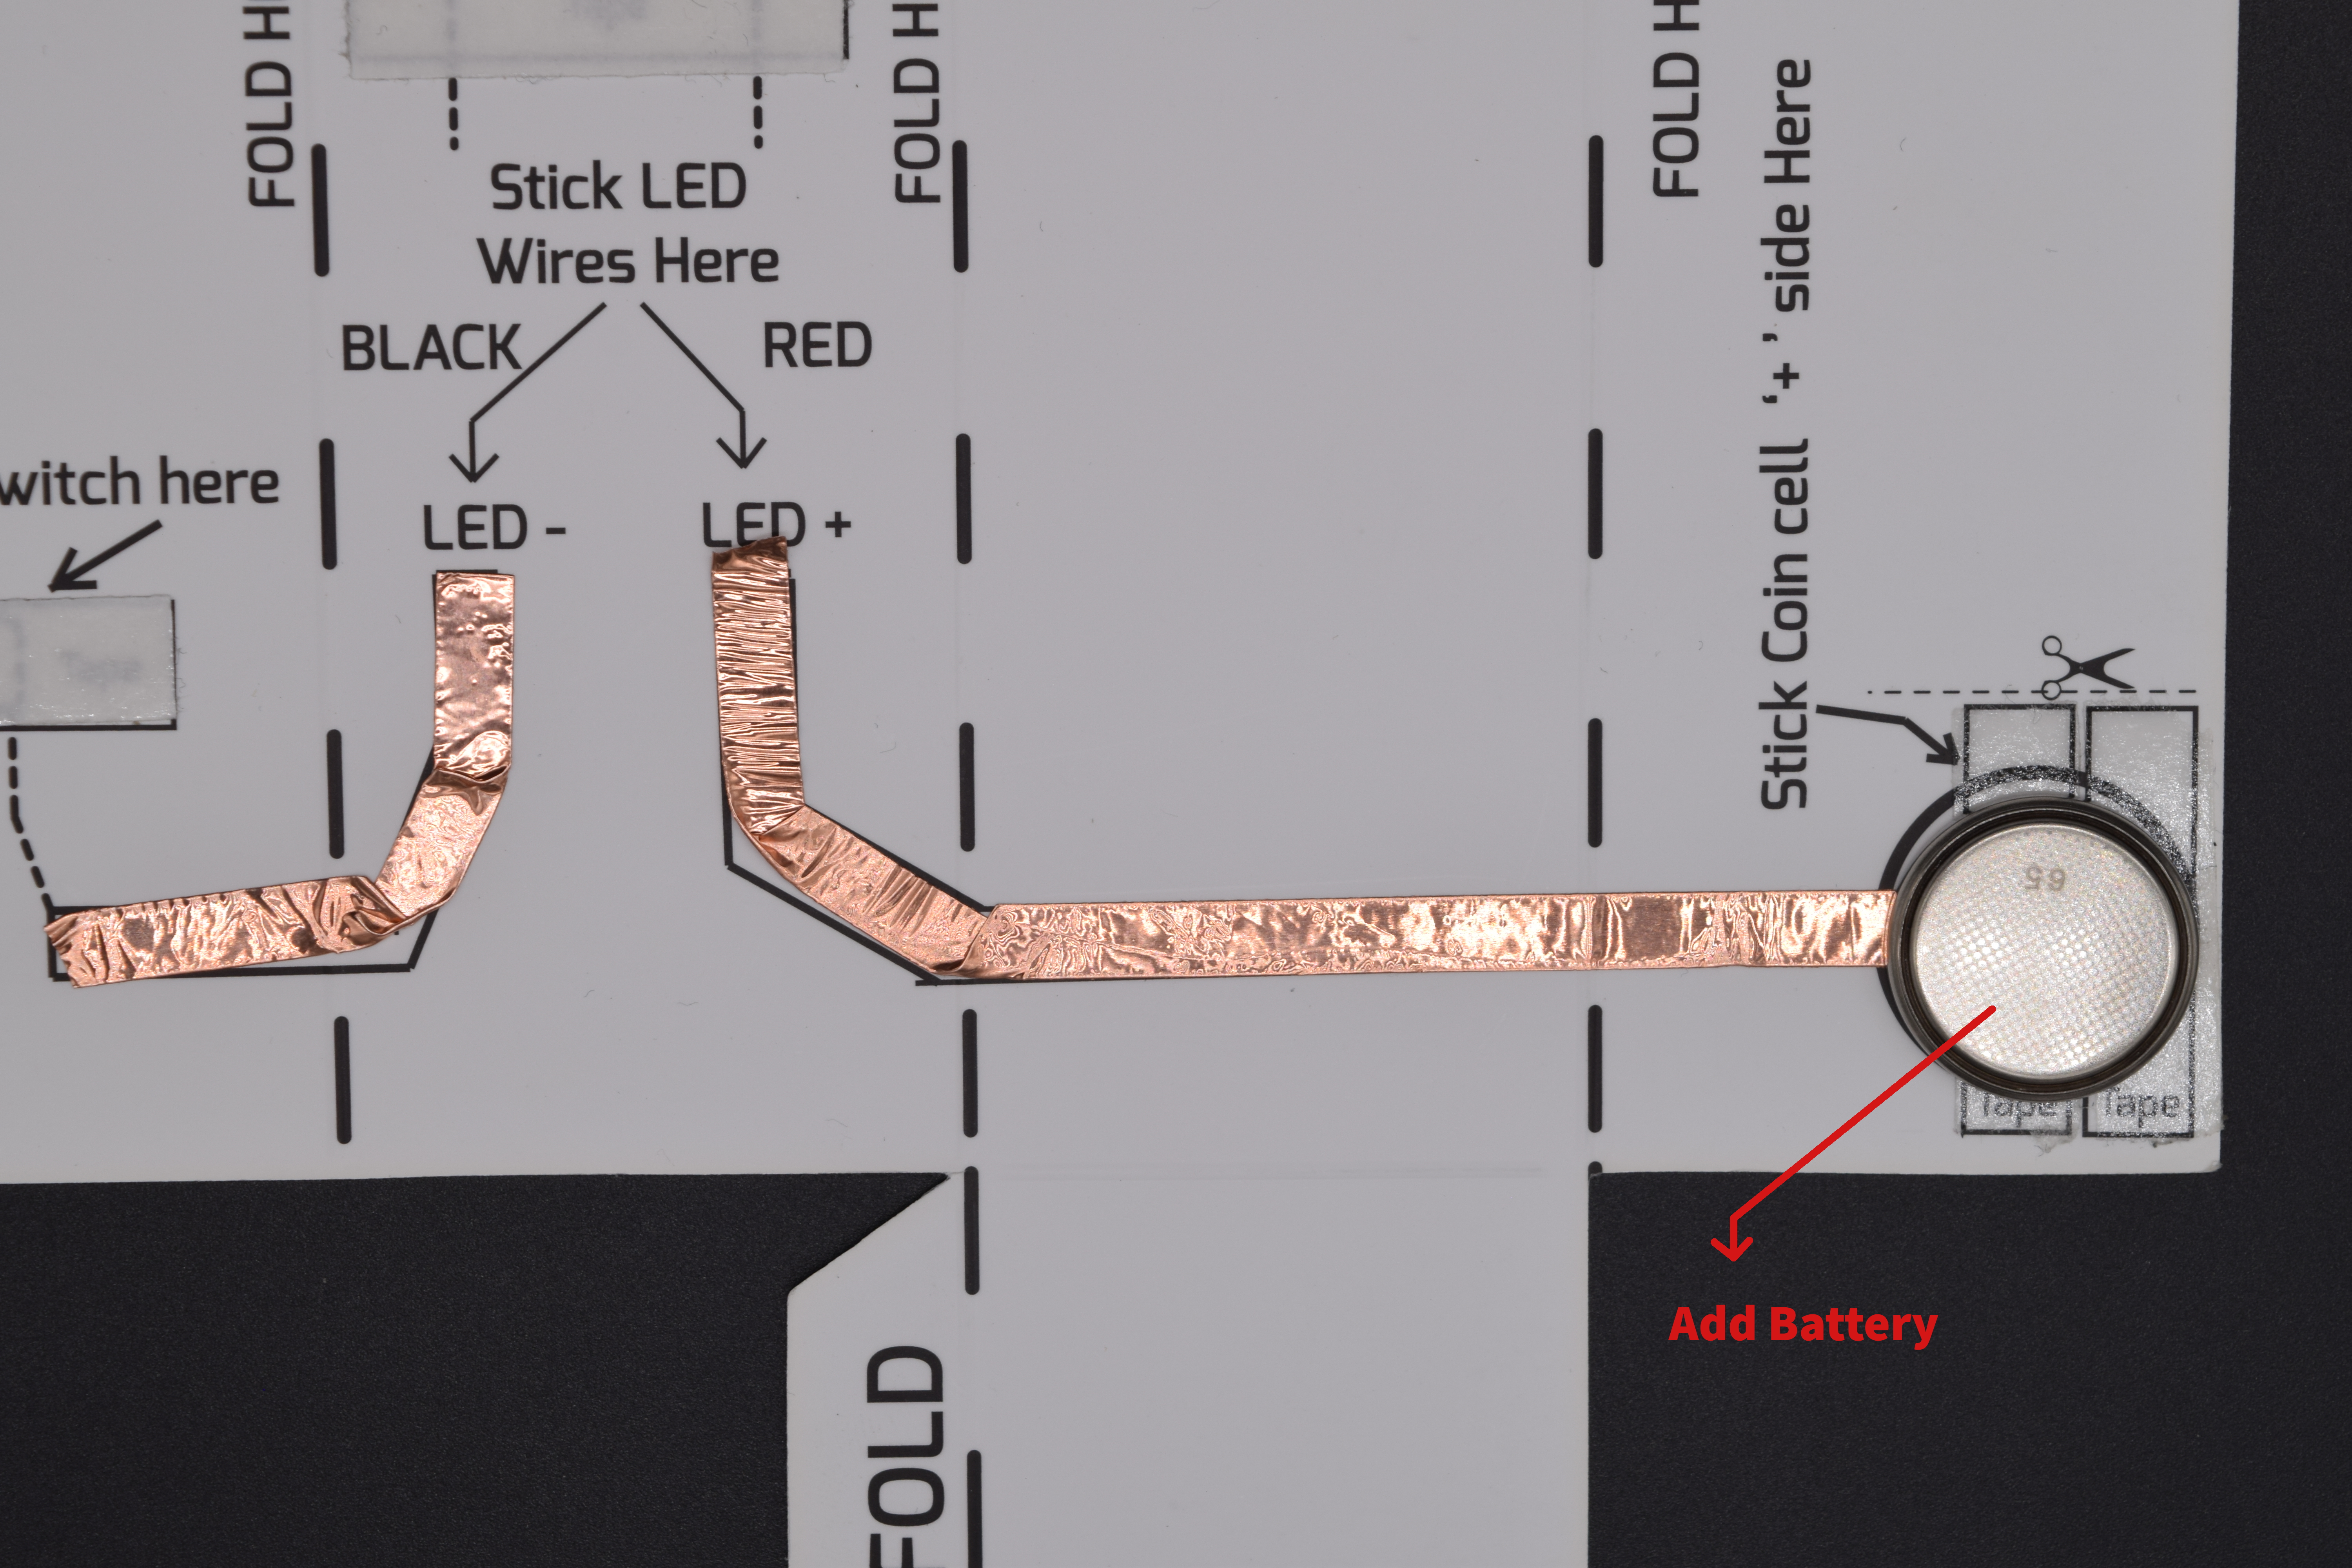
Add the Power Source
Note: Coin cell +ve must be on the sticky tape side.
Step 4:
- Apply copper tape to the other leg of the tilt switch, note that it needs to be extended to the other side of the sheet refer to the image for clarification, this is used to connect/disconnect the battery which acts as a main switch for the torch.
Tilt Switch Connection extended to front Side
- Stick the extended copper tape to the front side of the torch, the track is already there on the sheet, refer the image below for better idea. Peel out the excess copper tape.
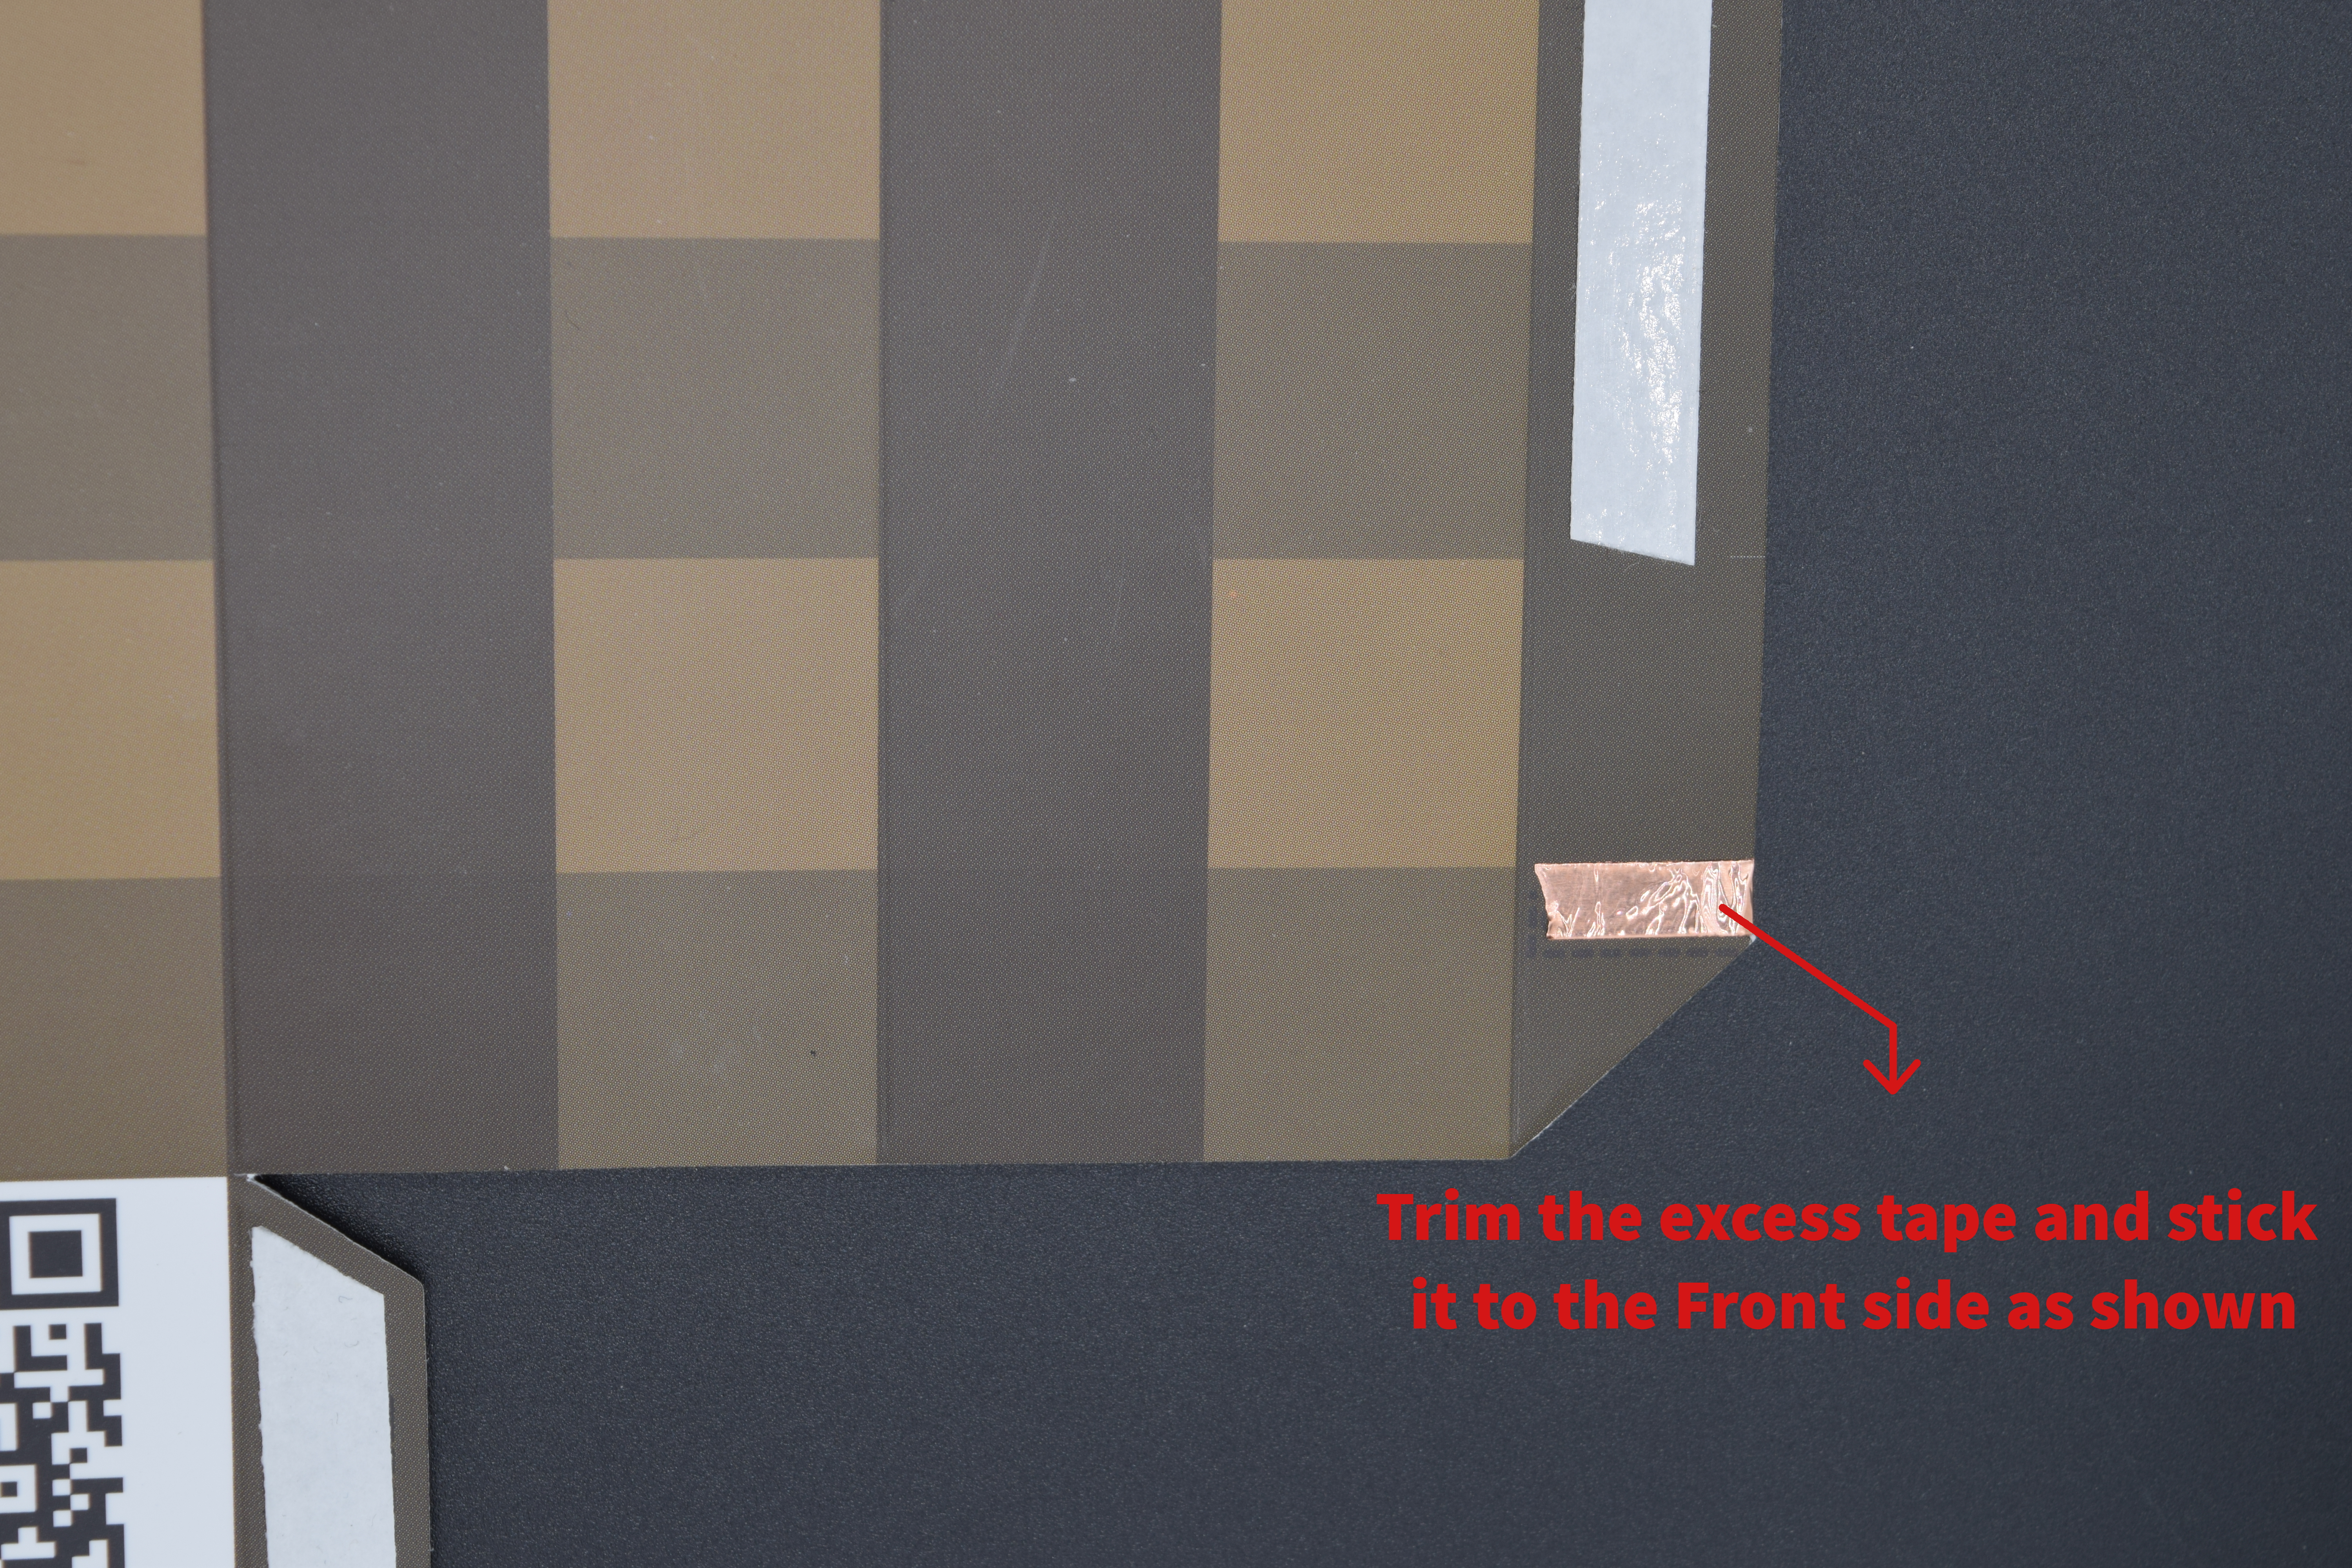
Extend tilt switch connection to the front side of the torch
Step 5:
- Peel the sticker from the tape to stick the LED to the Circuit, check the image:
Peel the sticker from the Tape
- Stick the LED to the tape as shown:
Stick Your LED to the torch
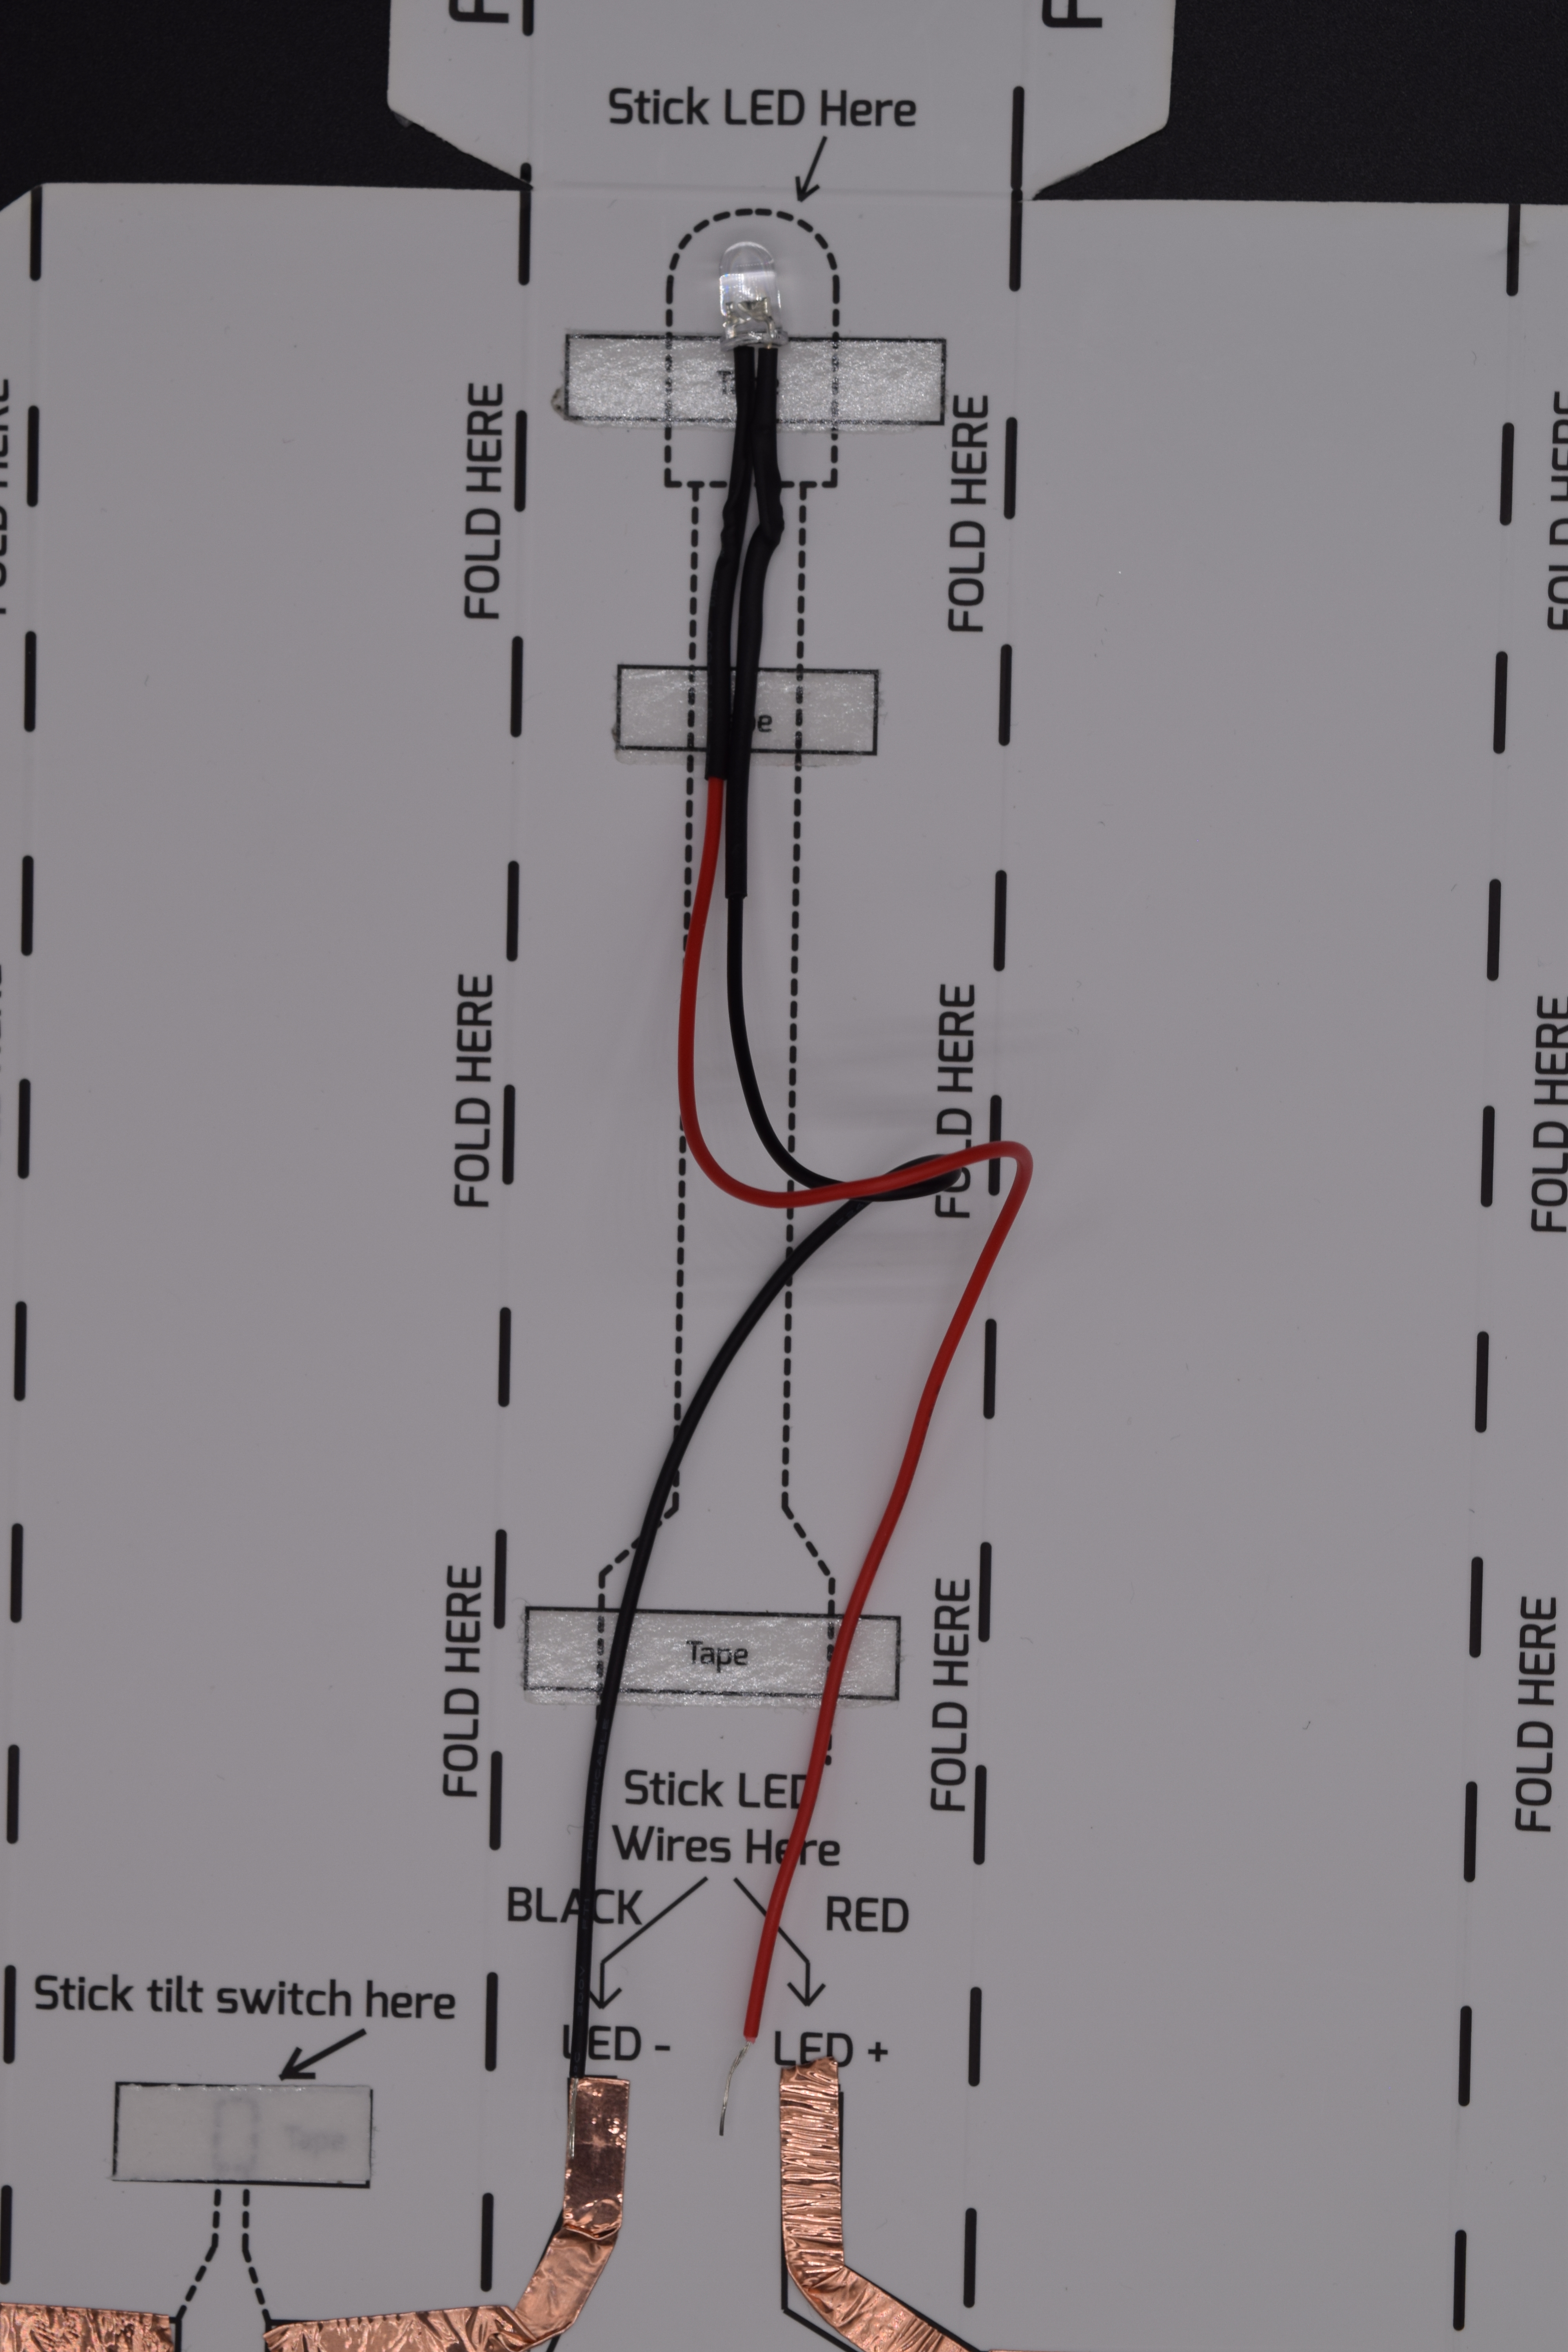
- Make sure that LED Wires will come on the top of the LED+ and LED- copper track. Check this image:
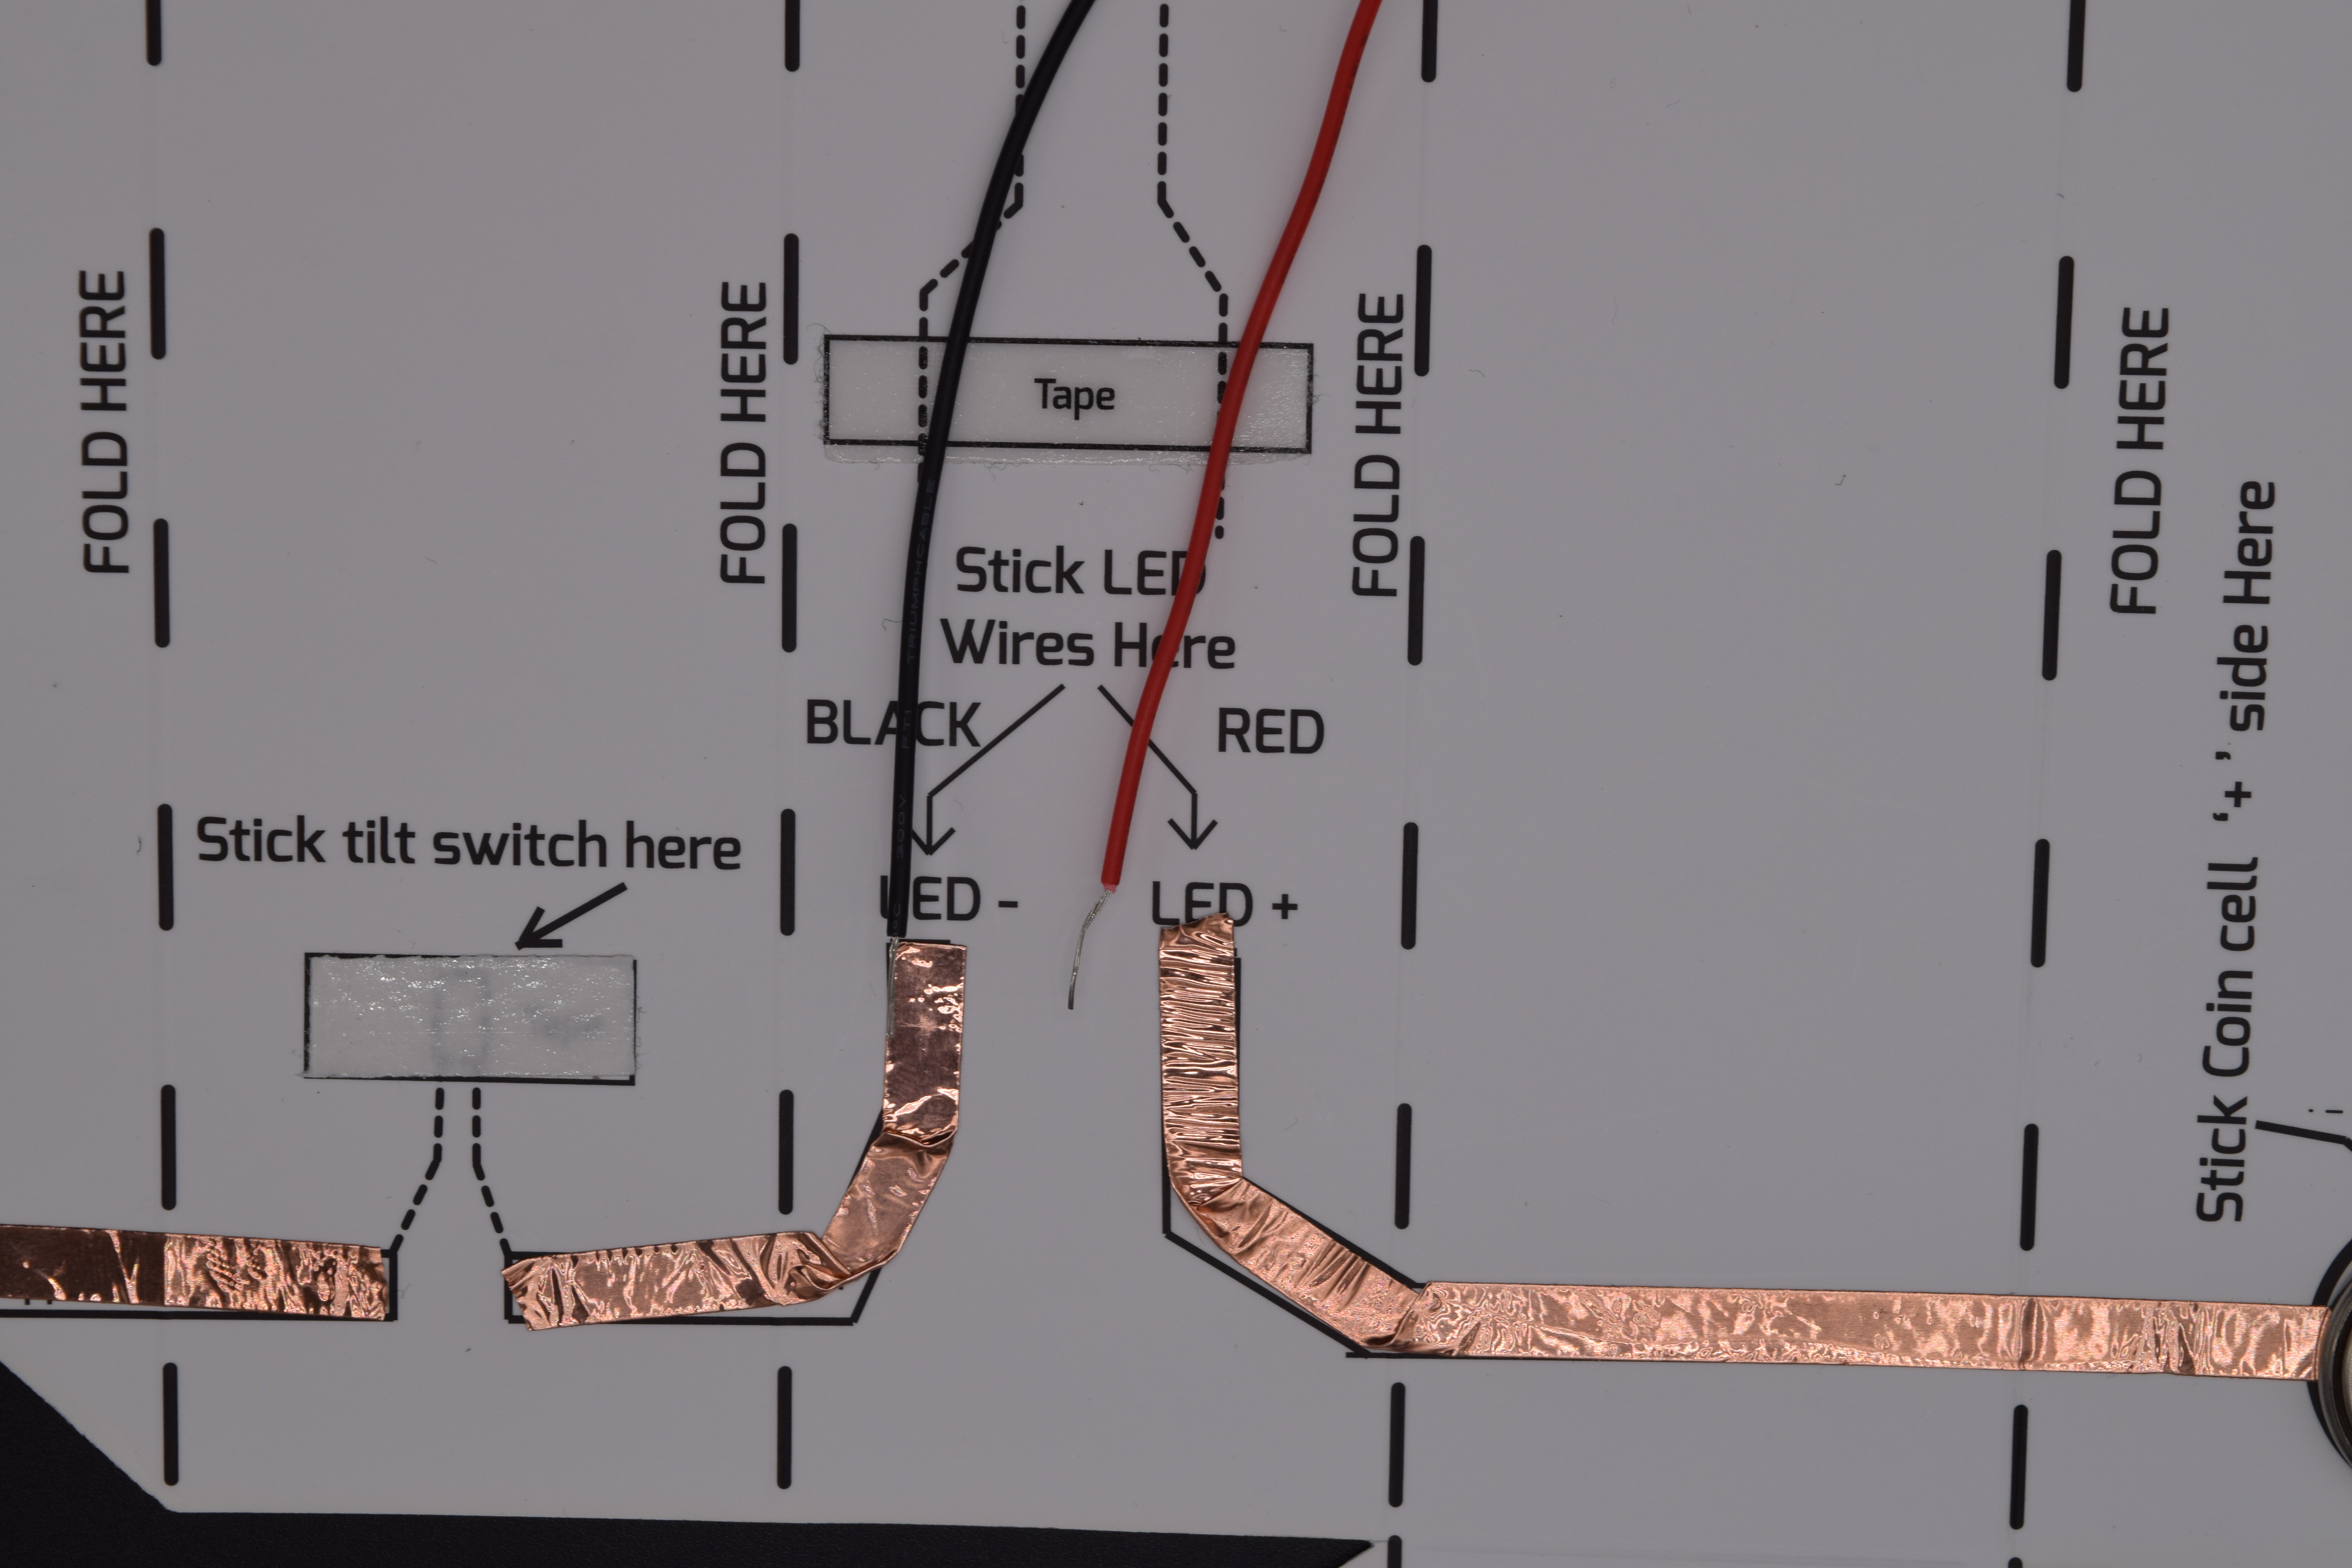
LED Wires Placement
Note: LED Red Cable must go to LED+ and LED black cable must go to LED –
Step 6:
- Secure your LED with tape, so that it will stay in one position.
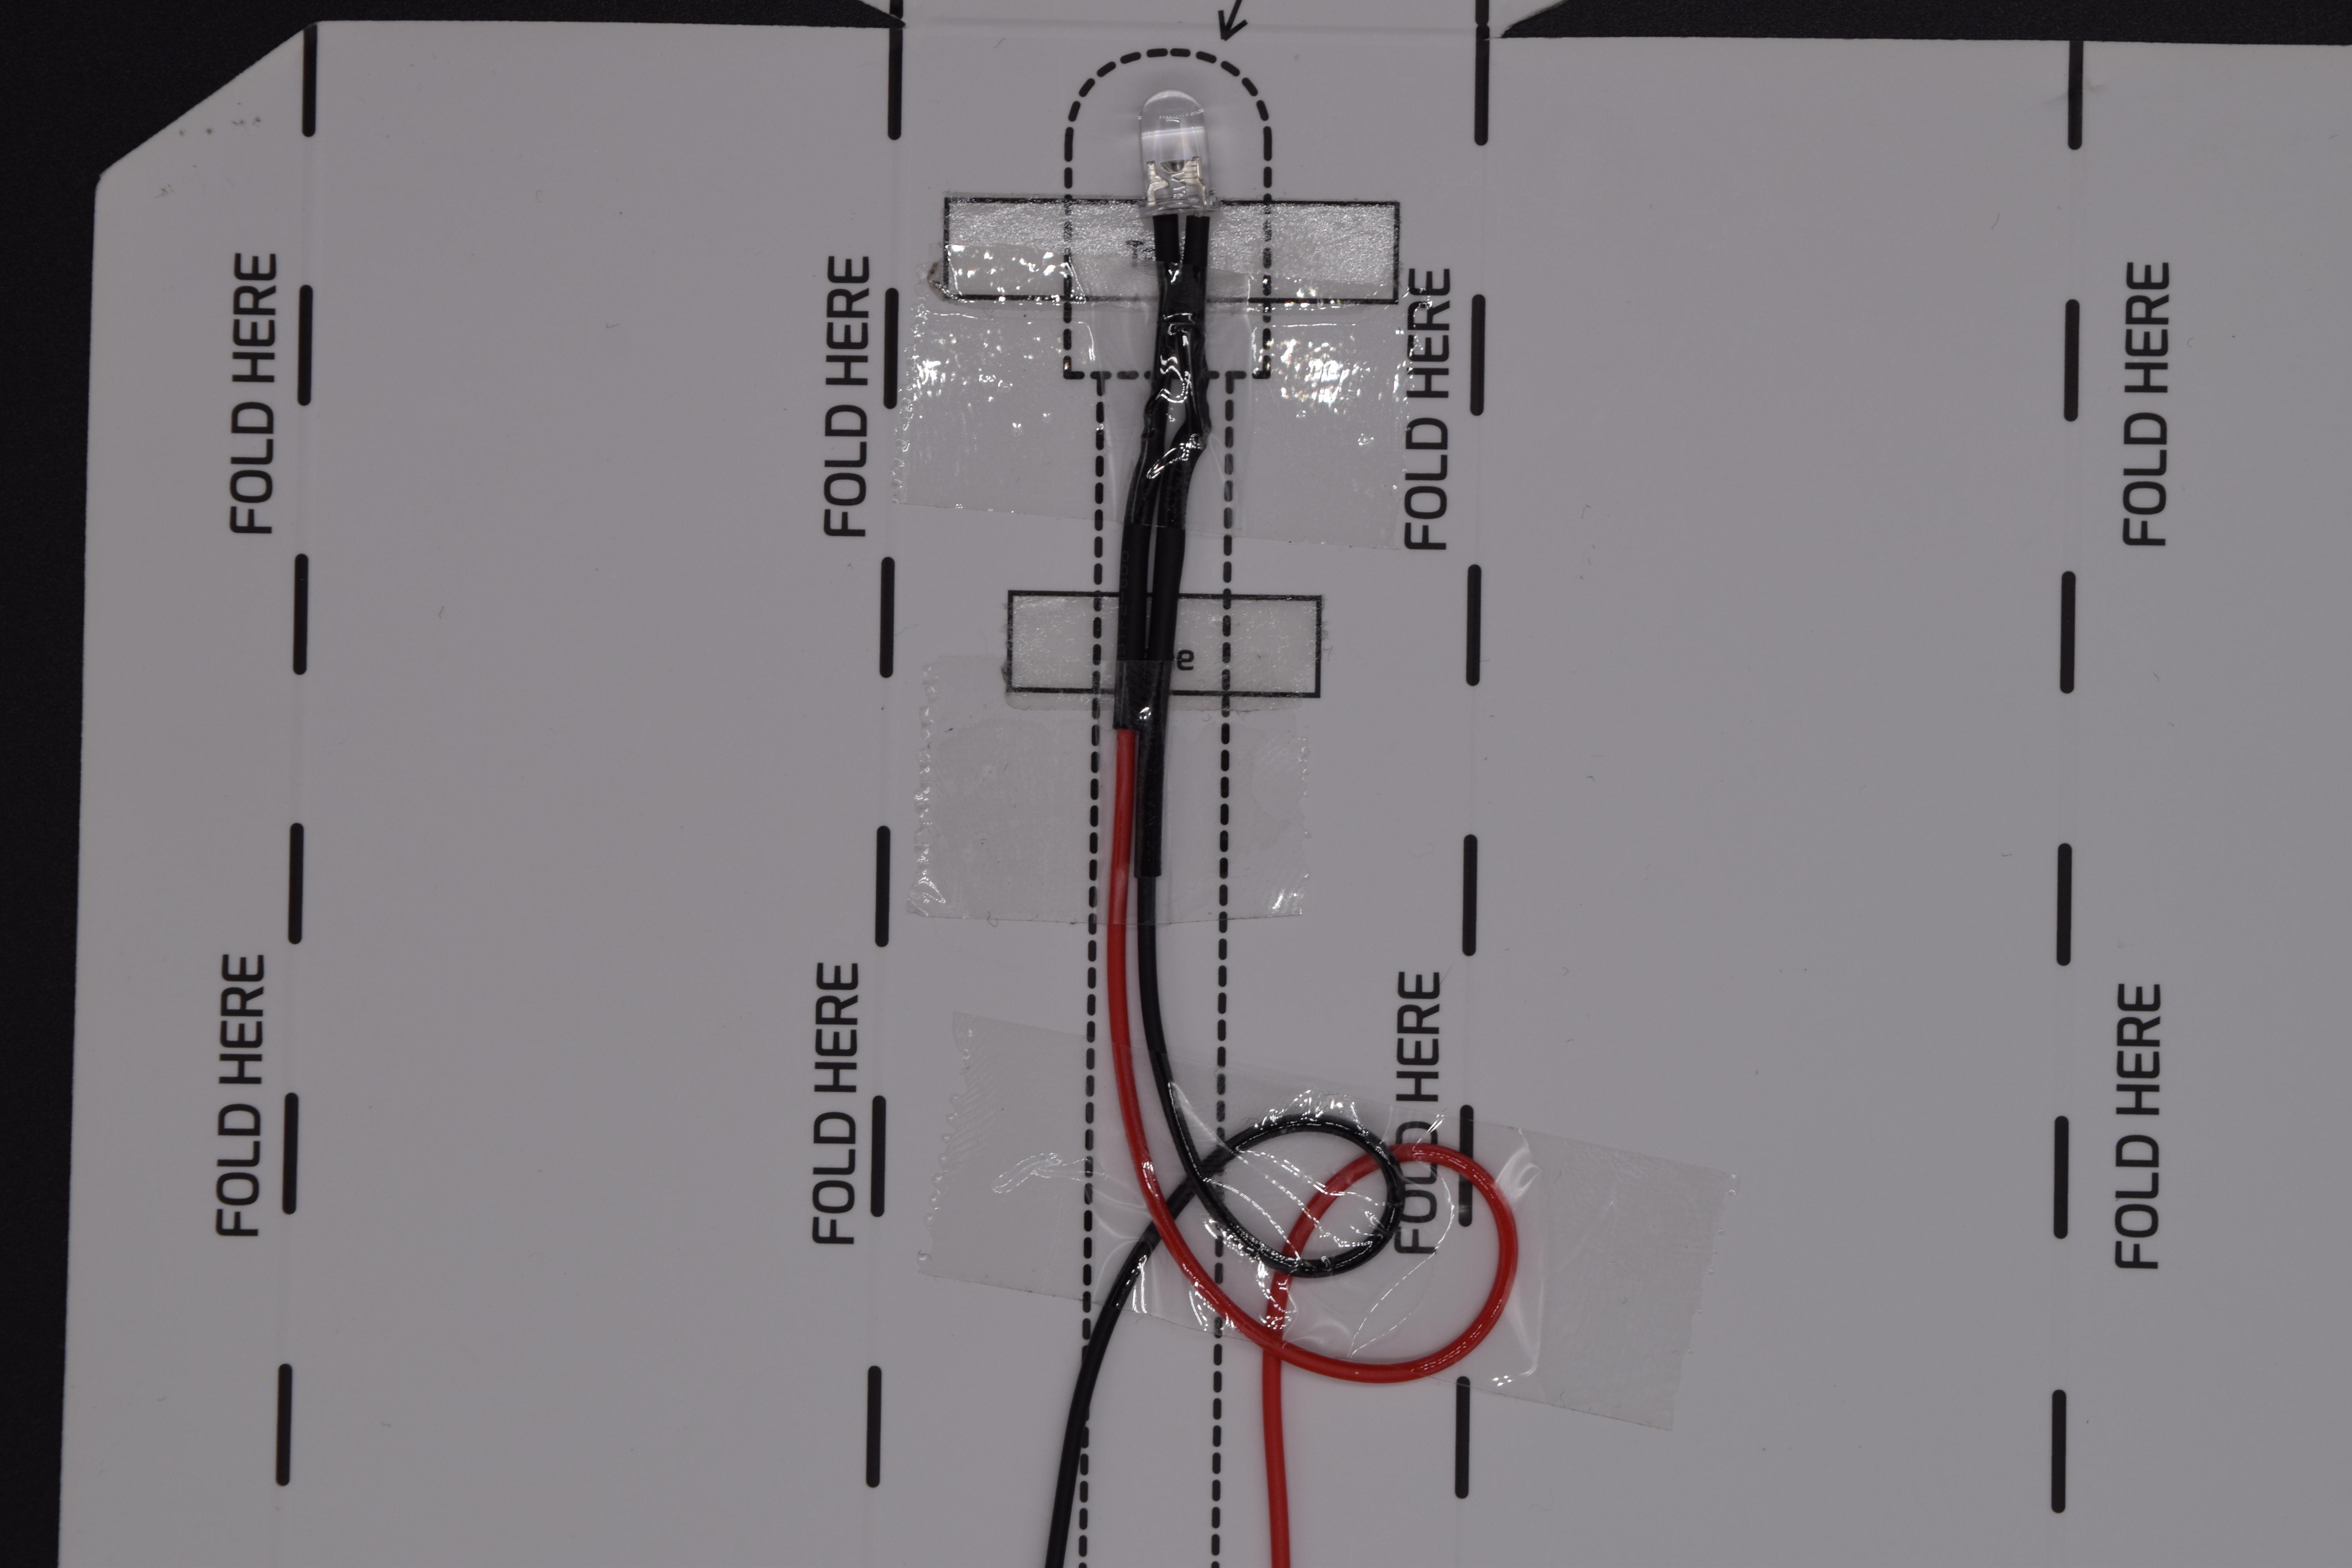
Secure your LED position
Step 7:
- Secure and fix the LED wires to the tracks using Copper tape, use a small amount of tape to stick the wire to the bottom track. Refer the image below for better idea.
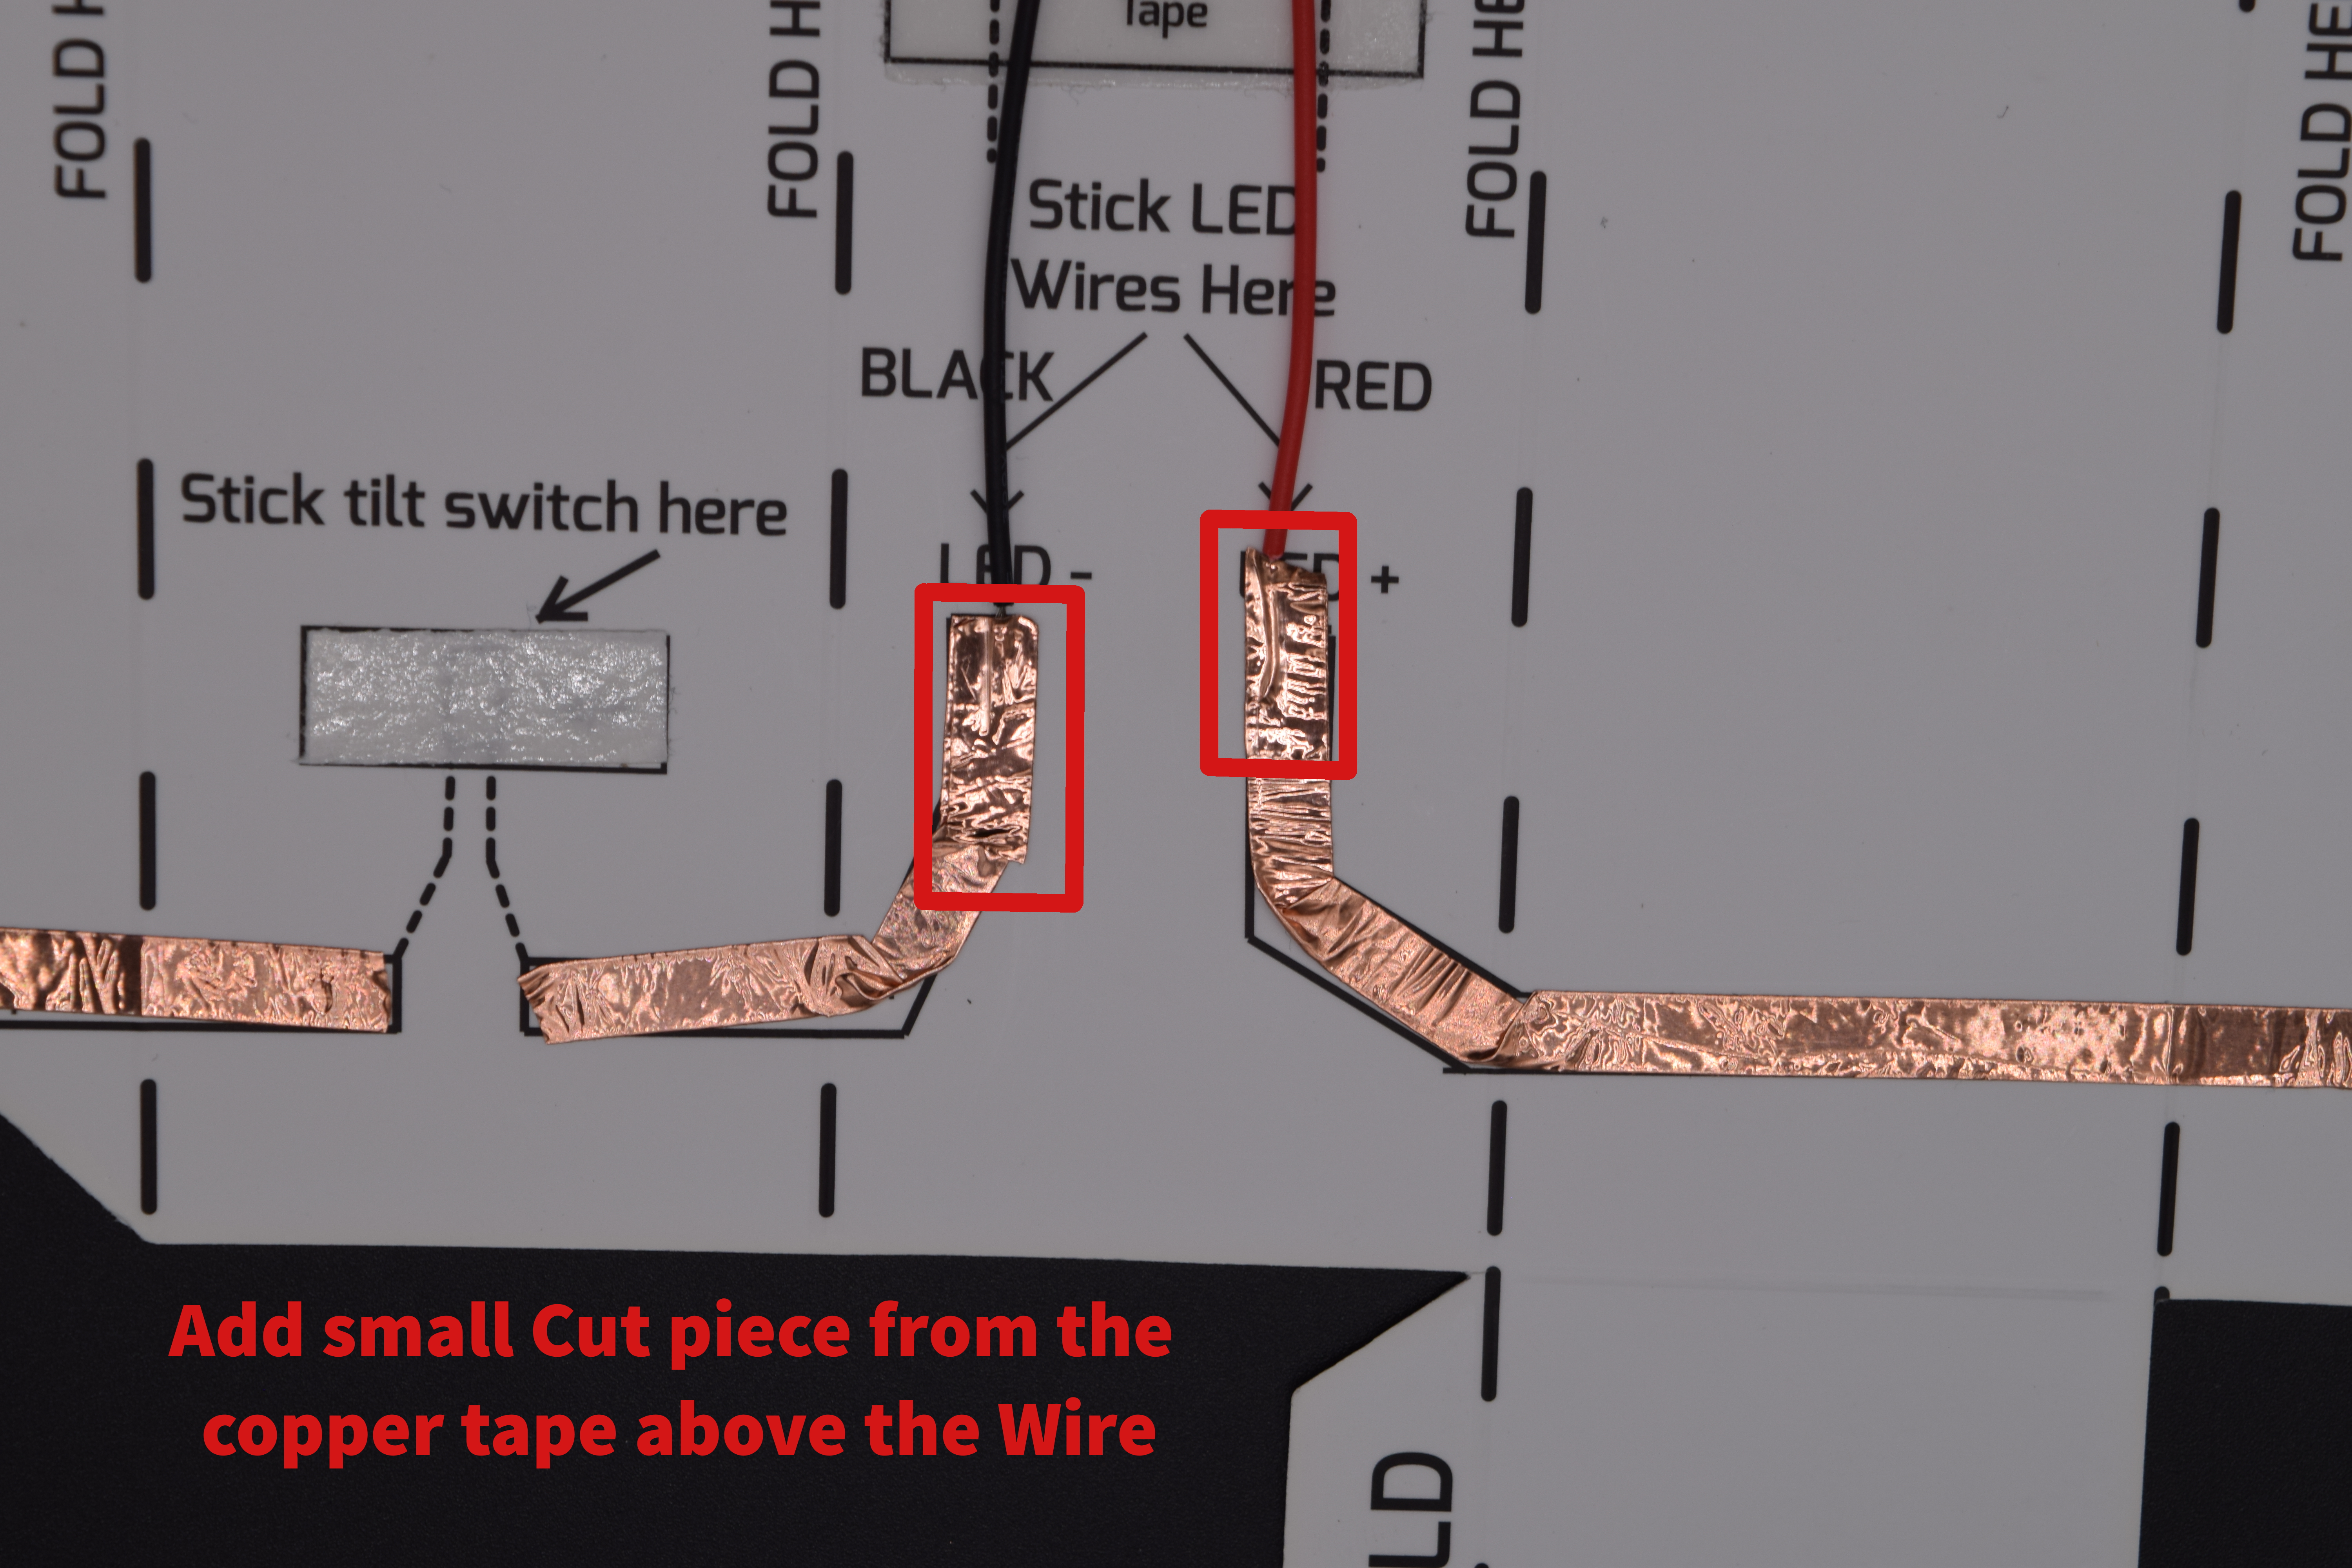
Connect LED Wires with LED+ and LED- Copper Track
Step 8:
- Remove Sticker from the Tilt Switch Tape, check the Image below:
Remove Tilt Switch Sticker from the tape

Fix Tilt Sensor to its position
Note: Tilt Switch any one of the legs can be placed on, one of the copper tracks.
Step 9:
- Now its time to make tilt switch connection, connect the tilt switch legs to the copper track using small copper tape pieces. Refer the Image below:
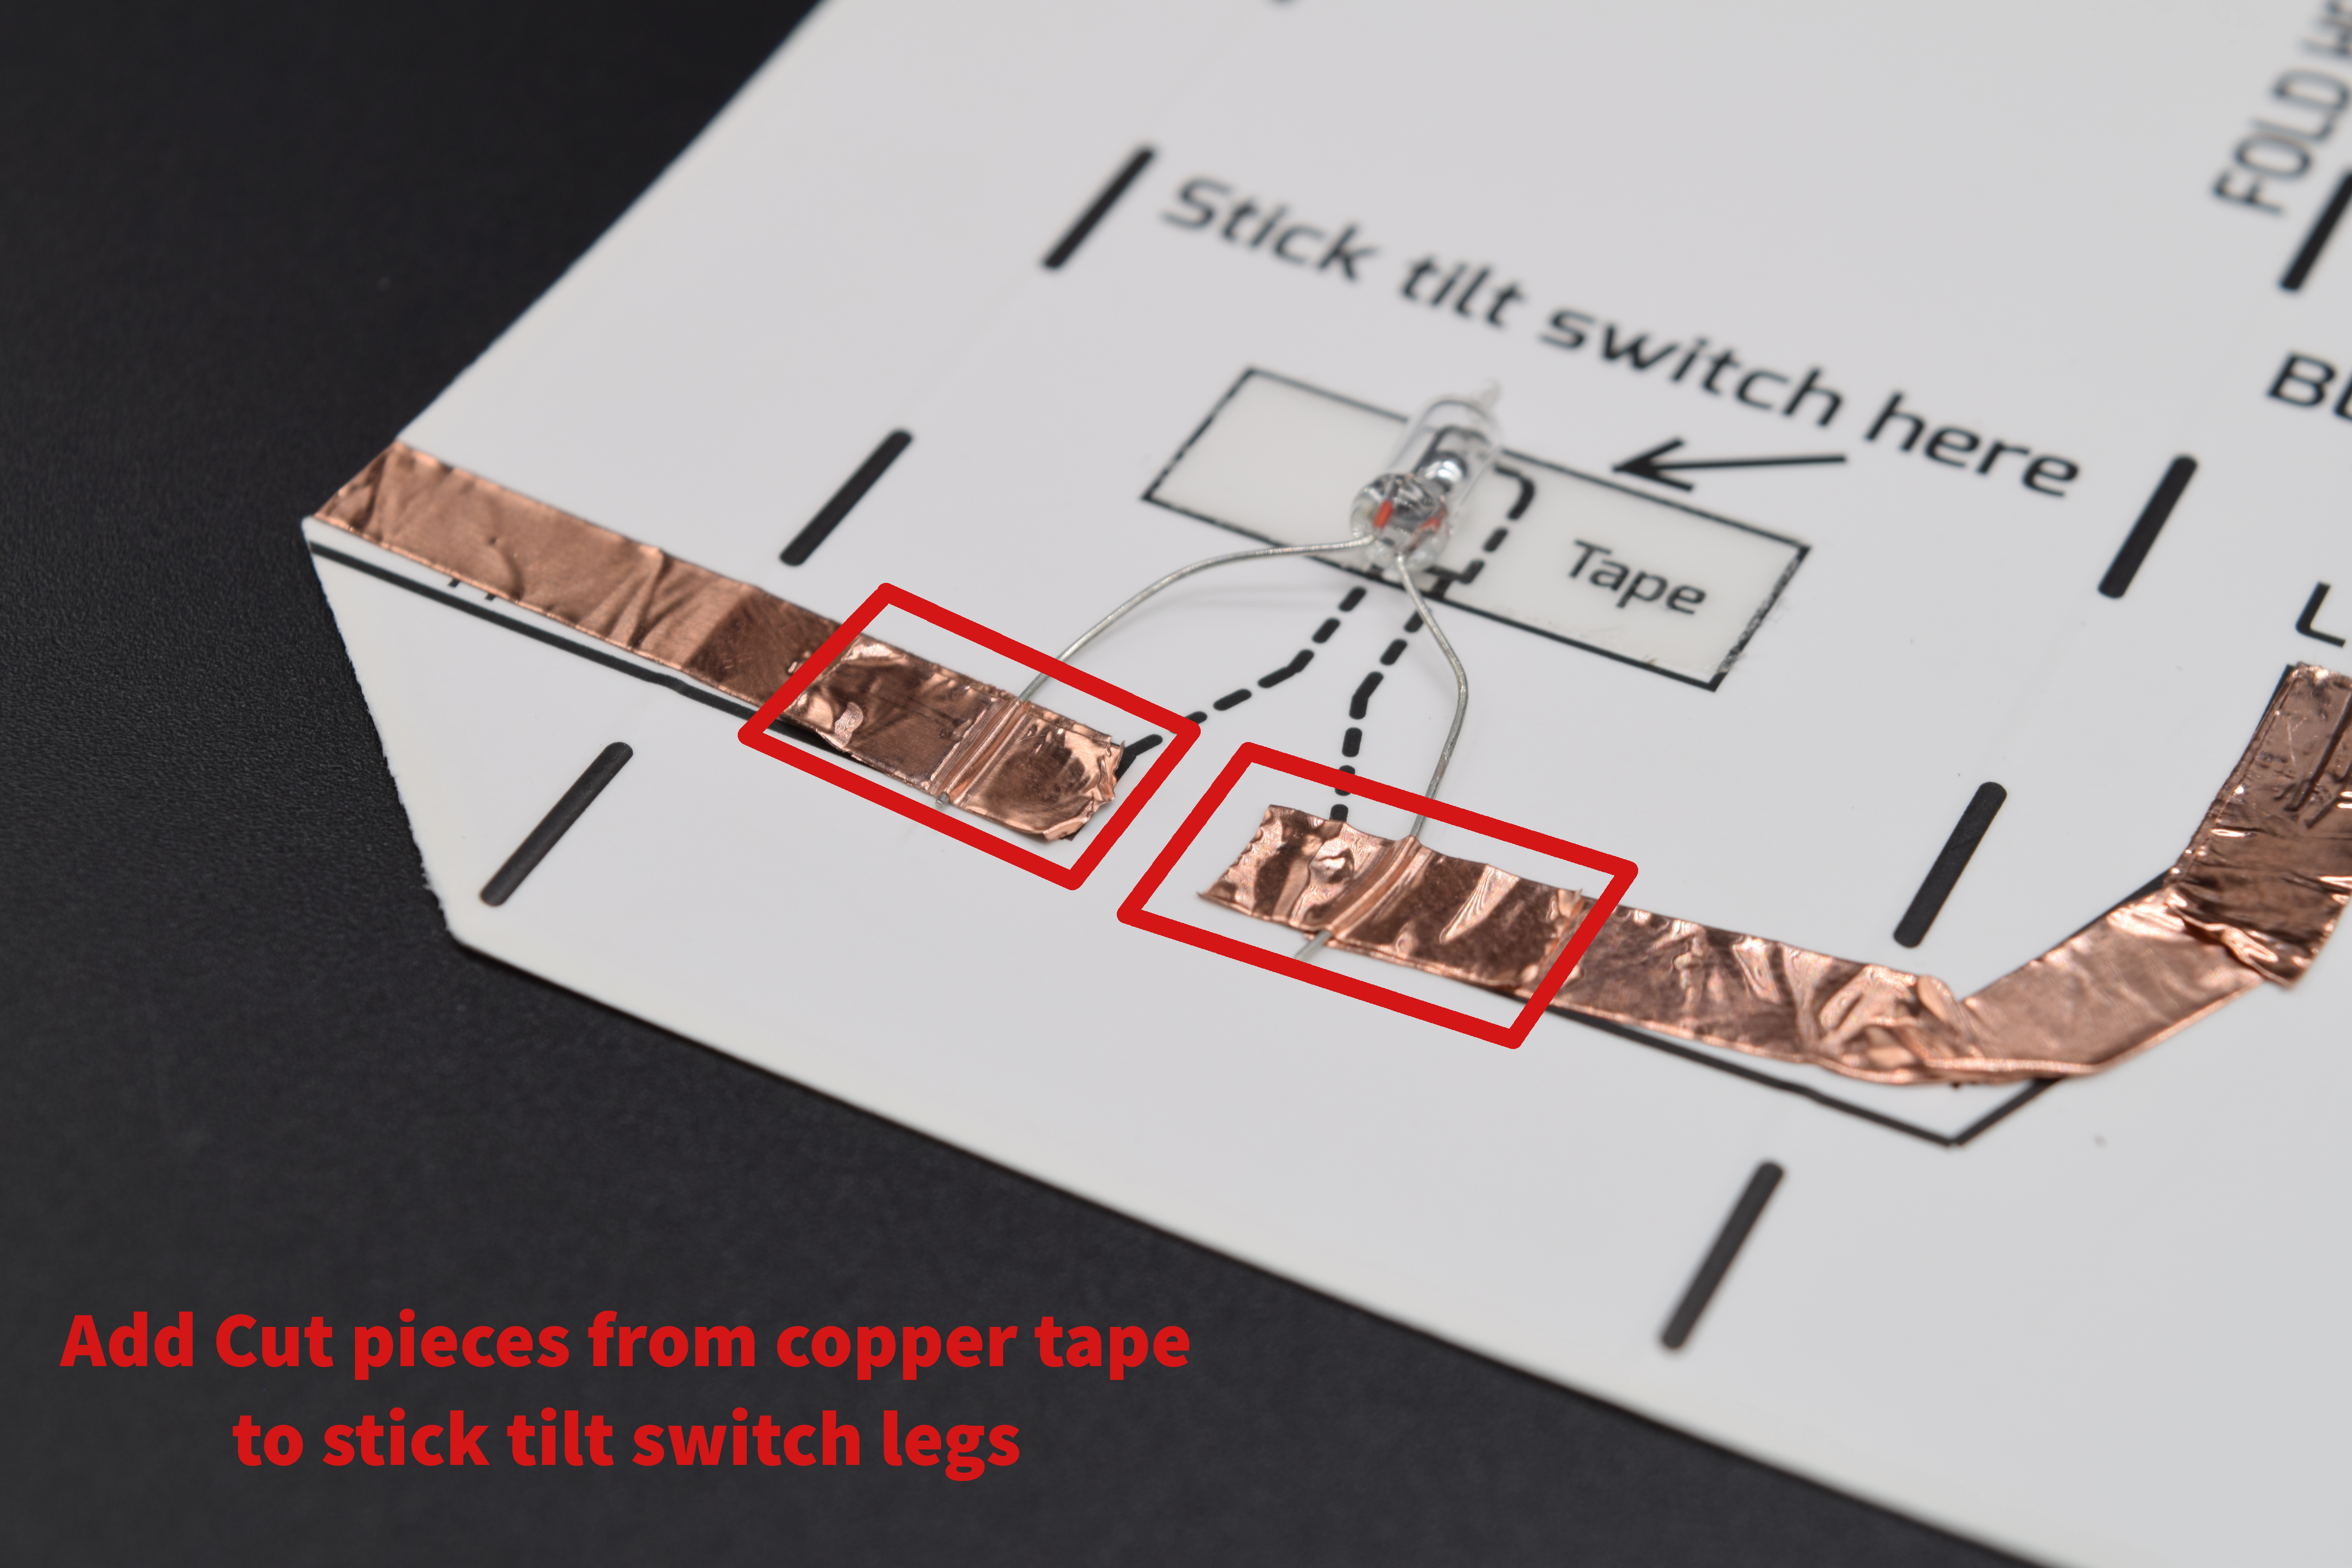
Secure and Connect Tilt Sensor Legs to the copper track
Step 10:
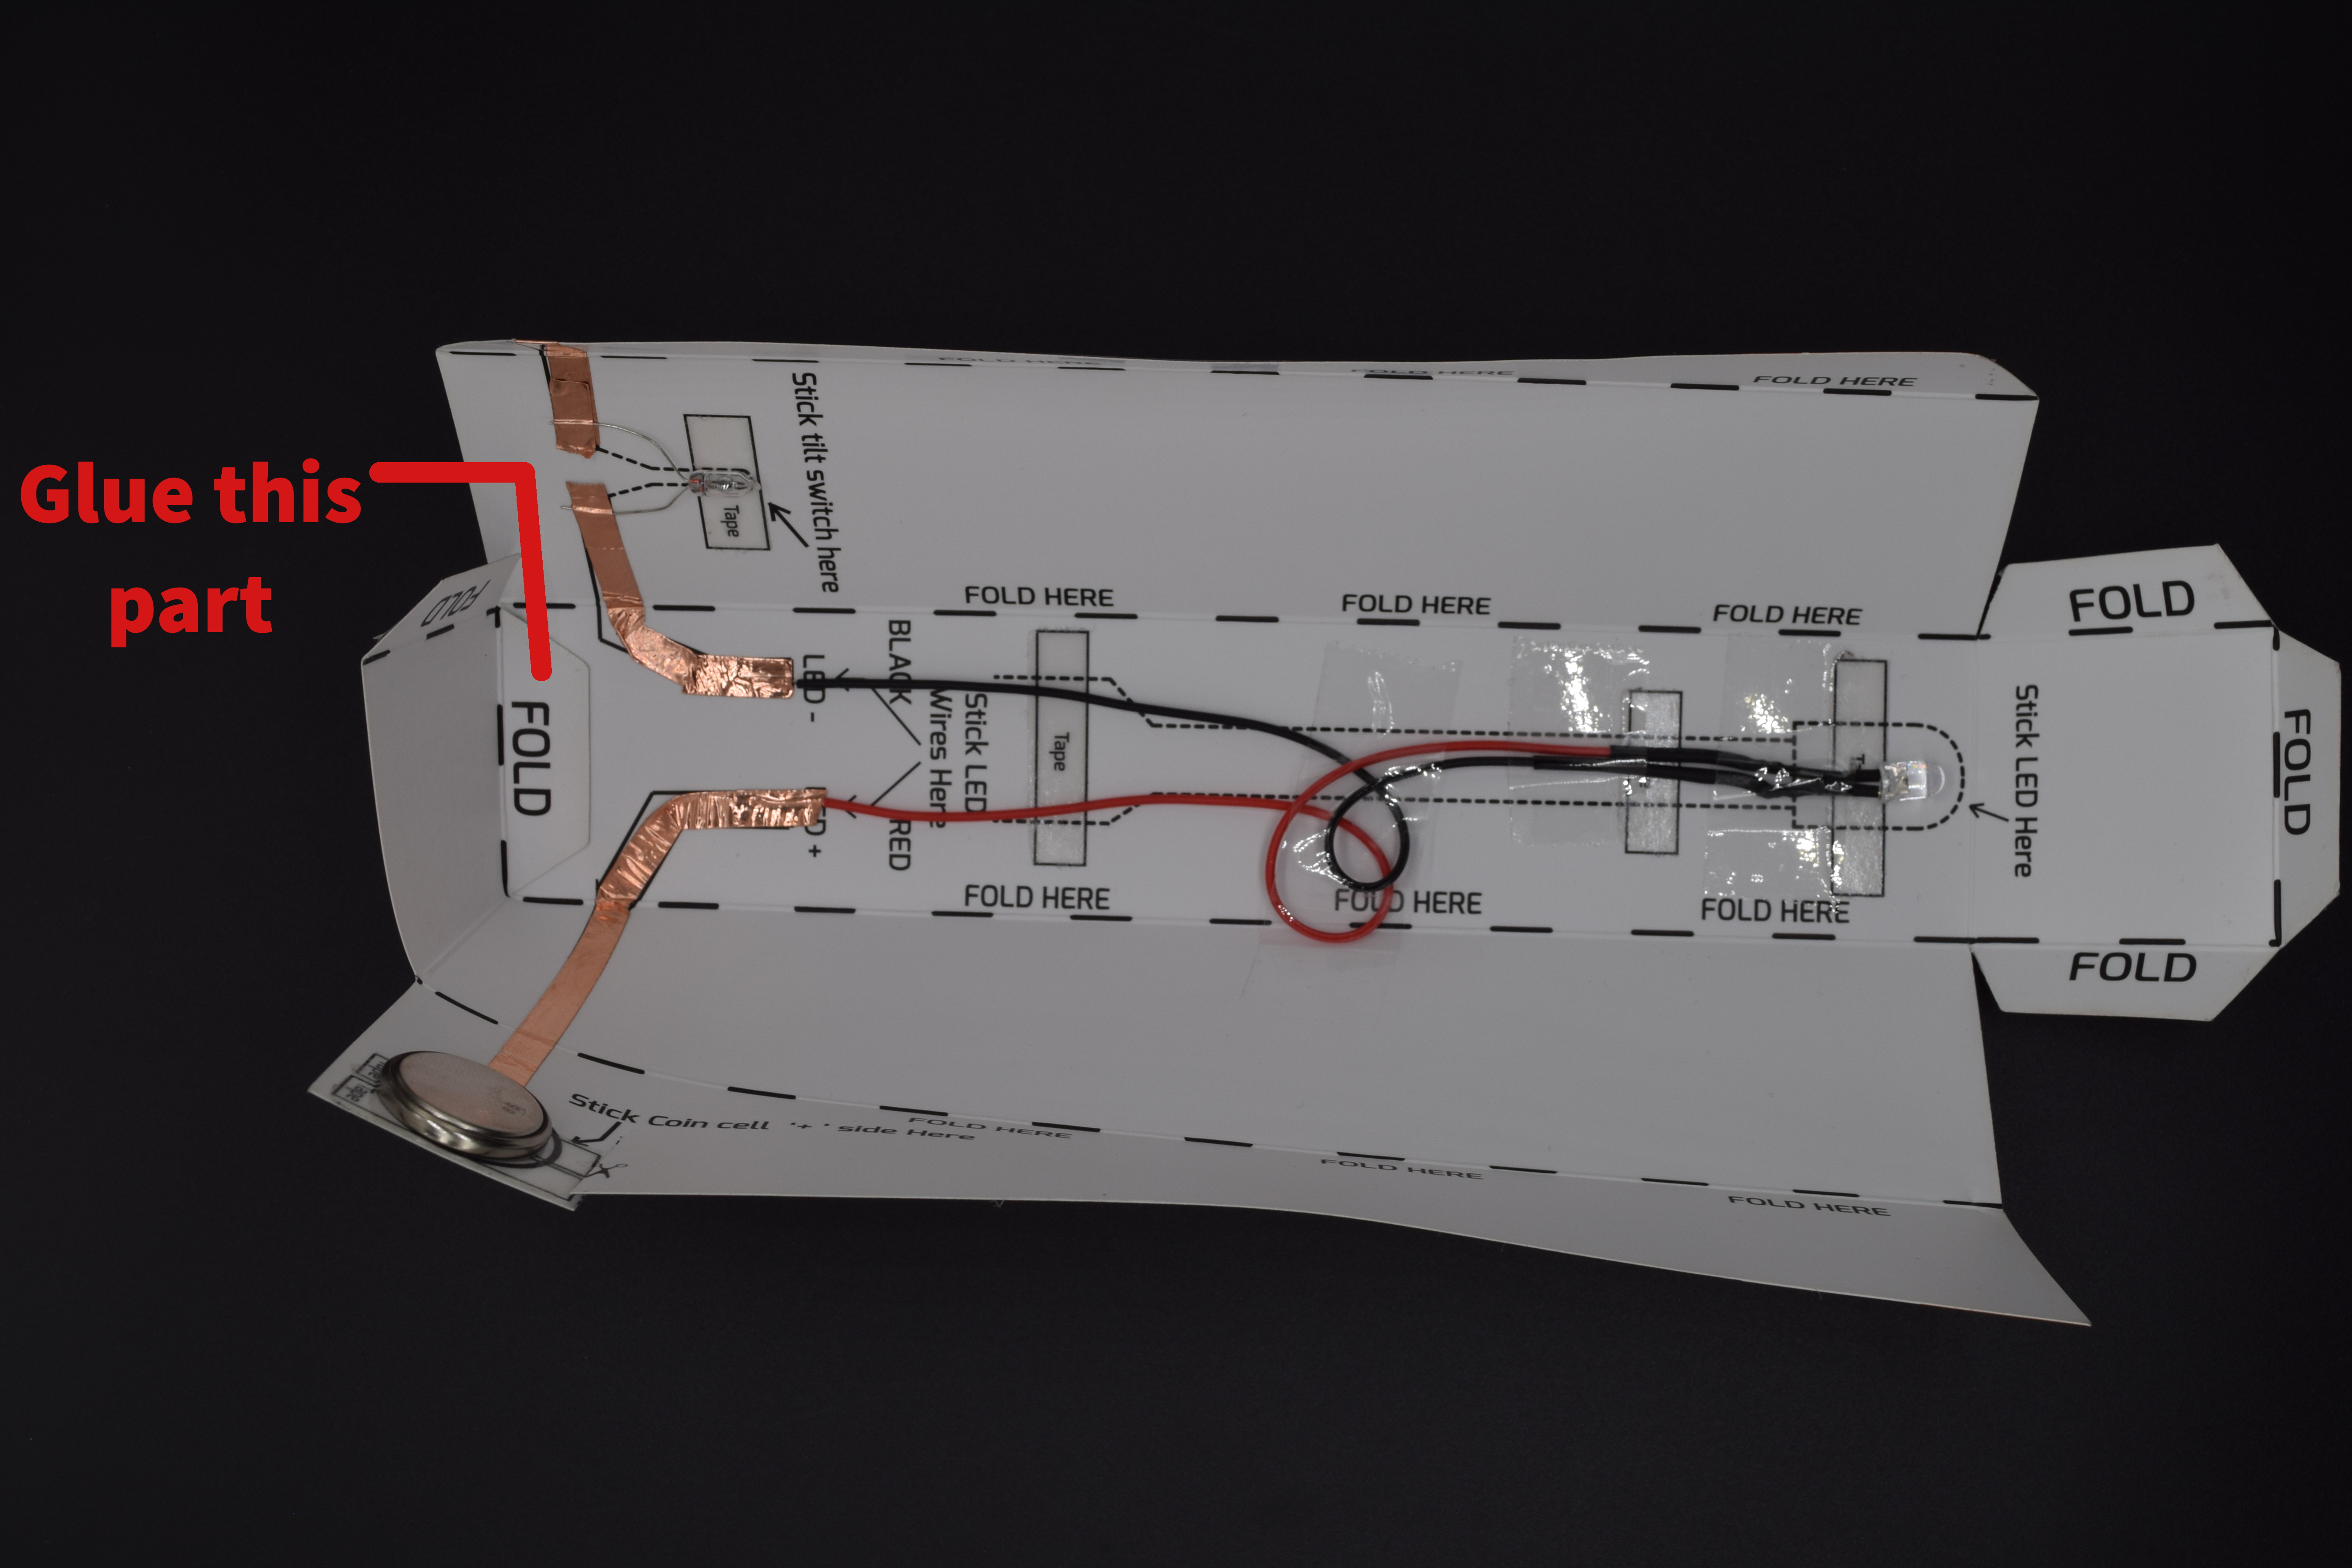
- If you had followed from steps 1 to 9, you will be having a working LED circuit ready before you, the complete circuit setup will looks as follows:
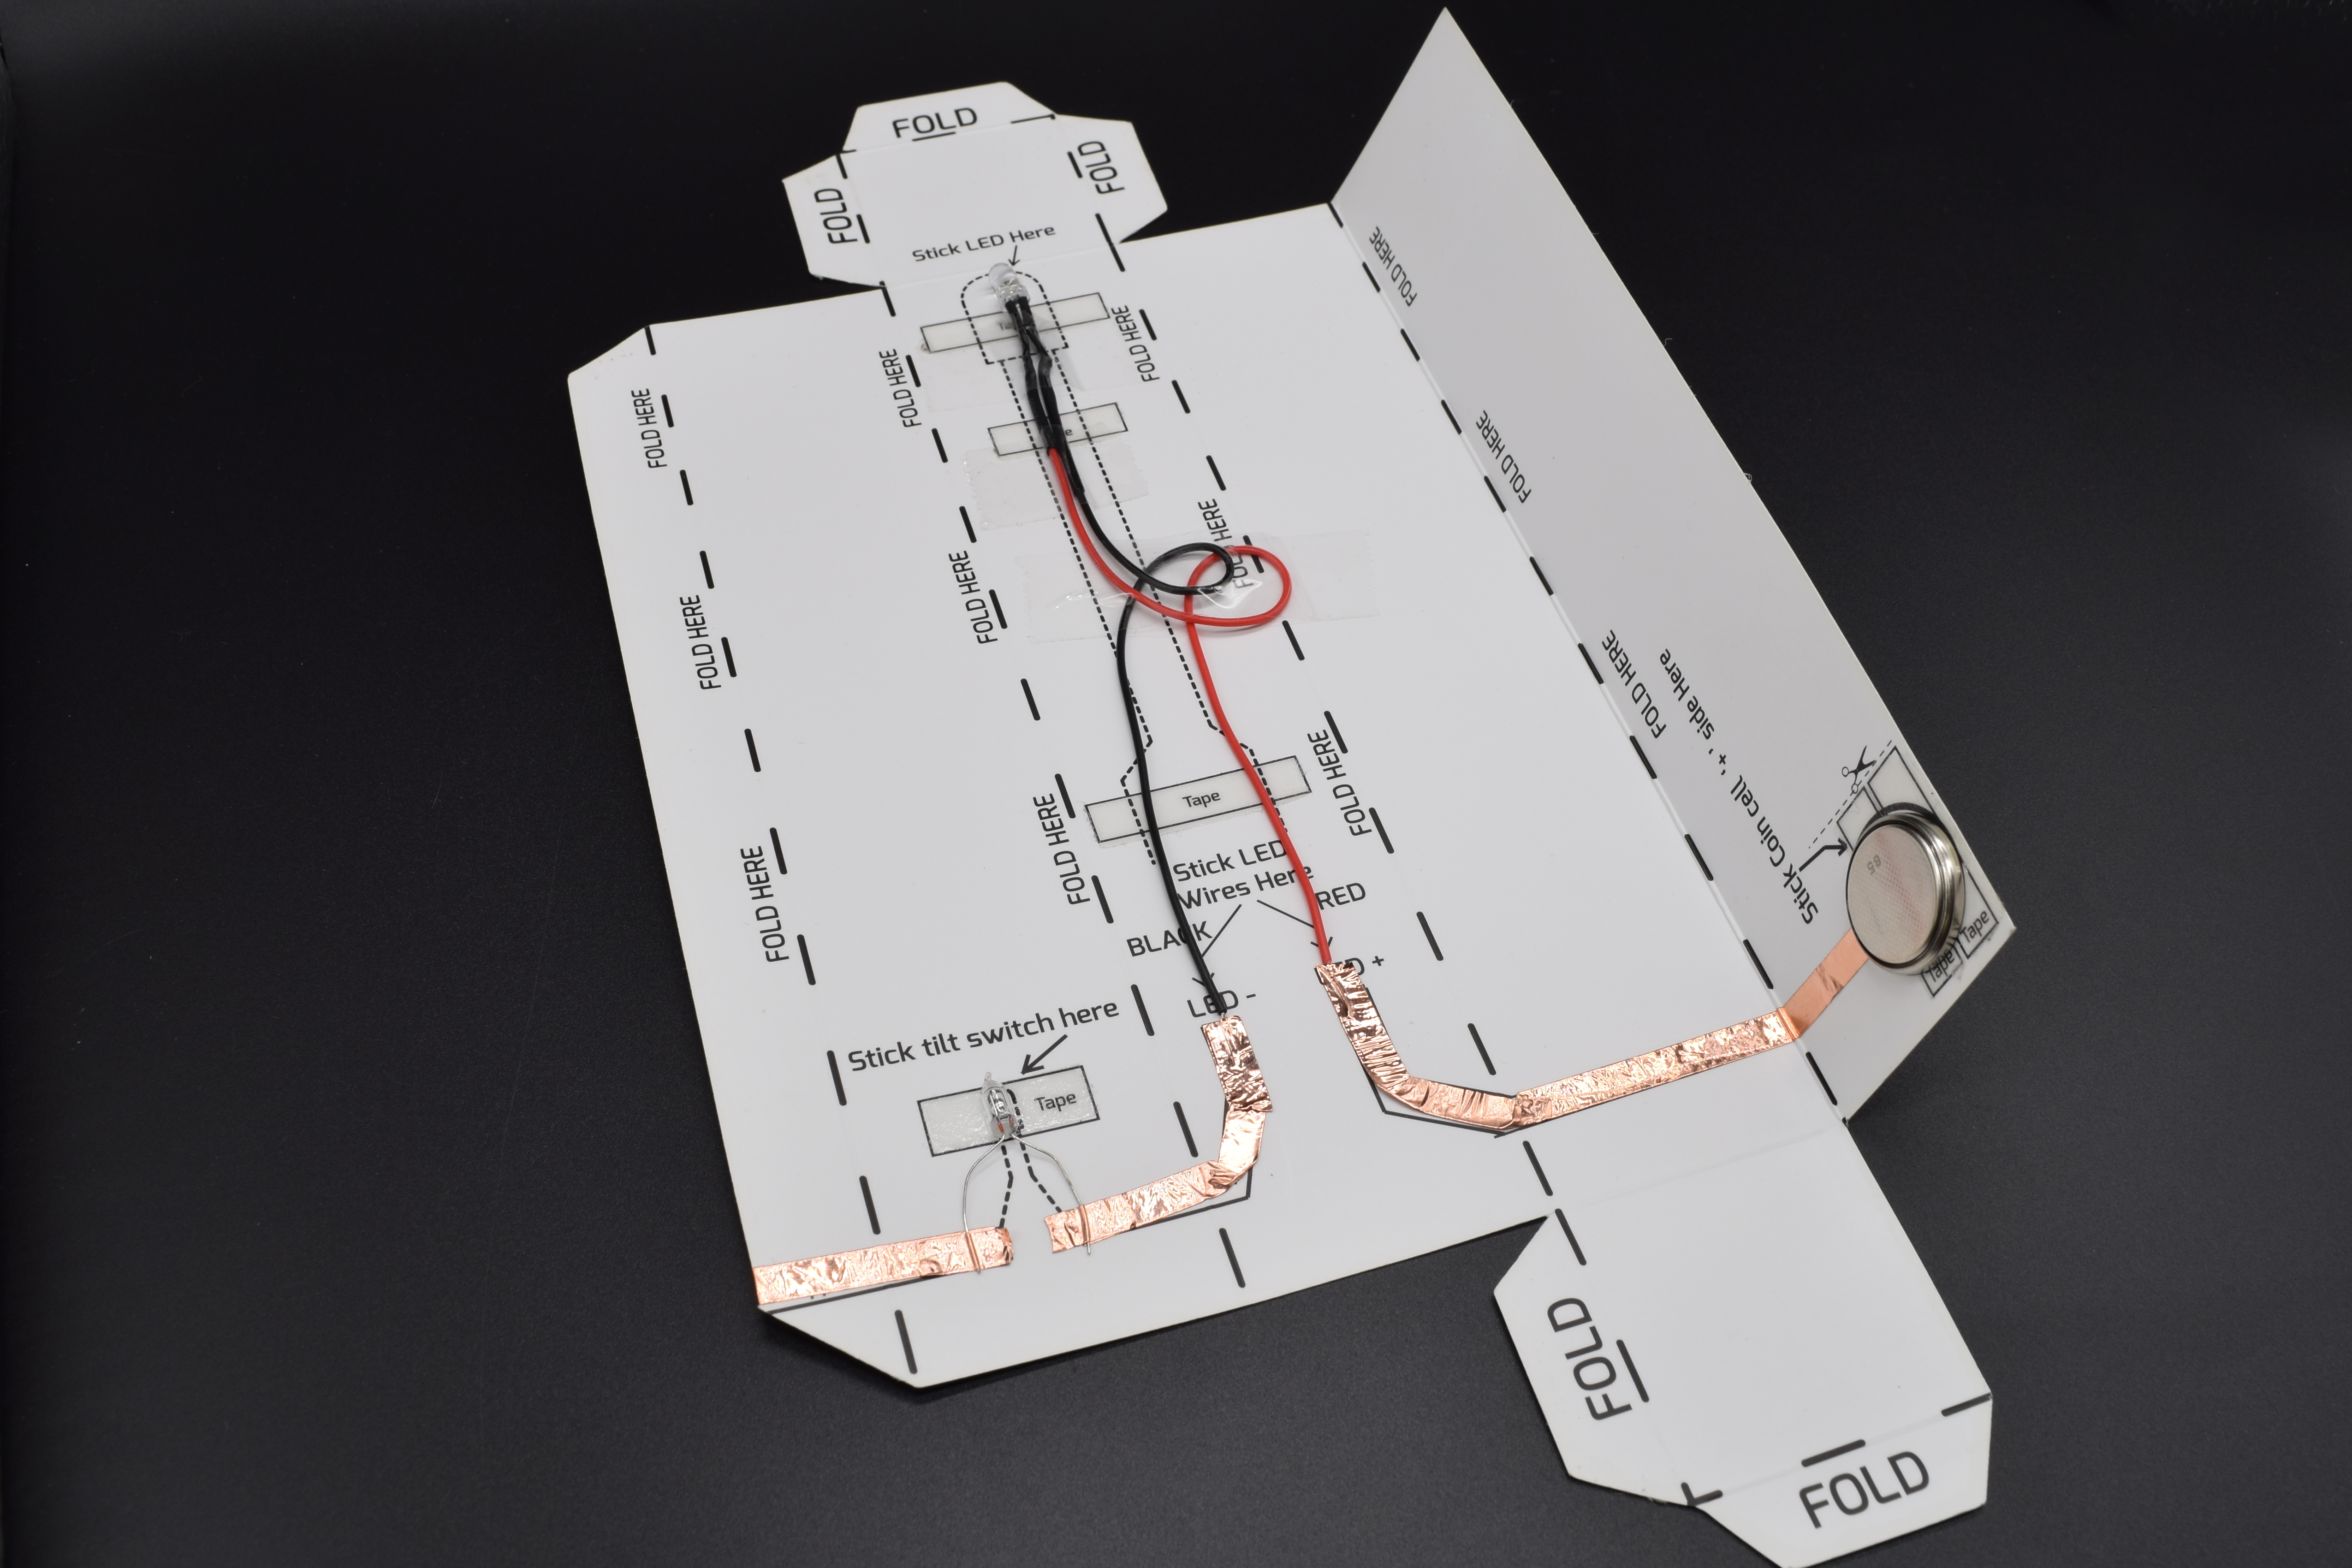
Complete Circuit
Step 11:
- Its time to test the circuit and to make sure that everything works fine.
- Touch the Coin cell to the small Tape section in the front side of the sheet, refer the below image for better idea:
Test your Circuit by shorting the coin cell to the copper track
- The LED must lit up when you touch the coin cell with copper track. Make sure the torch held up right, the same way as shown tin the image while testing.
- With battery connected, test the setup by holding the torch upside down as well, this way your LED will not glow.
- If these two conditions are met, then your circuit is all fine, if not check your circuit again.
Step 12:
- Check the Scissor cut mark present next to coin cell, refer the below image:
Scissor cut mark
- Cut the Paper as shown:
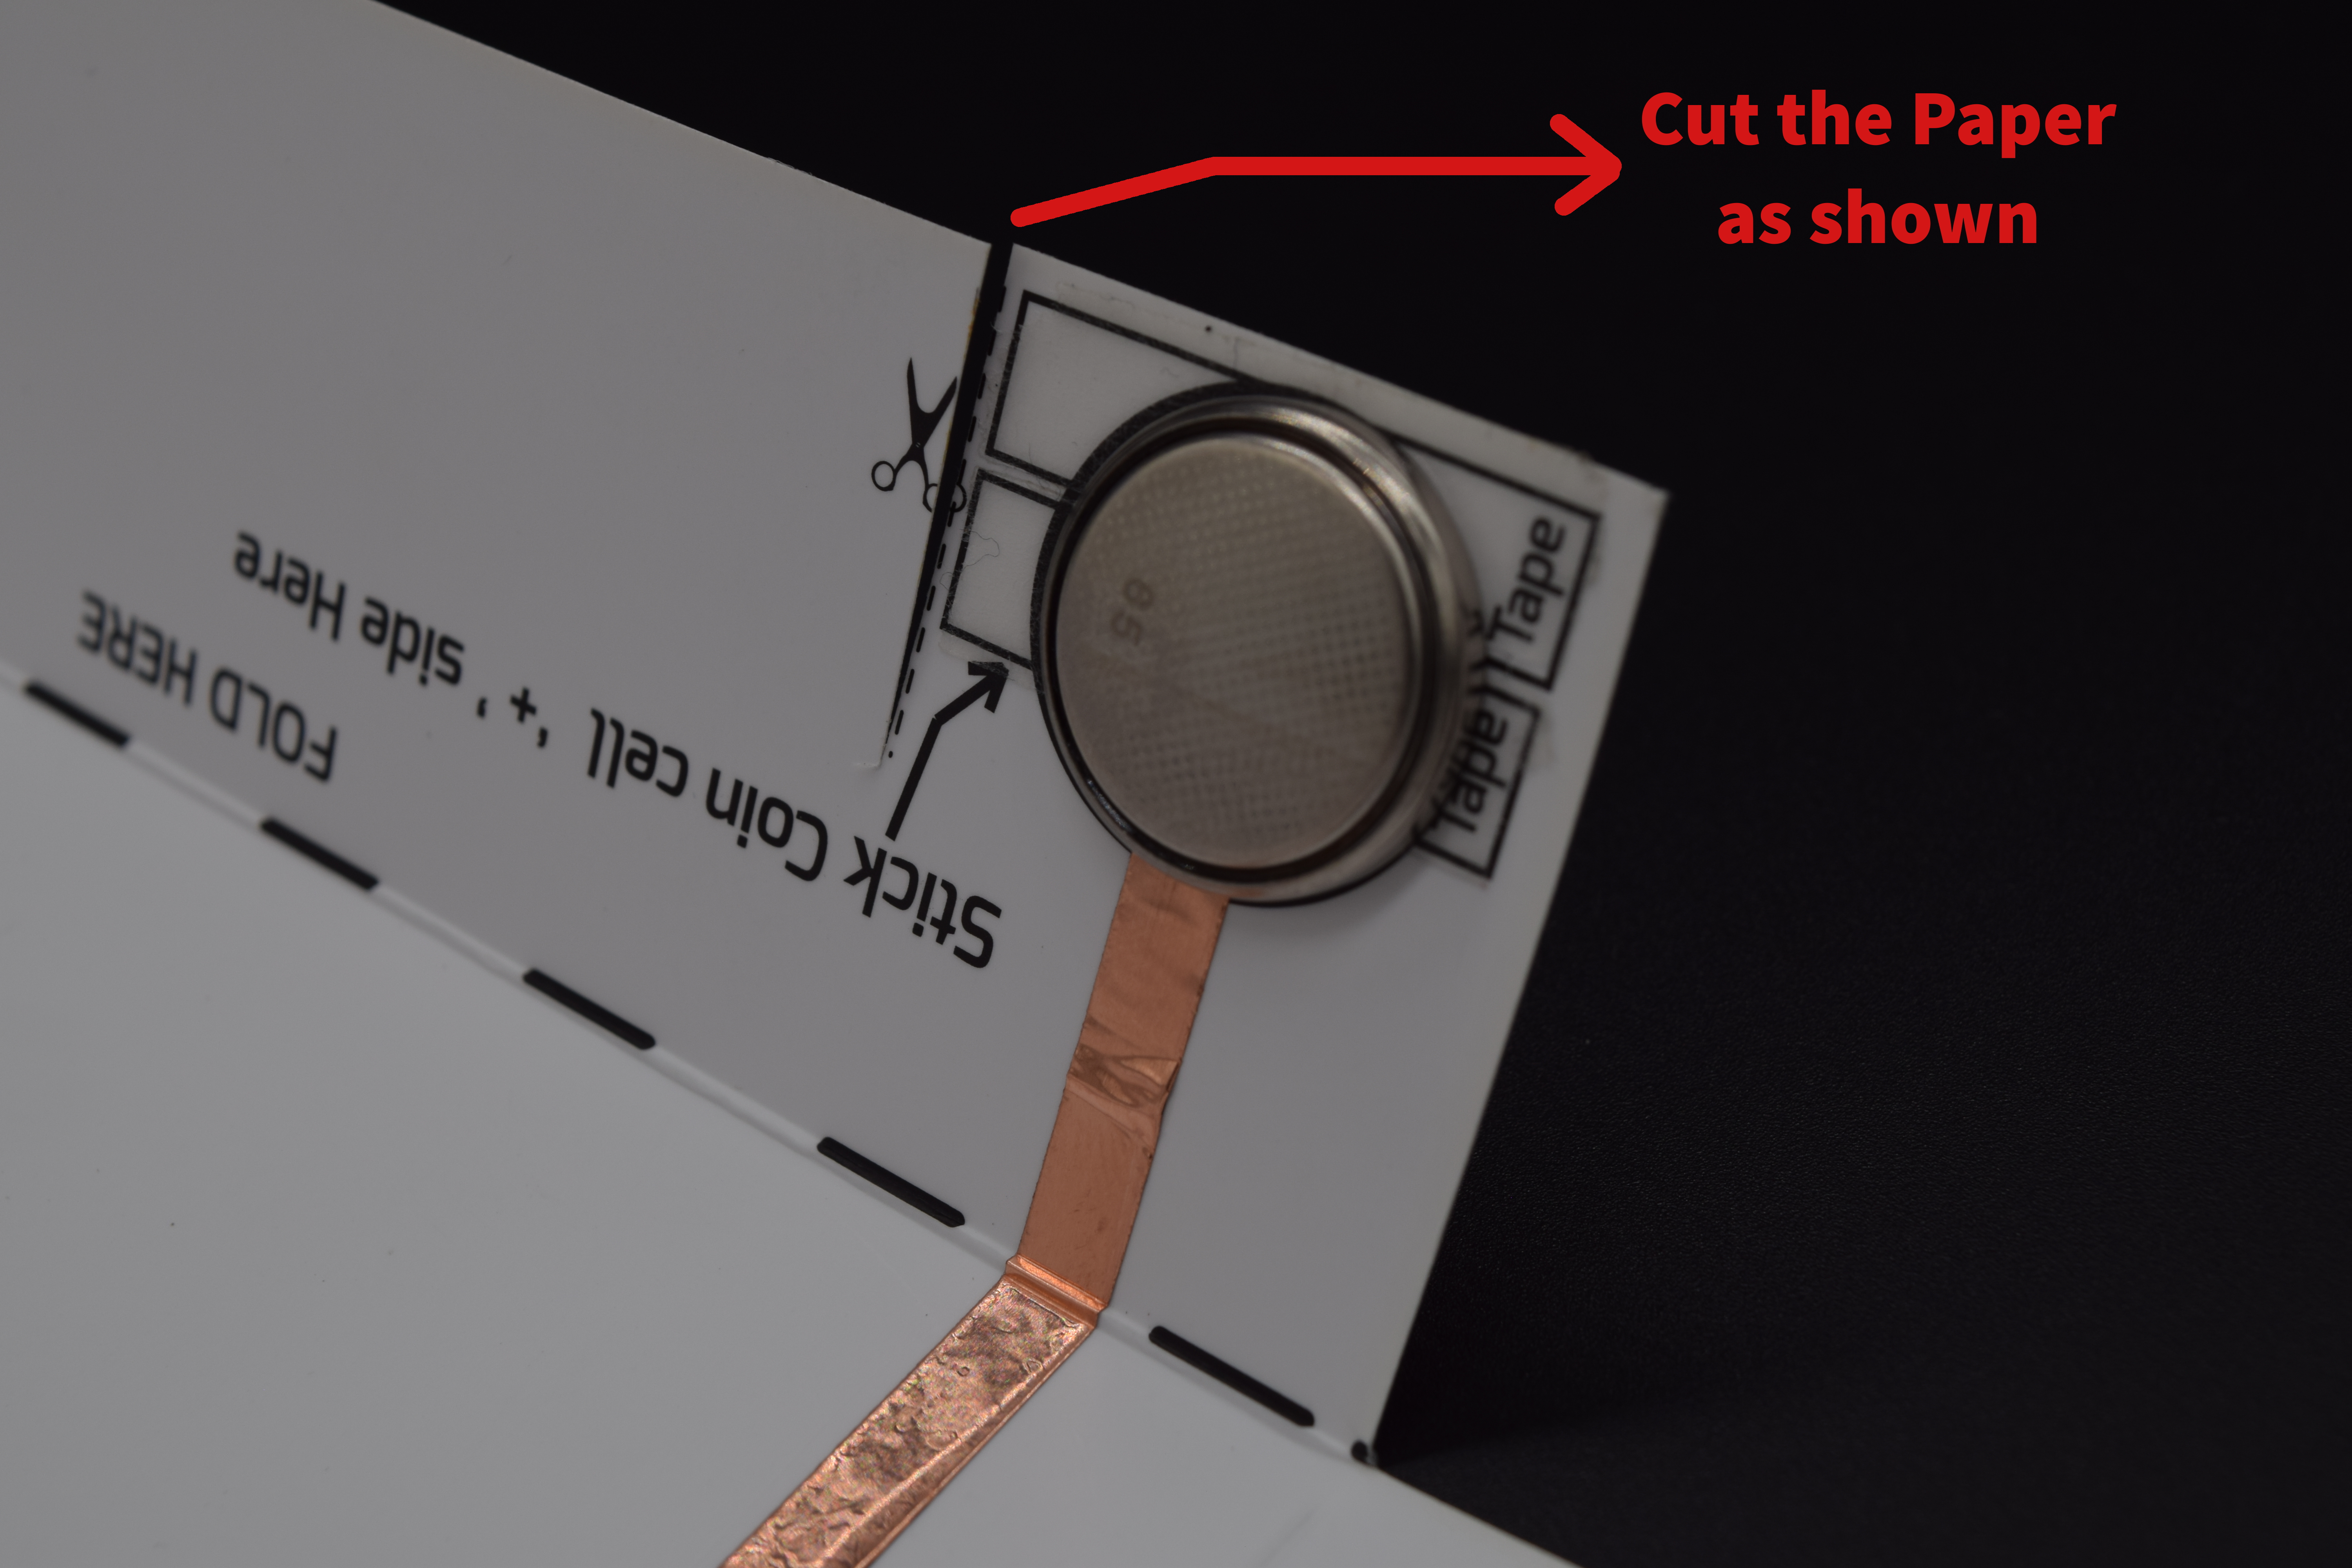
Added Cut mark to connect/disconnect the battery anytime
Step 13:
- If your circuit is working and ready, its time to glue all the edges.
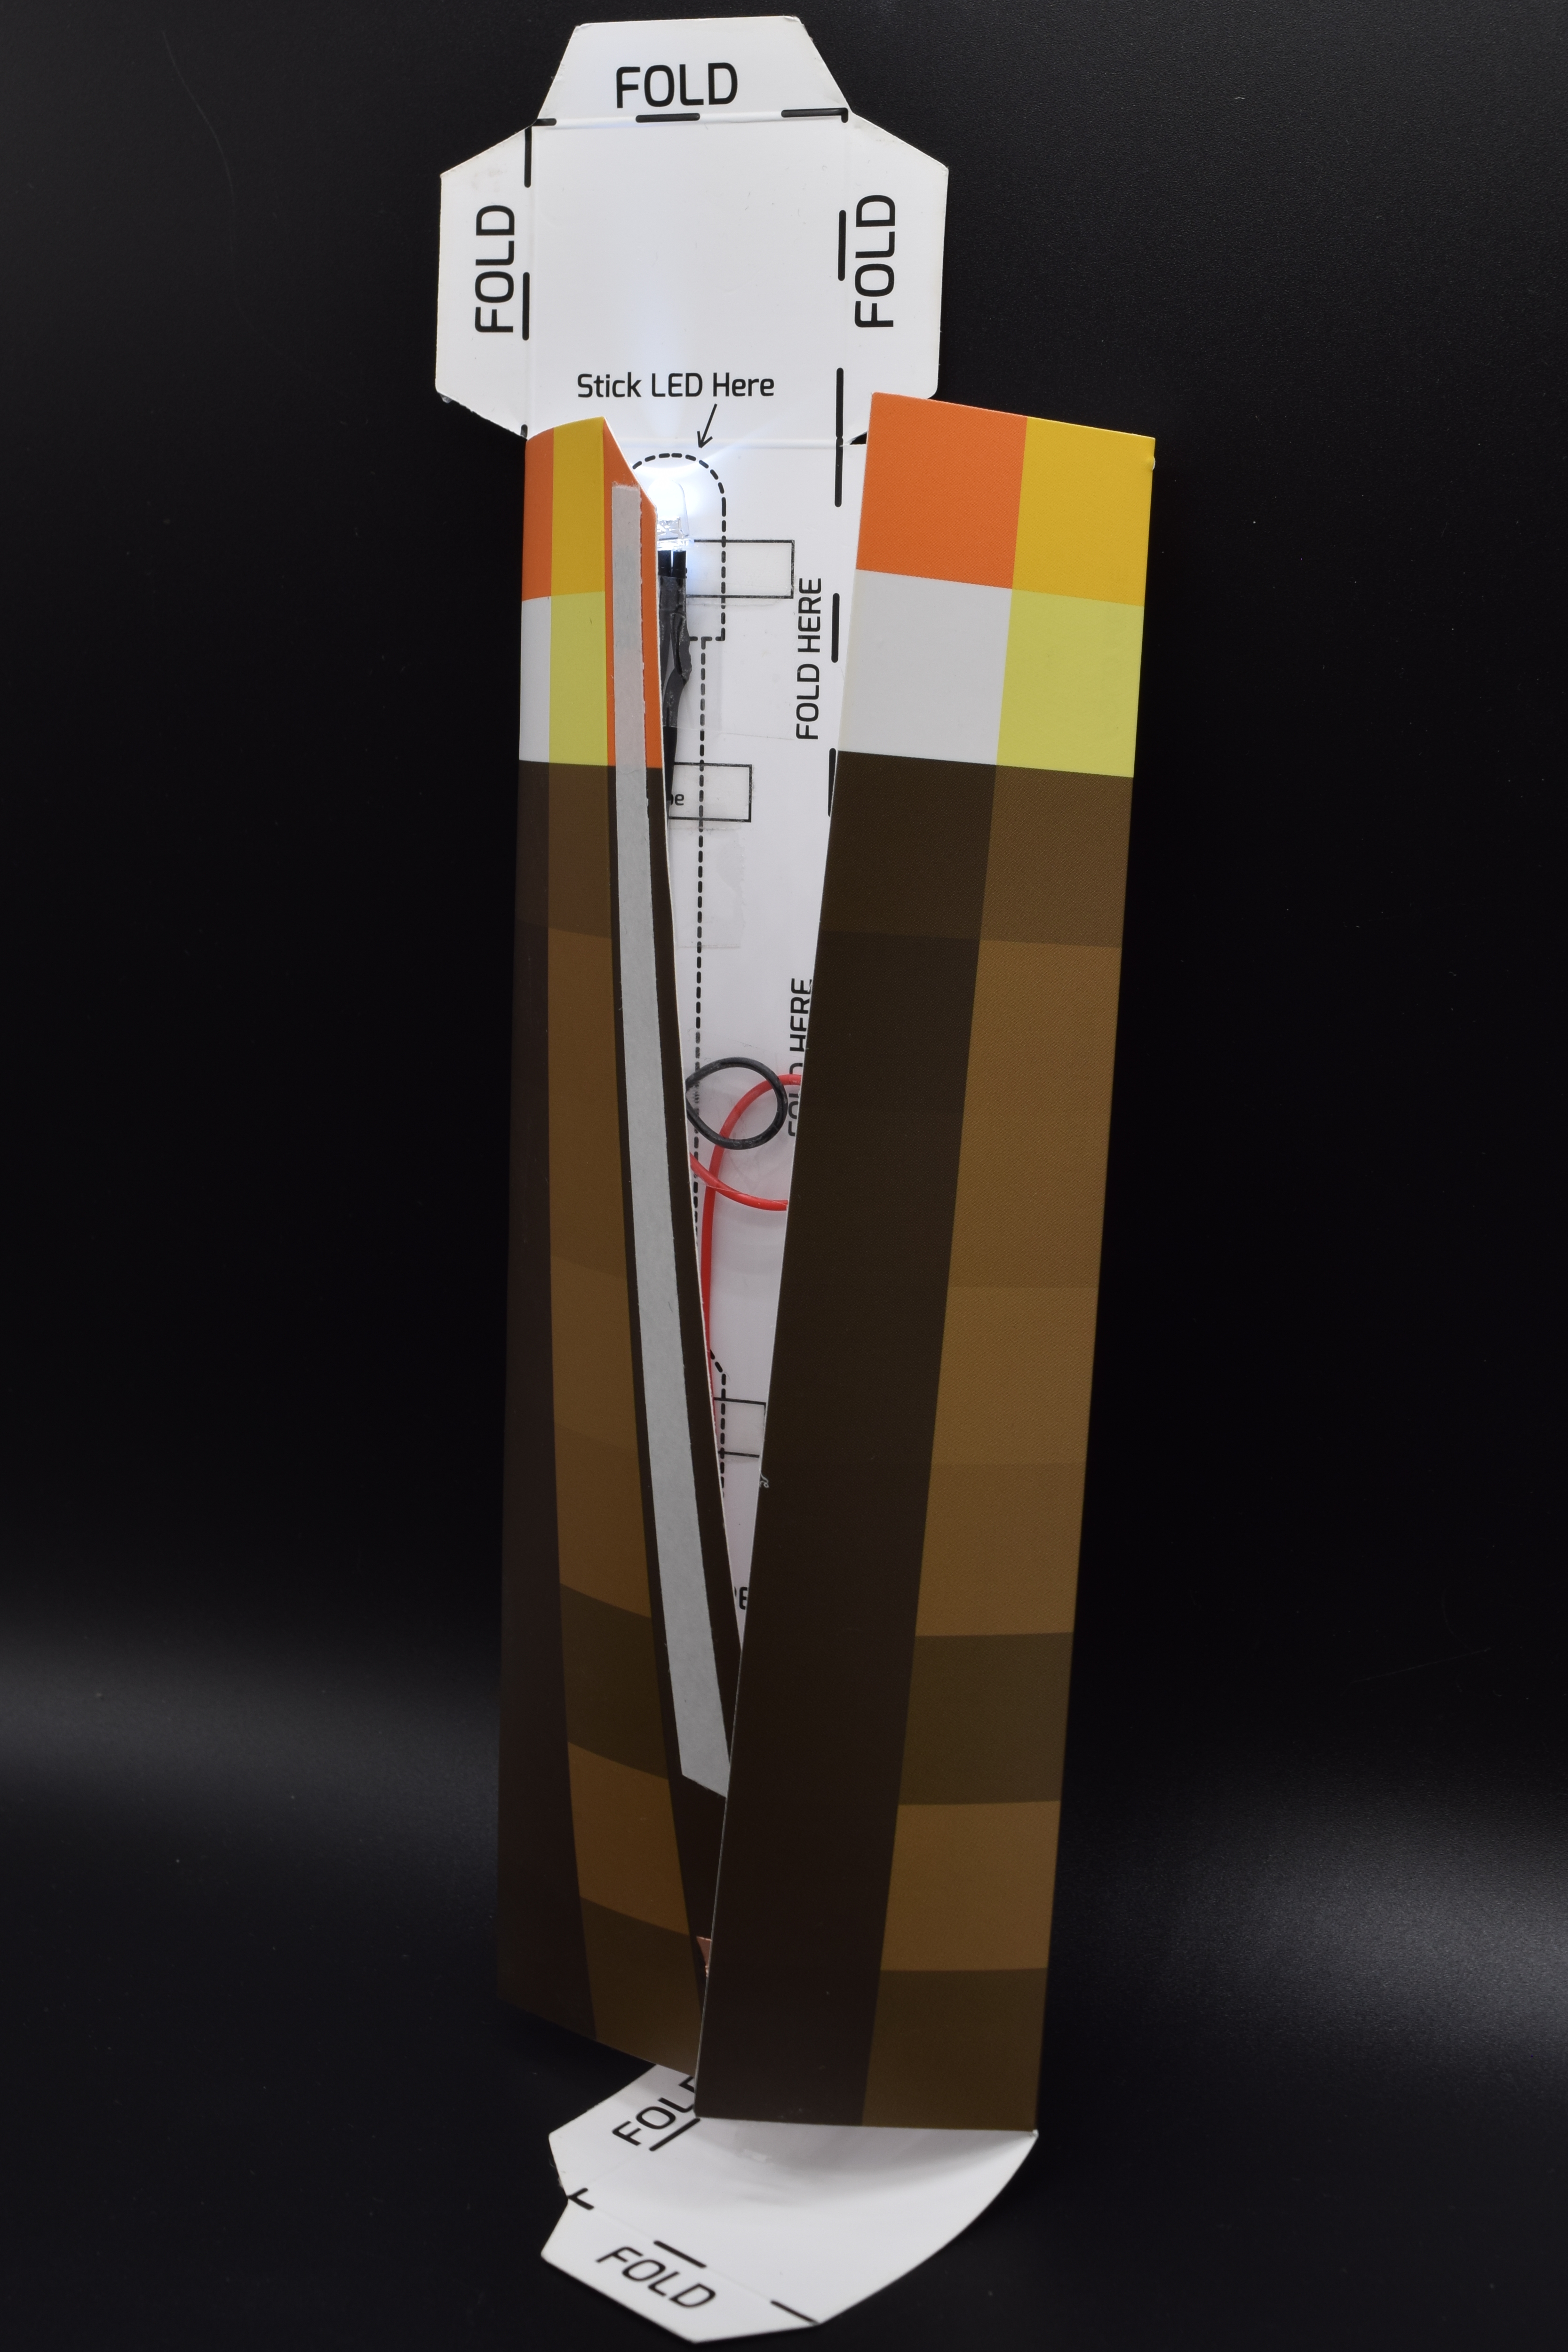
- Add the Fold to the paper, wherever its mentioned, check this image:

Fold the paper near to the marks
Step 14:
- Remove the protection sticker and start sticking the sides one by one, check the below images:
Stick sides after removing the sticker

Peel the stickers and glue the sides
Step 15:
- Check the circuit one last time, before sticking this last side
Peel the last side and stick it against the paper
Step 16:
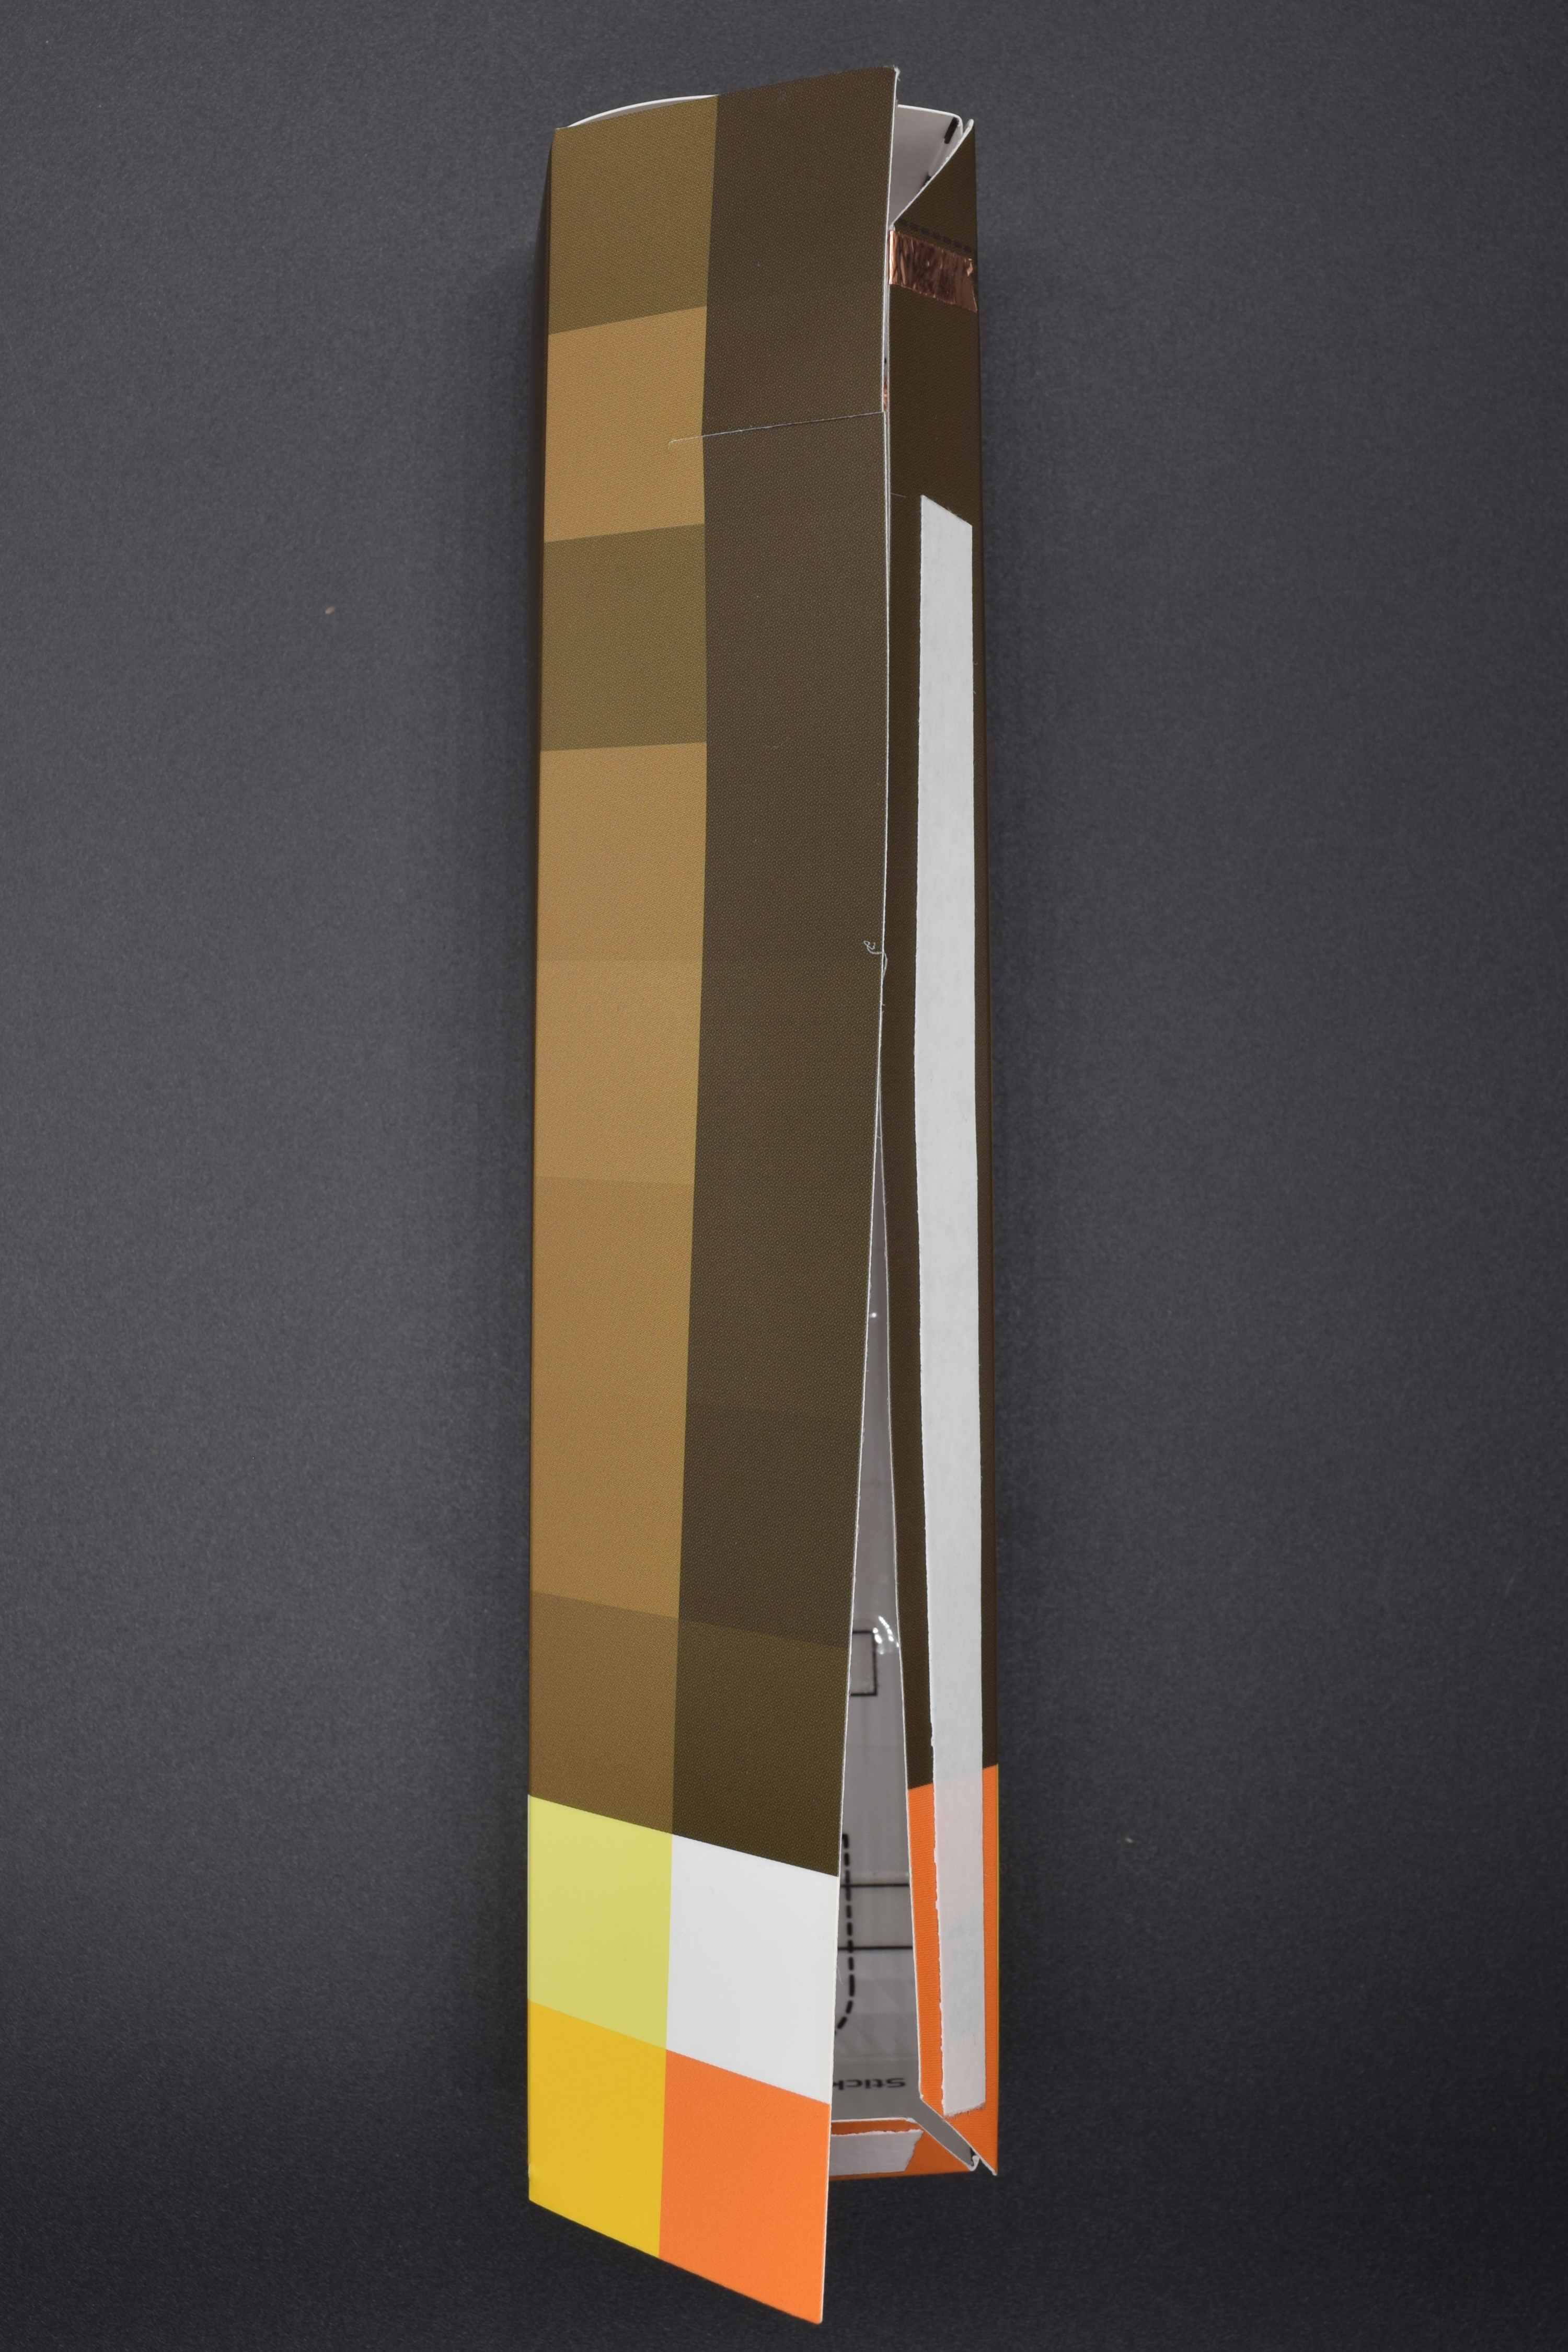
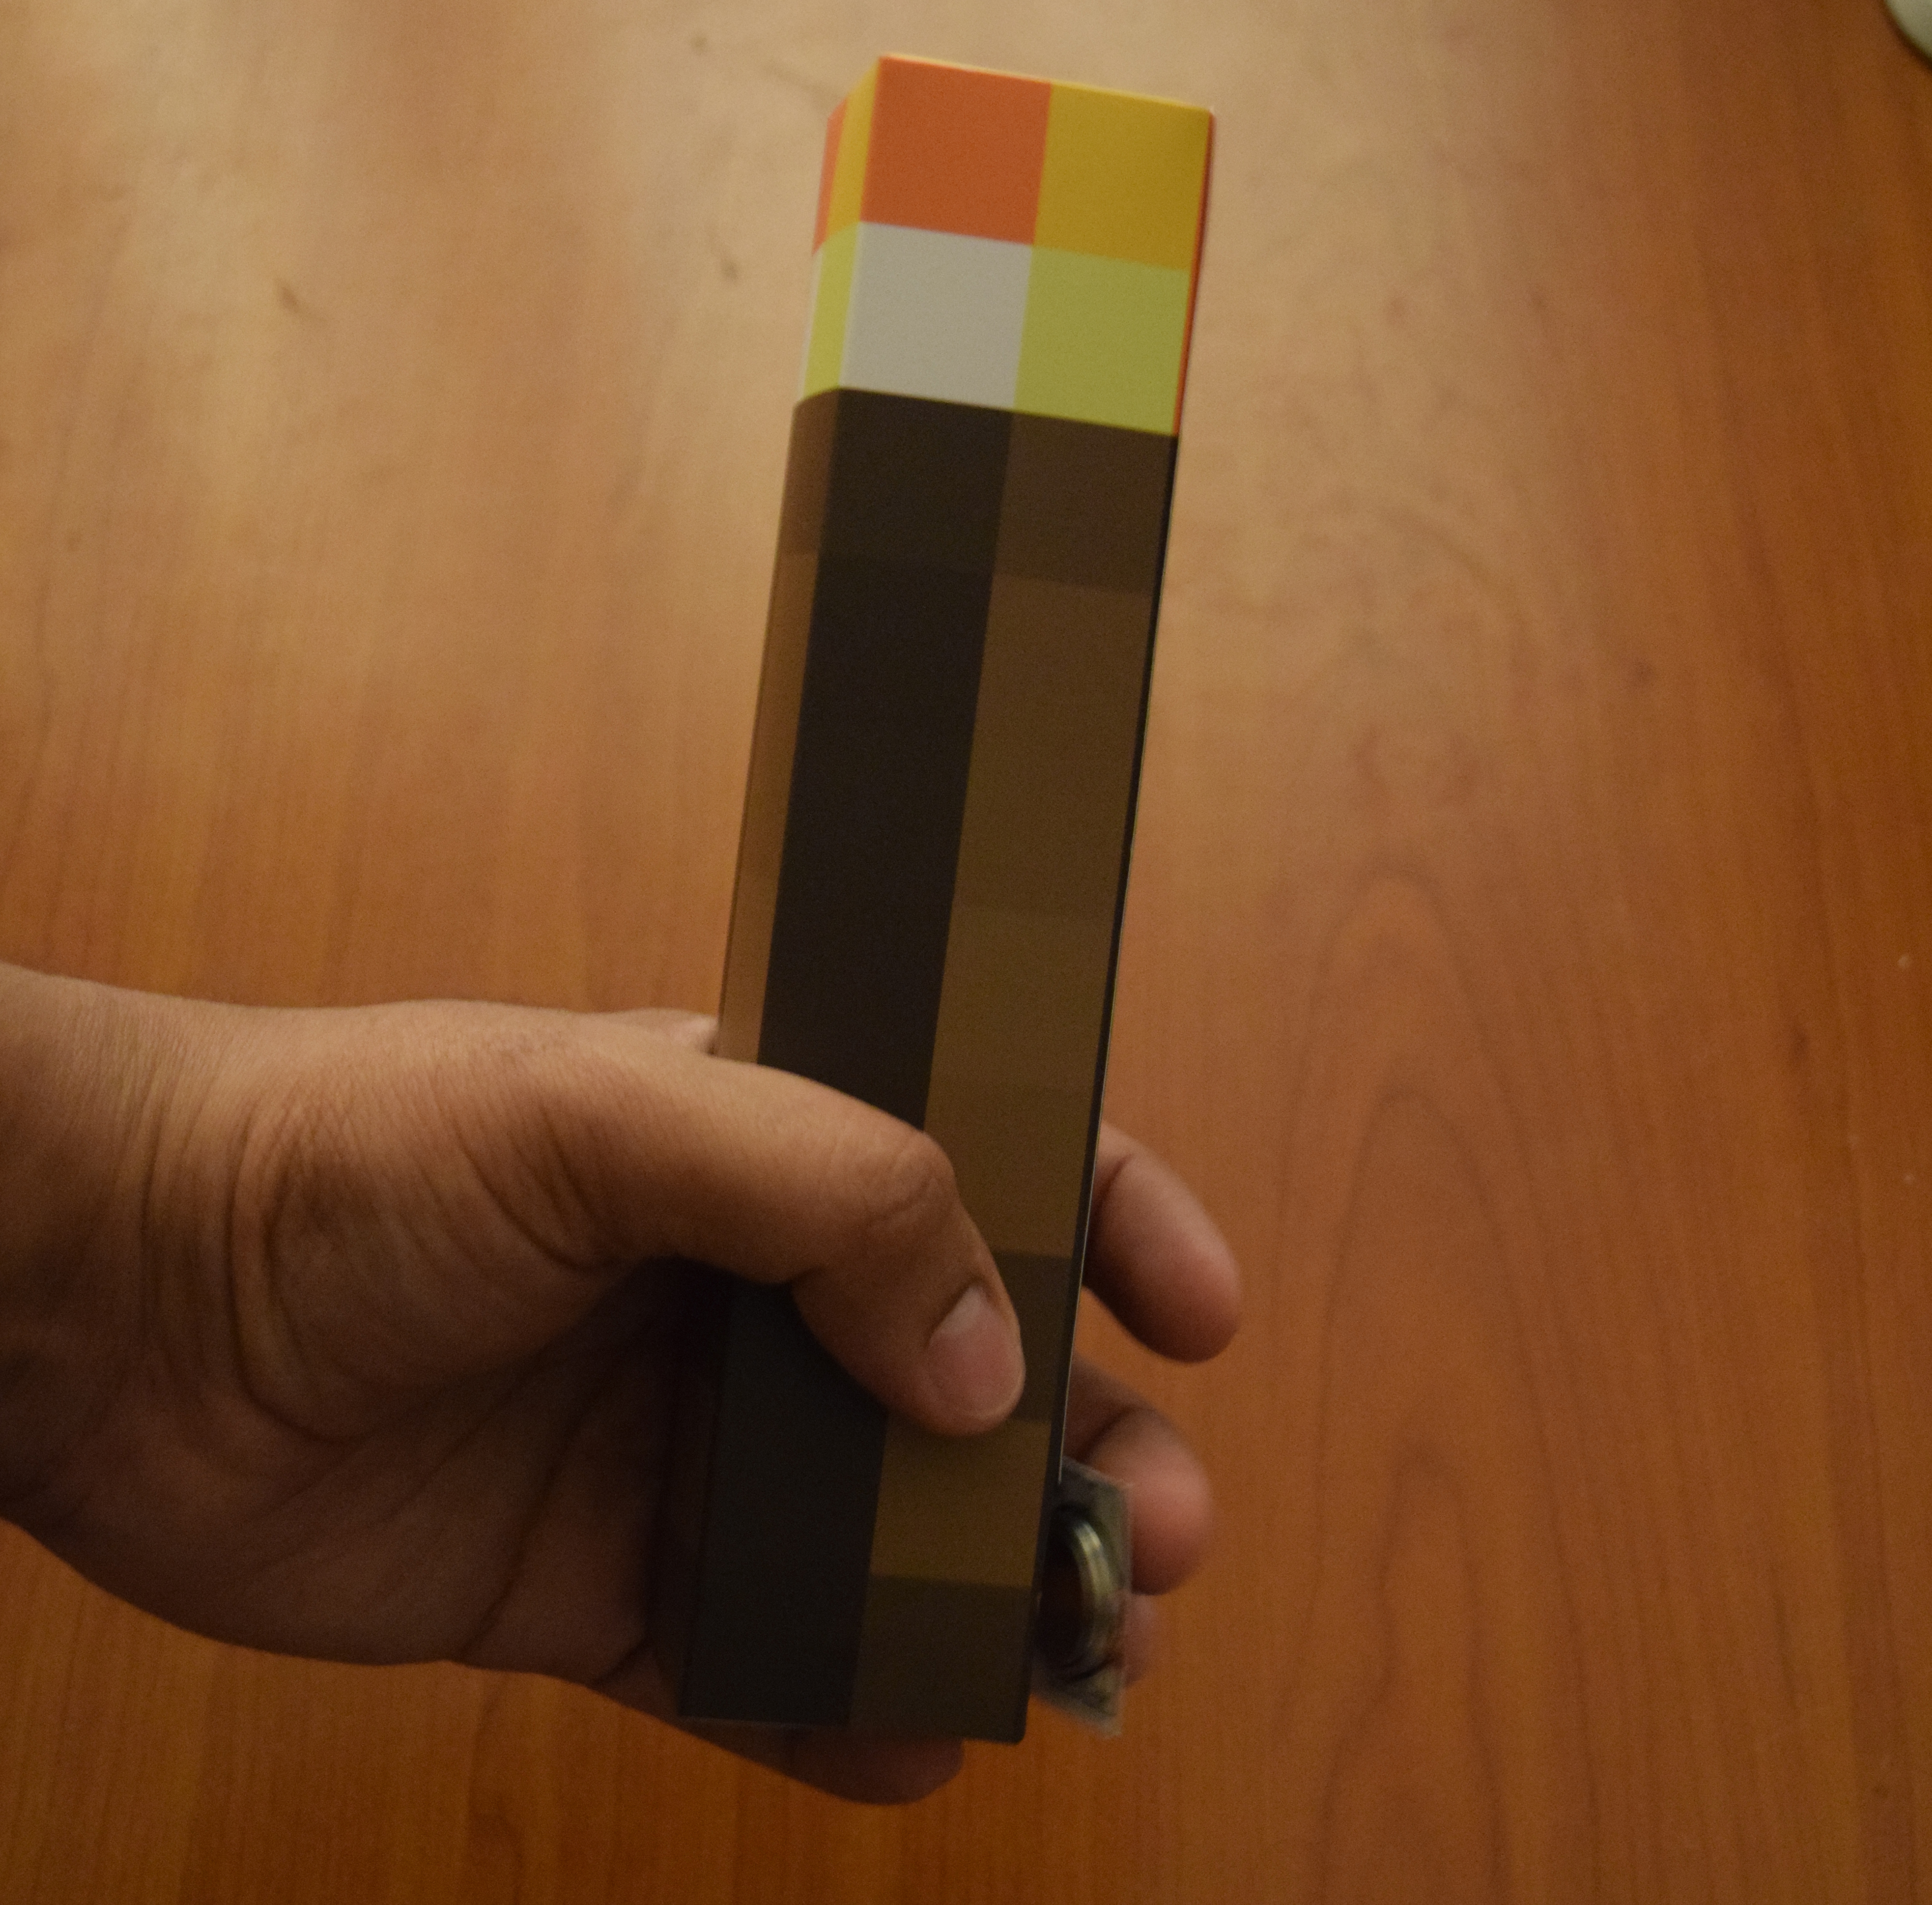
- Now you have a ready torch in front of you. which will looks like as follows:
Torch with battery slit open
Note: you are able to replace the battery from this slit, without any need to open the Torch.
View from another angle
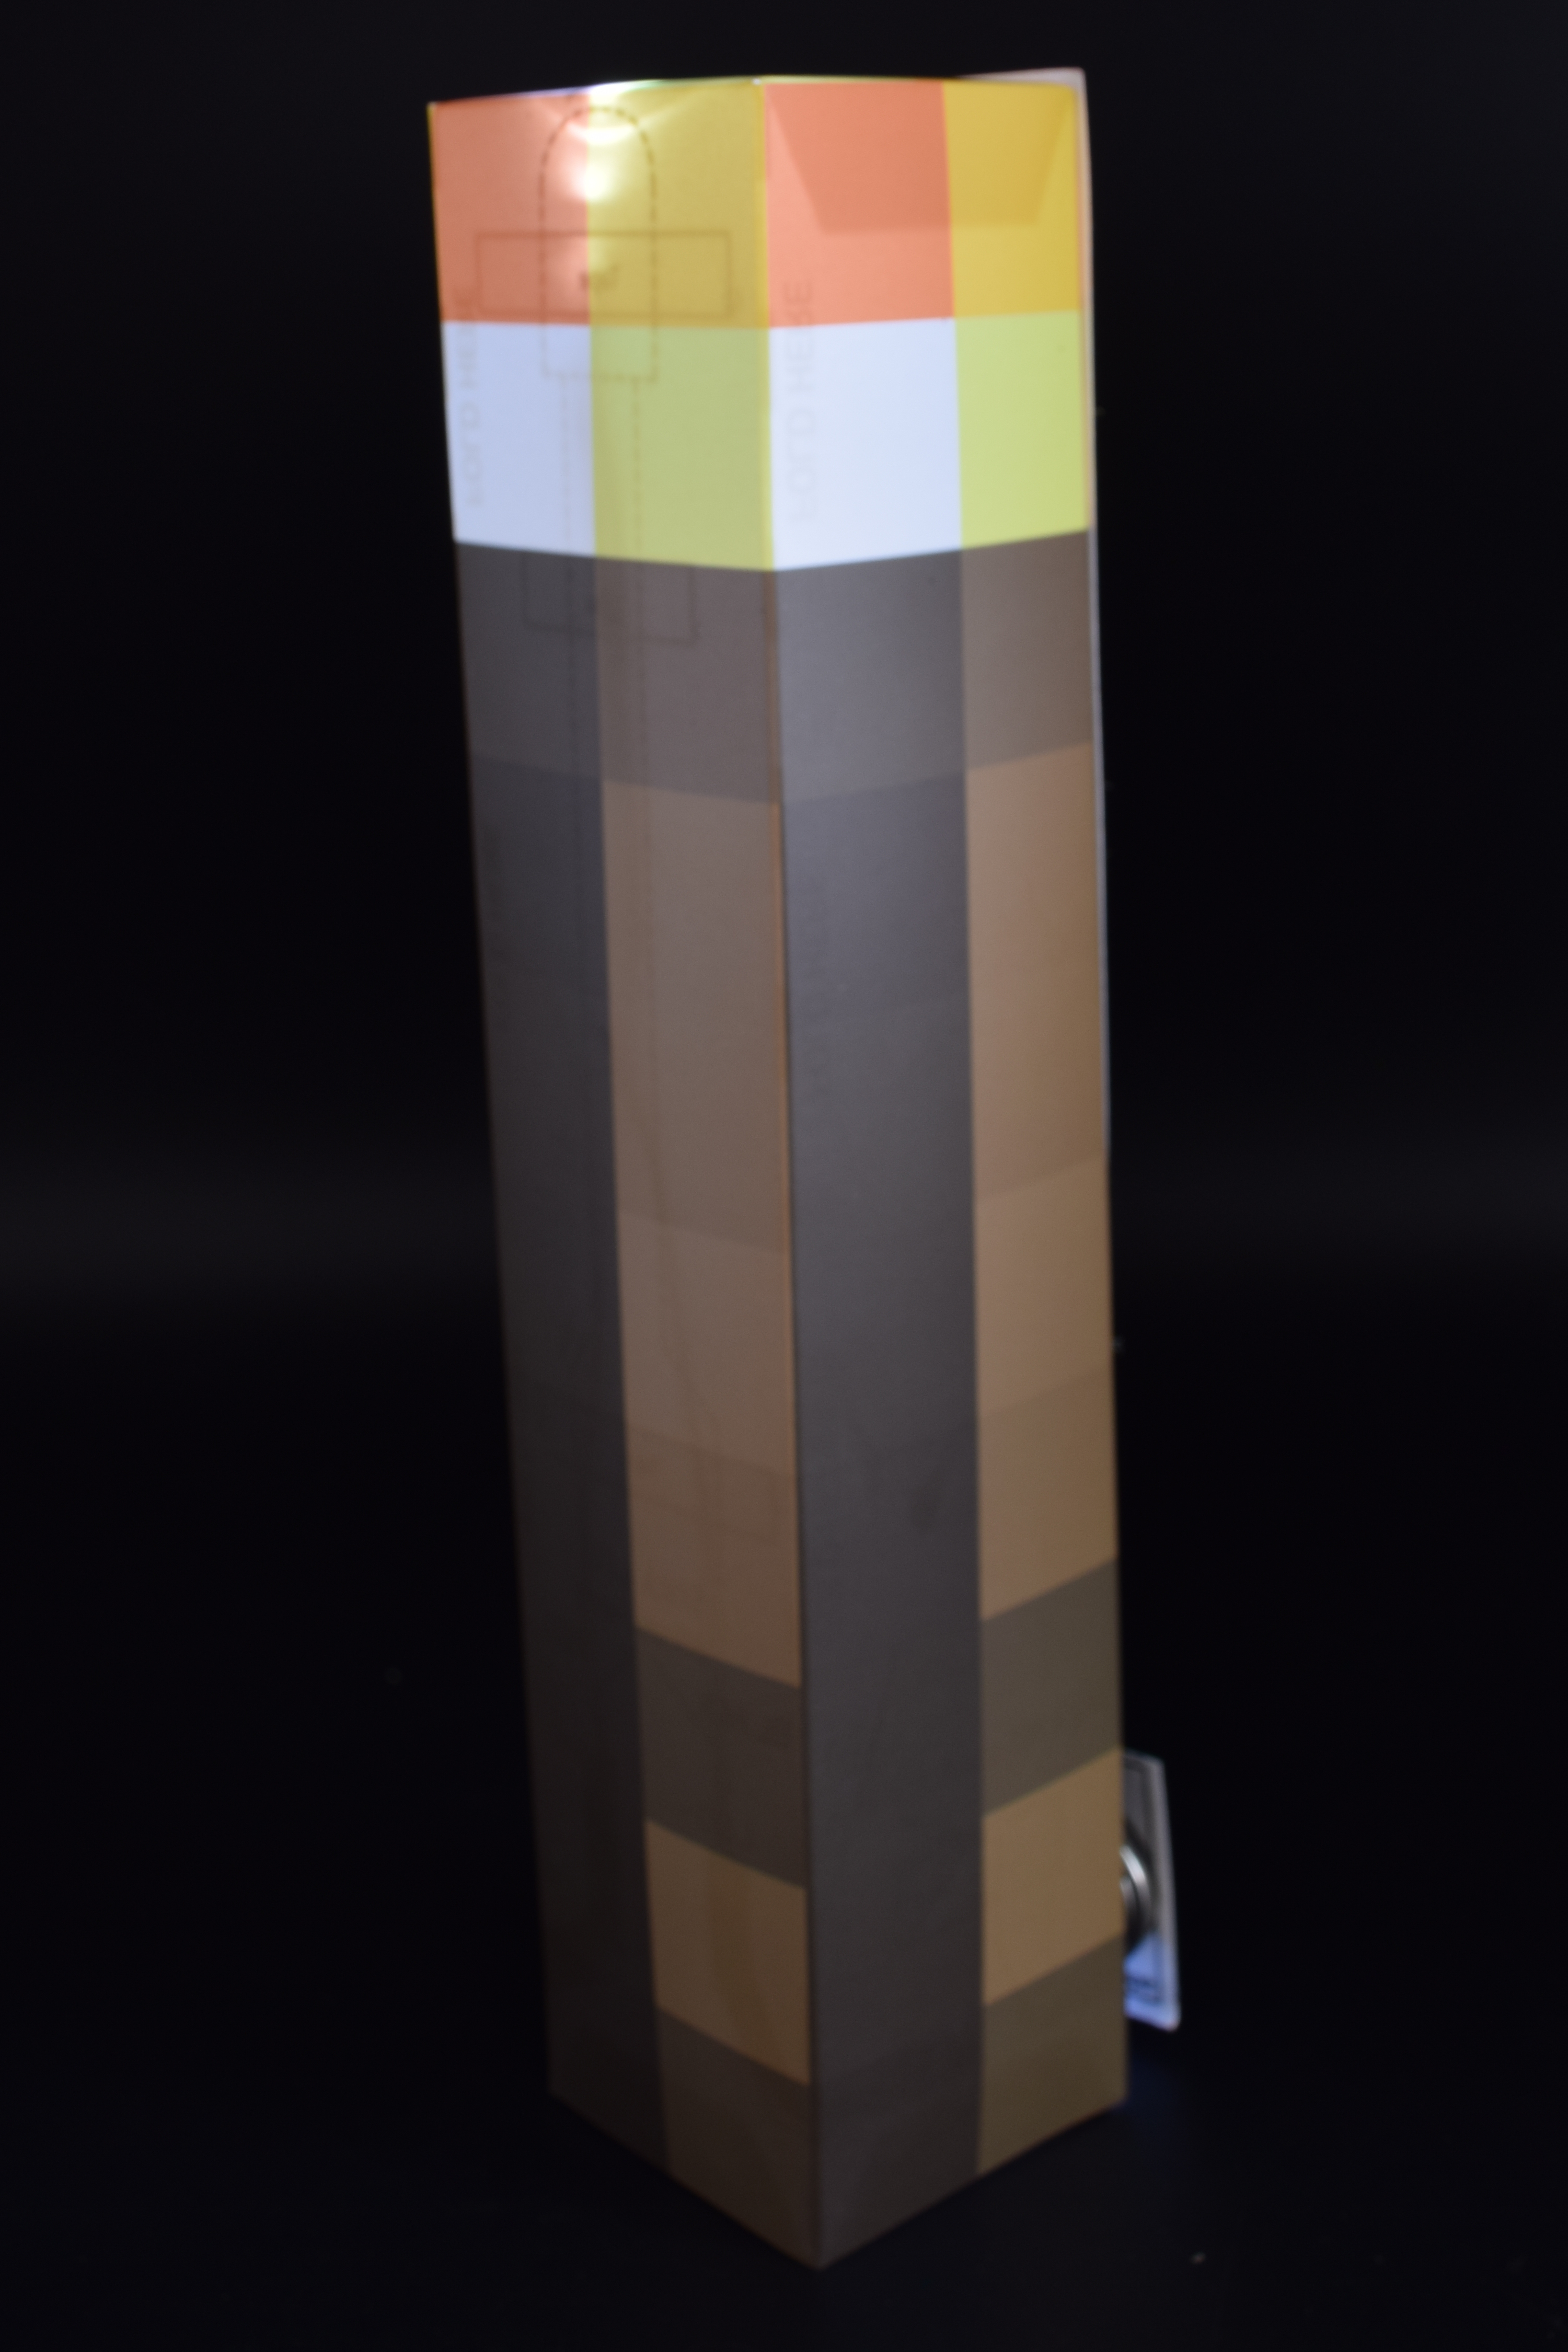
Torch with battery Slit Closed
Step 17:
- Enjoy!!
When the battery is not in contact

When the battery is in contact
Hi…I tried connecting the Minecraft Torch but it doesn’t work. Can someone please help.
Thanks
Hi Crescentia,
Did you get it to work, or are you still facing issues? Can you start off by connecting the negative terminal of the battery (the side facing you) to the right leg of the tilt switch, this way we can determine where the issue starts from.
thanks
Emil
It doesn’t works it is waste of time?. Now I wasted all my gift.