Introduction to Ardublockly using Medusa – Blinking an LED
This introductory project to Medusa Line for SparkFun ESP32 Thing is focused on using the block of a set digital pin.
The set digital pin block does a simple function of Output Function, which allows the process of choosing which digital pin acts as your output and specifying the state of it.
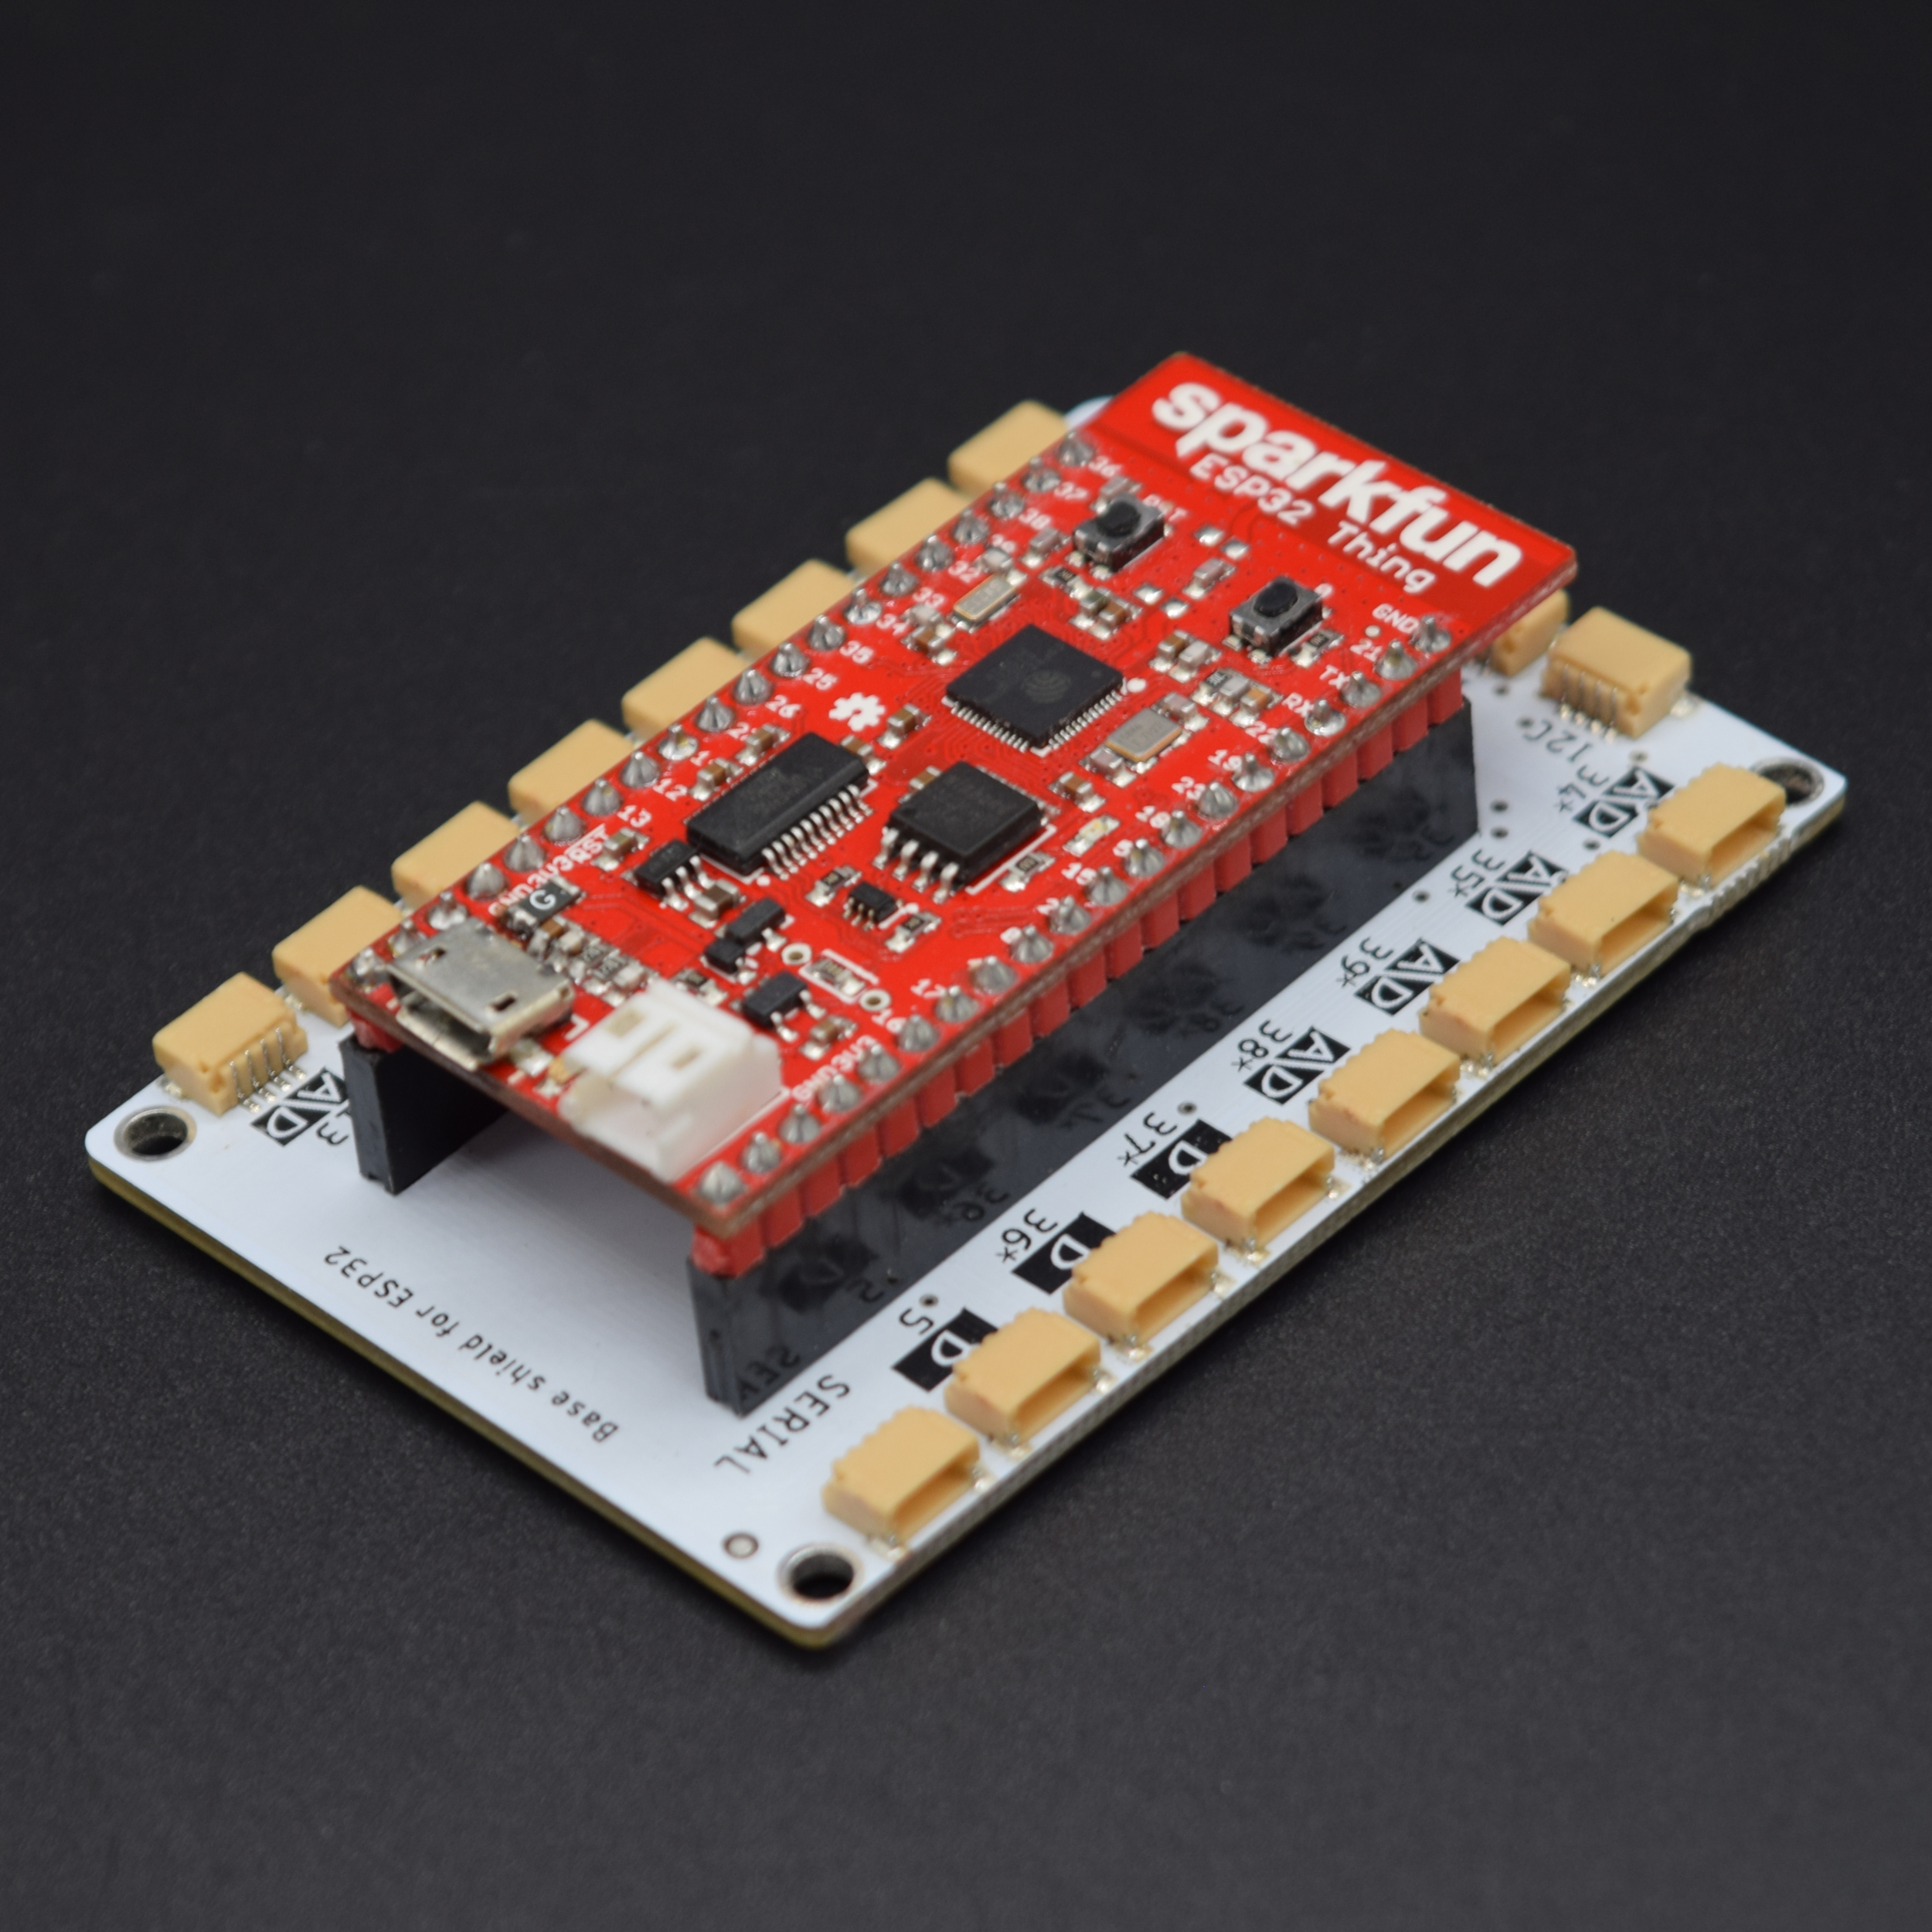
To execute this project you will need a Medusa Head for SparkFun Esp 32 Thing along with an LED Module.
Prerequisites:
To complete the projects you will need to install Arduino, ESP32 Arduino Core, and Ardublockly.
Blinking an LED
Before we get into the project, we will cover basic concept of an LED. The light emitting diode is a semiconductor doped in a way as to form a p n junction, and when it conducts, it emits light.
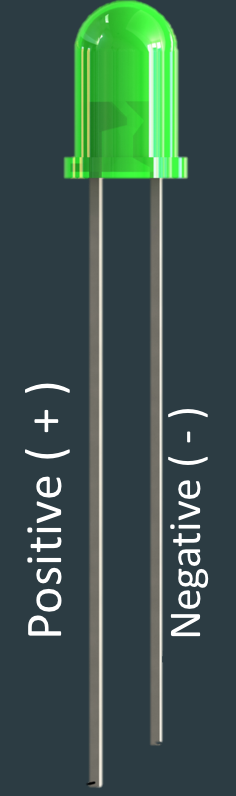
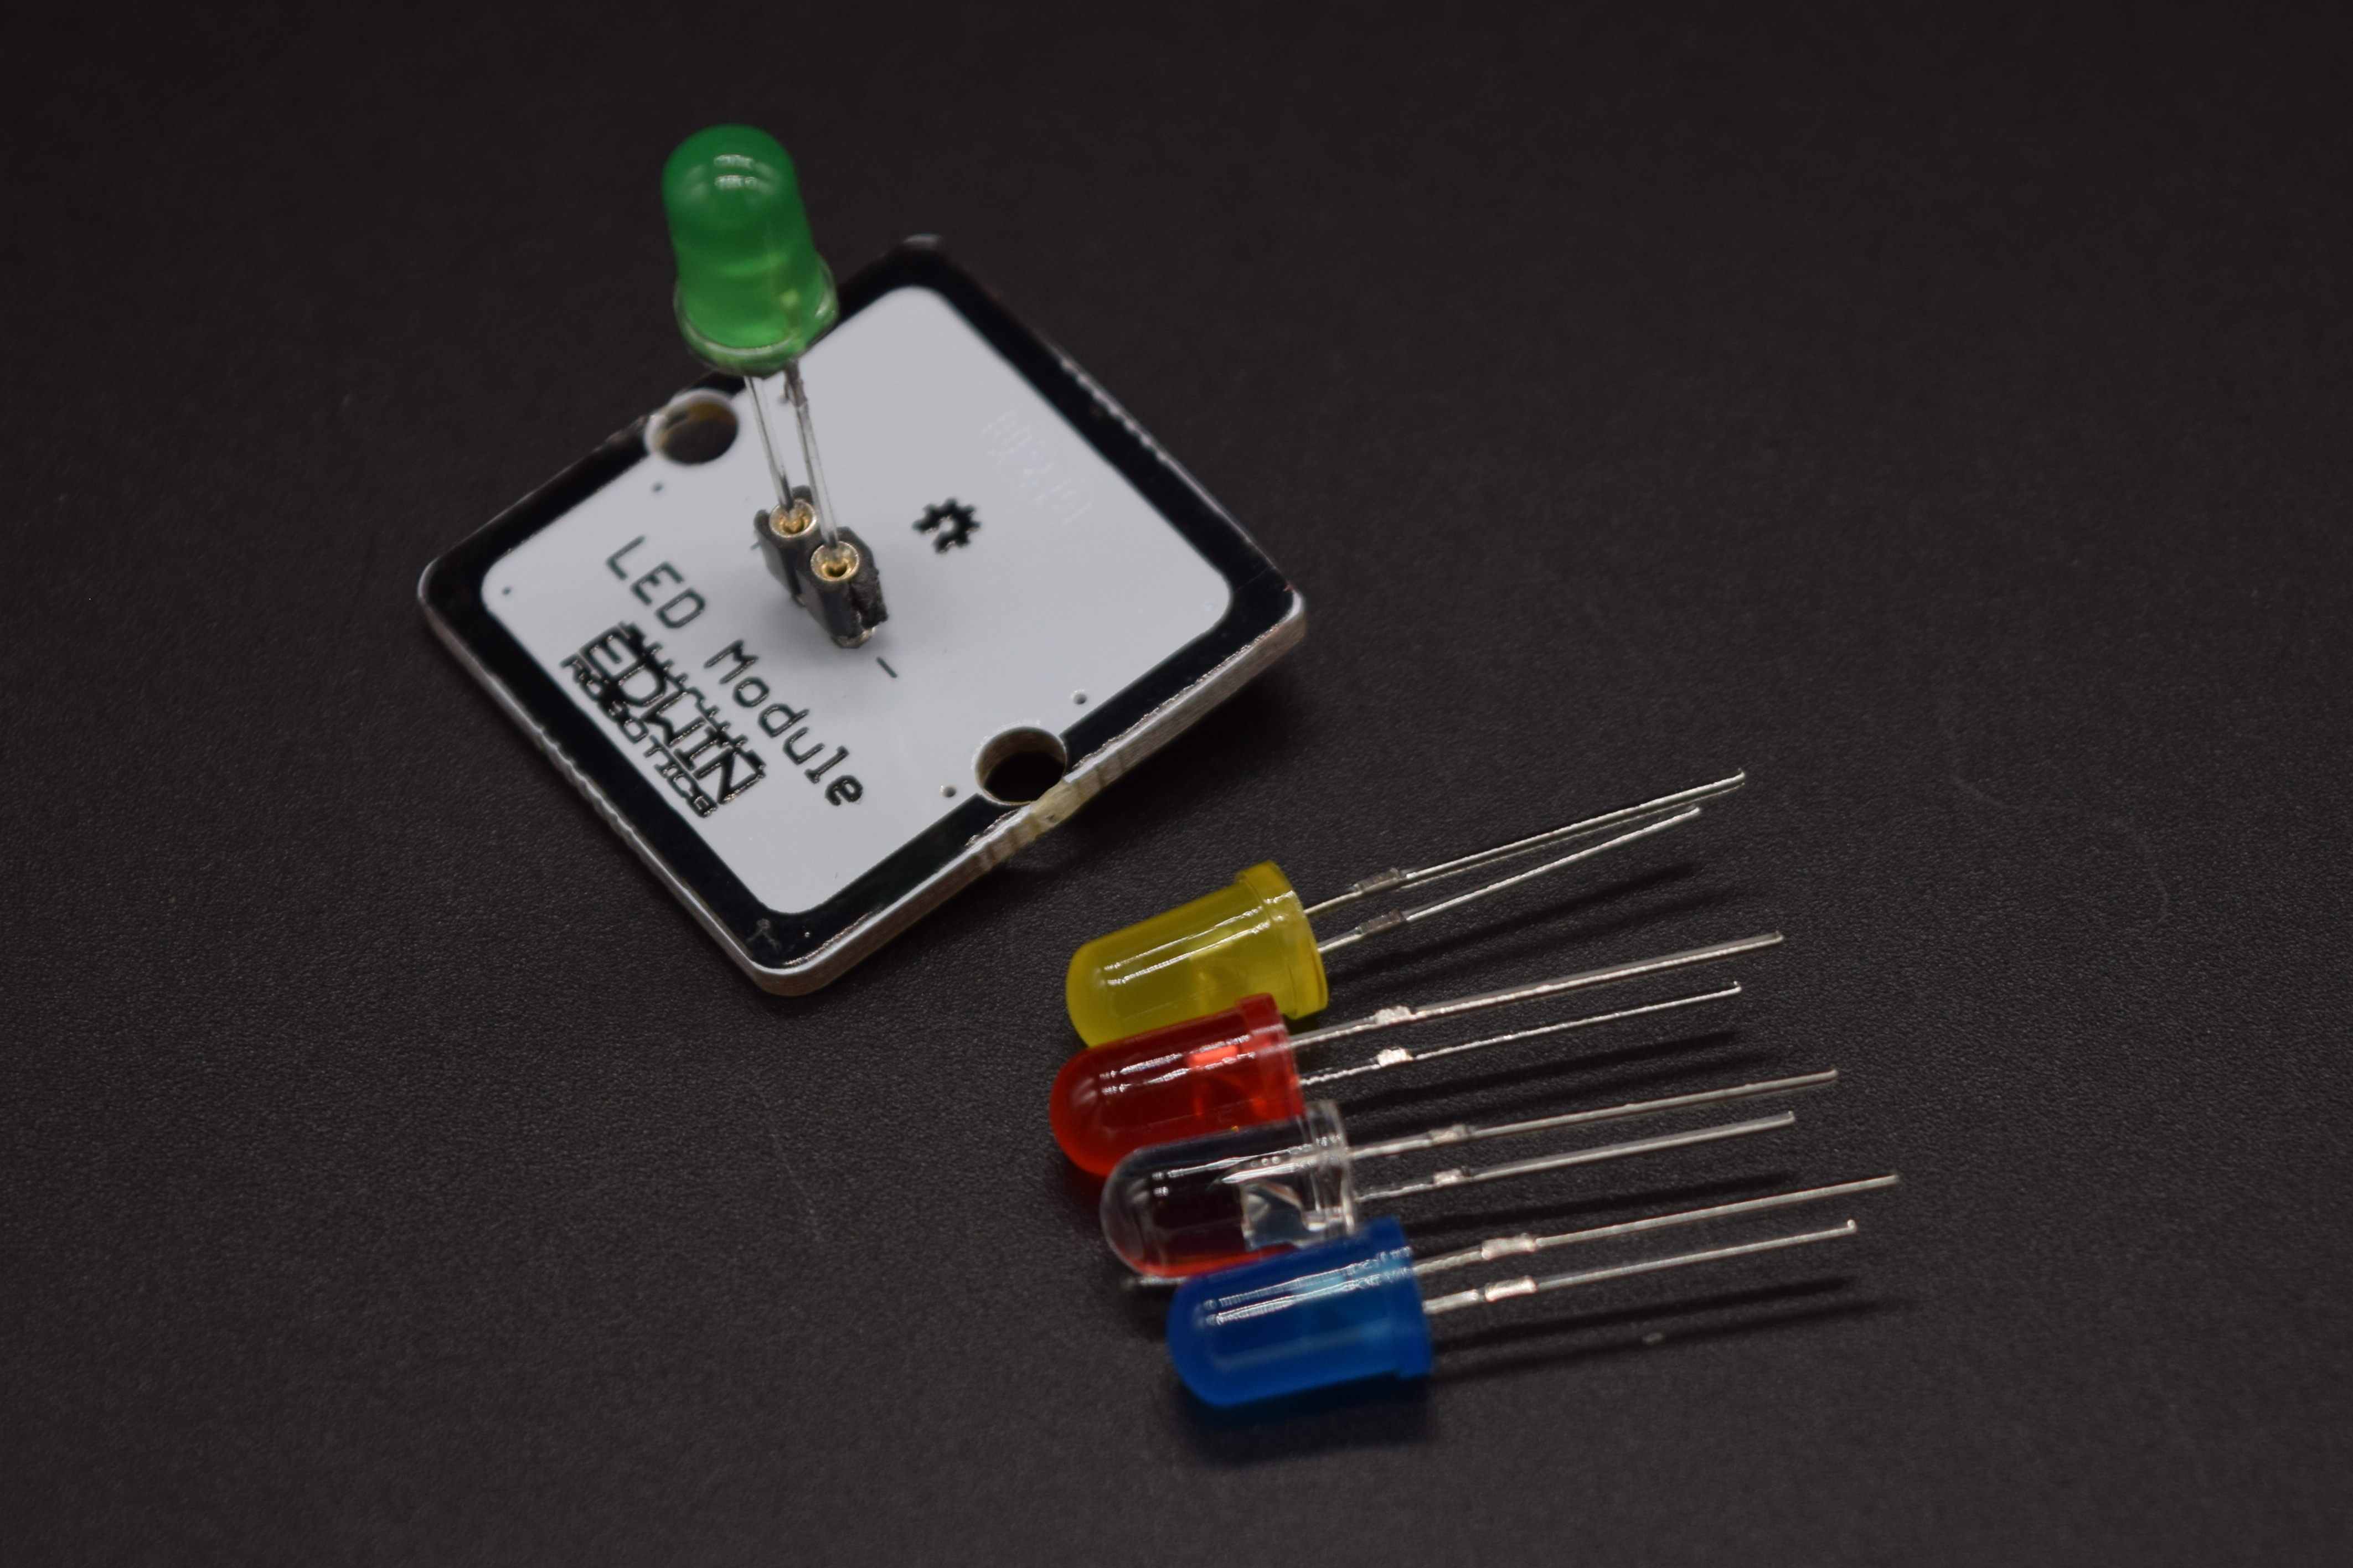
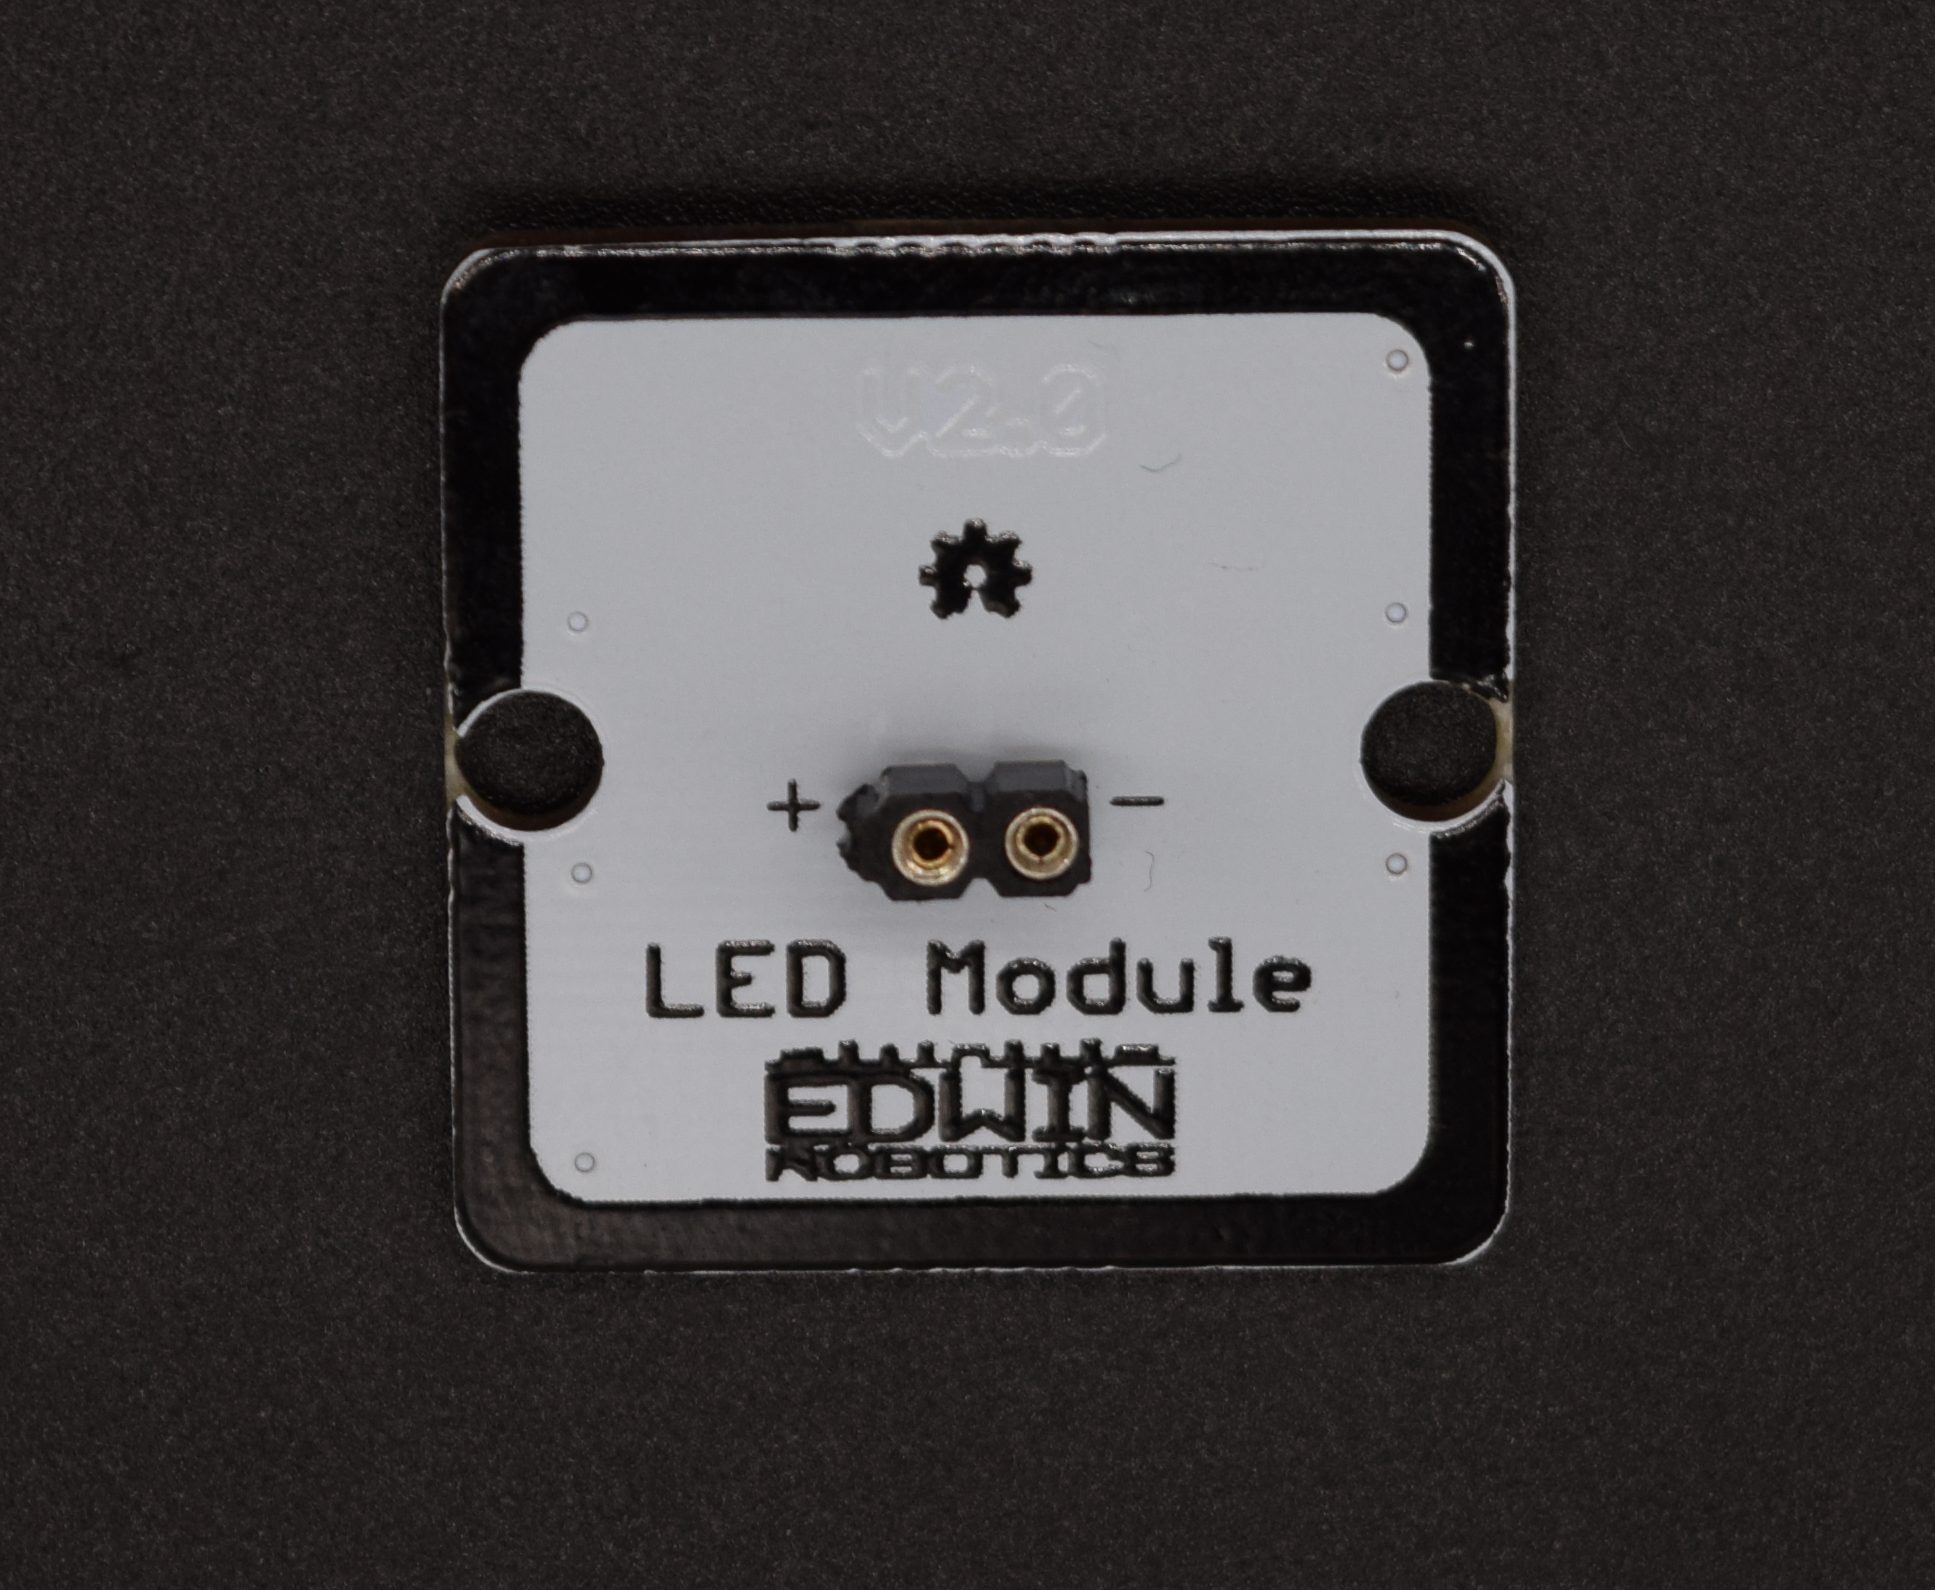
On the Medusa Led Module, there are 2 slots, one for positive and other for negative. The positive leg i.e. longer leg goes into the positive slot and the negative leg i.e. the shorter leg, into the negative slot.
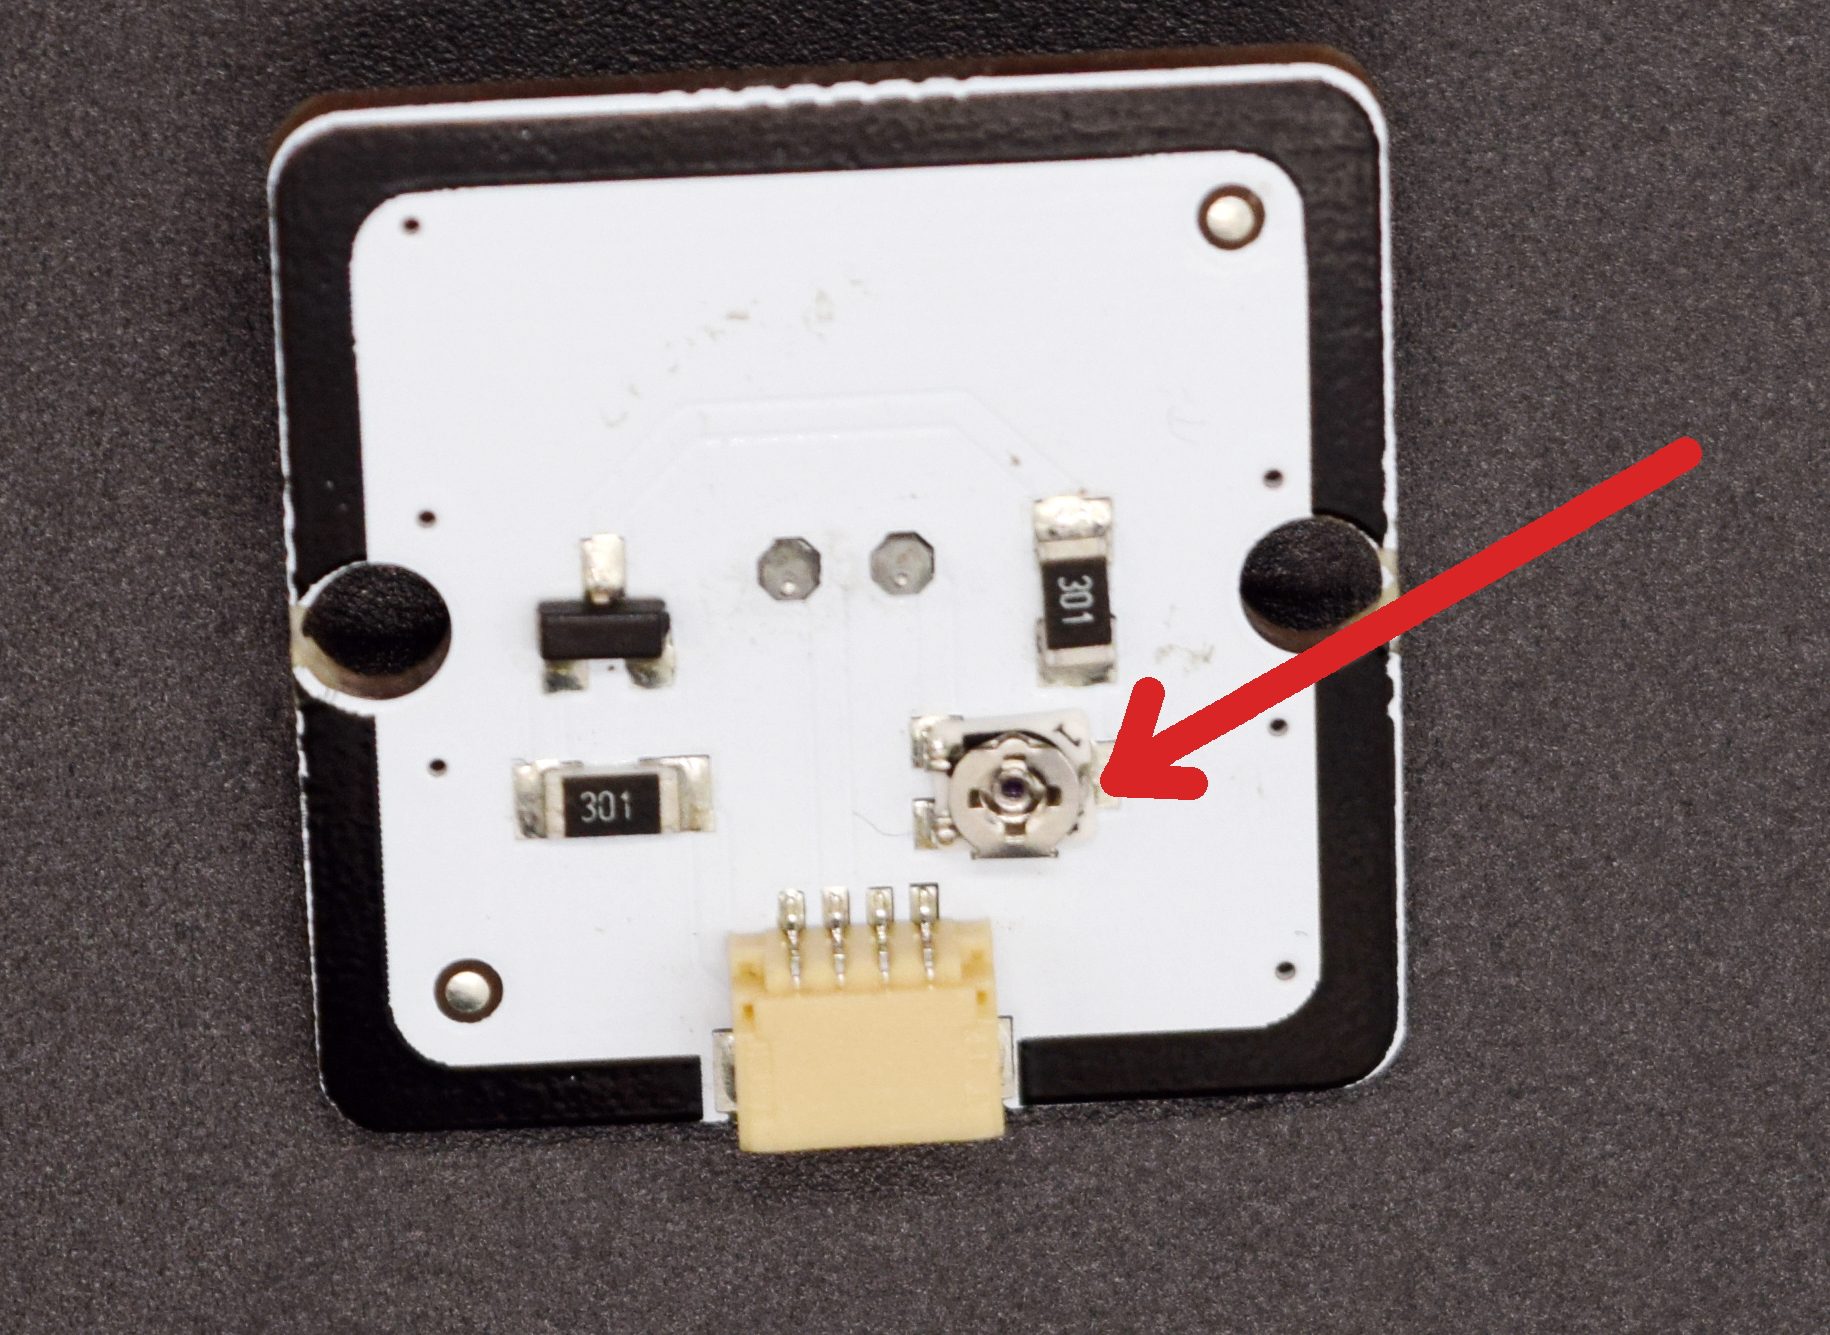
You can control the brightness by adjusting the potentiometer, which is the small circular disc, at the back of the PCB using a screwdriver.
As you know on and off of LED can be considered as a digital output of High and Low. So the next question will be – How to set up a digital pin High (on) or Low (off)?
There are 2 parts to it.
- To choose the pin on to which you need to digital write
- To choose the state in which you want it – High or Low
The following is the Digital Write block in Ardublockly, which can be found under Input/Output :
![]()
It comprises of 2 blocks, and the first block helps the programmer specify the number and the second allows to decide the state if it high or low.
So, let’s start a project,
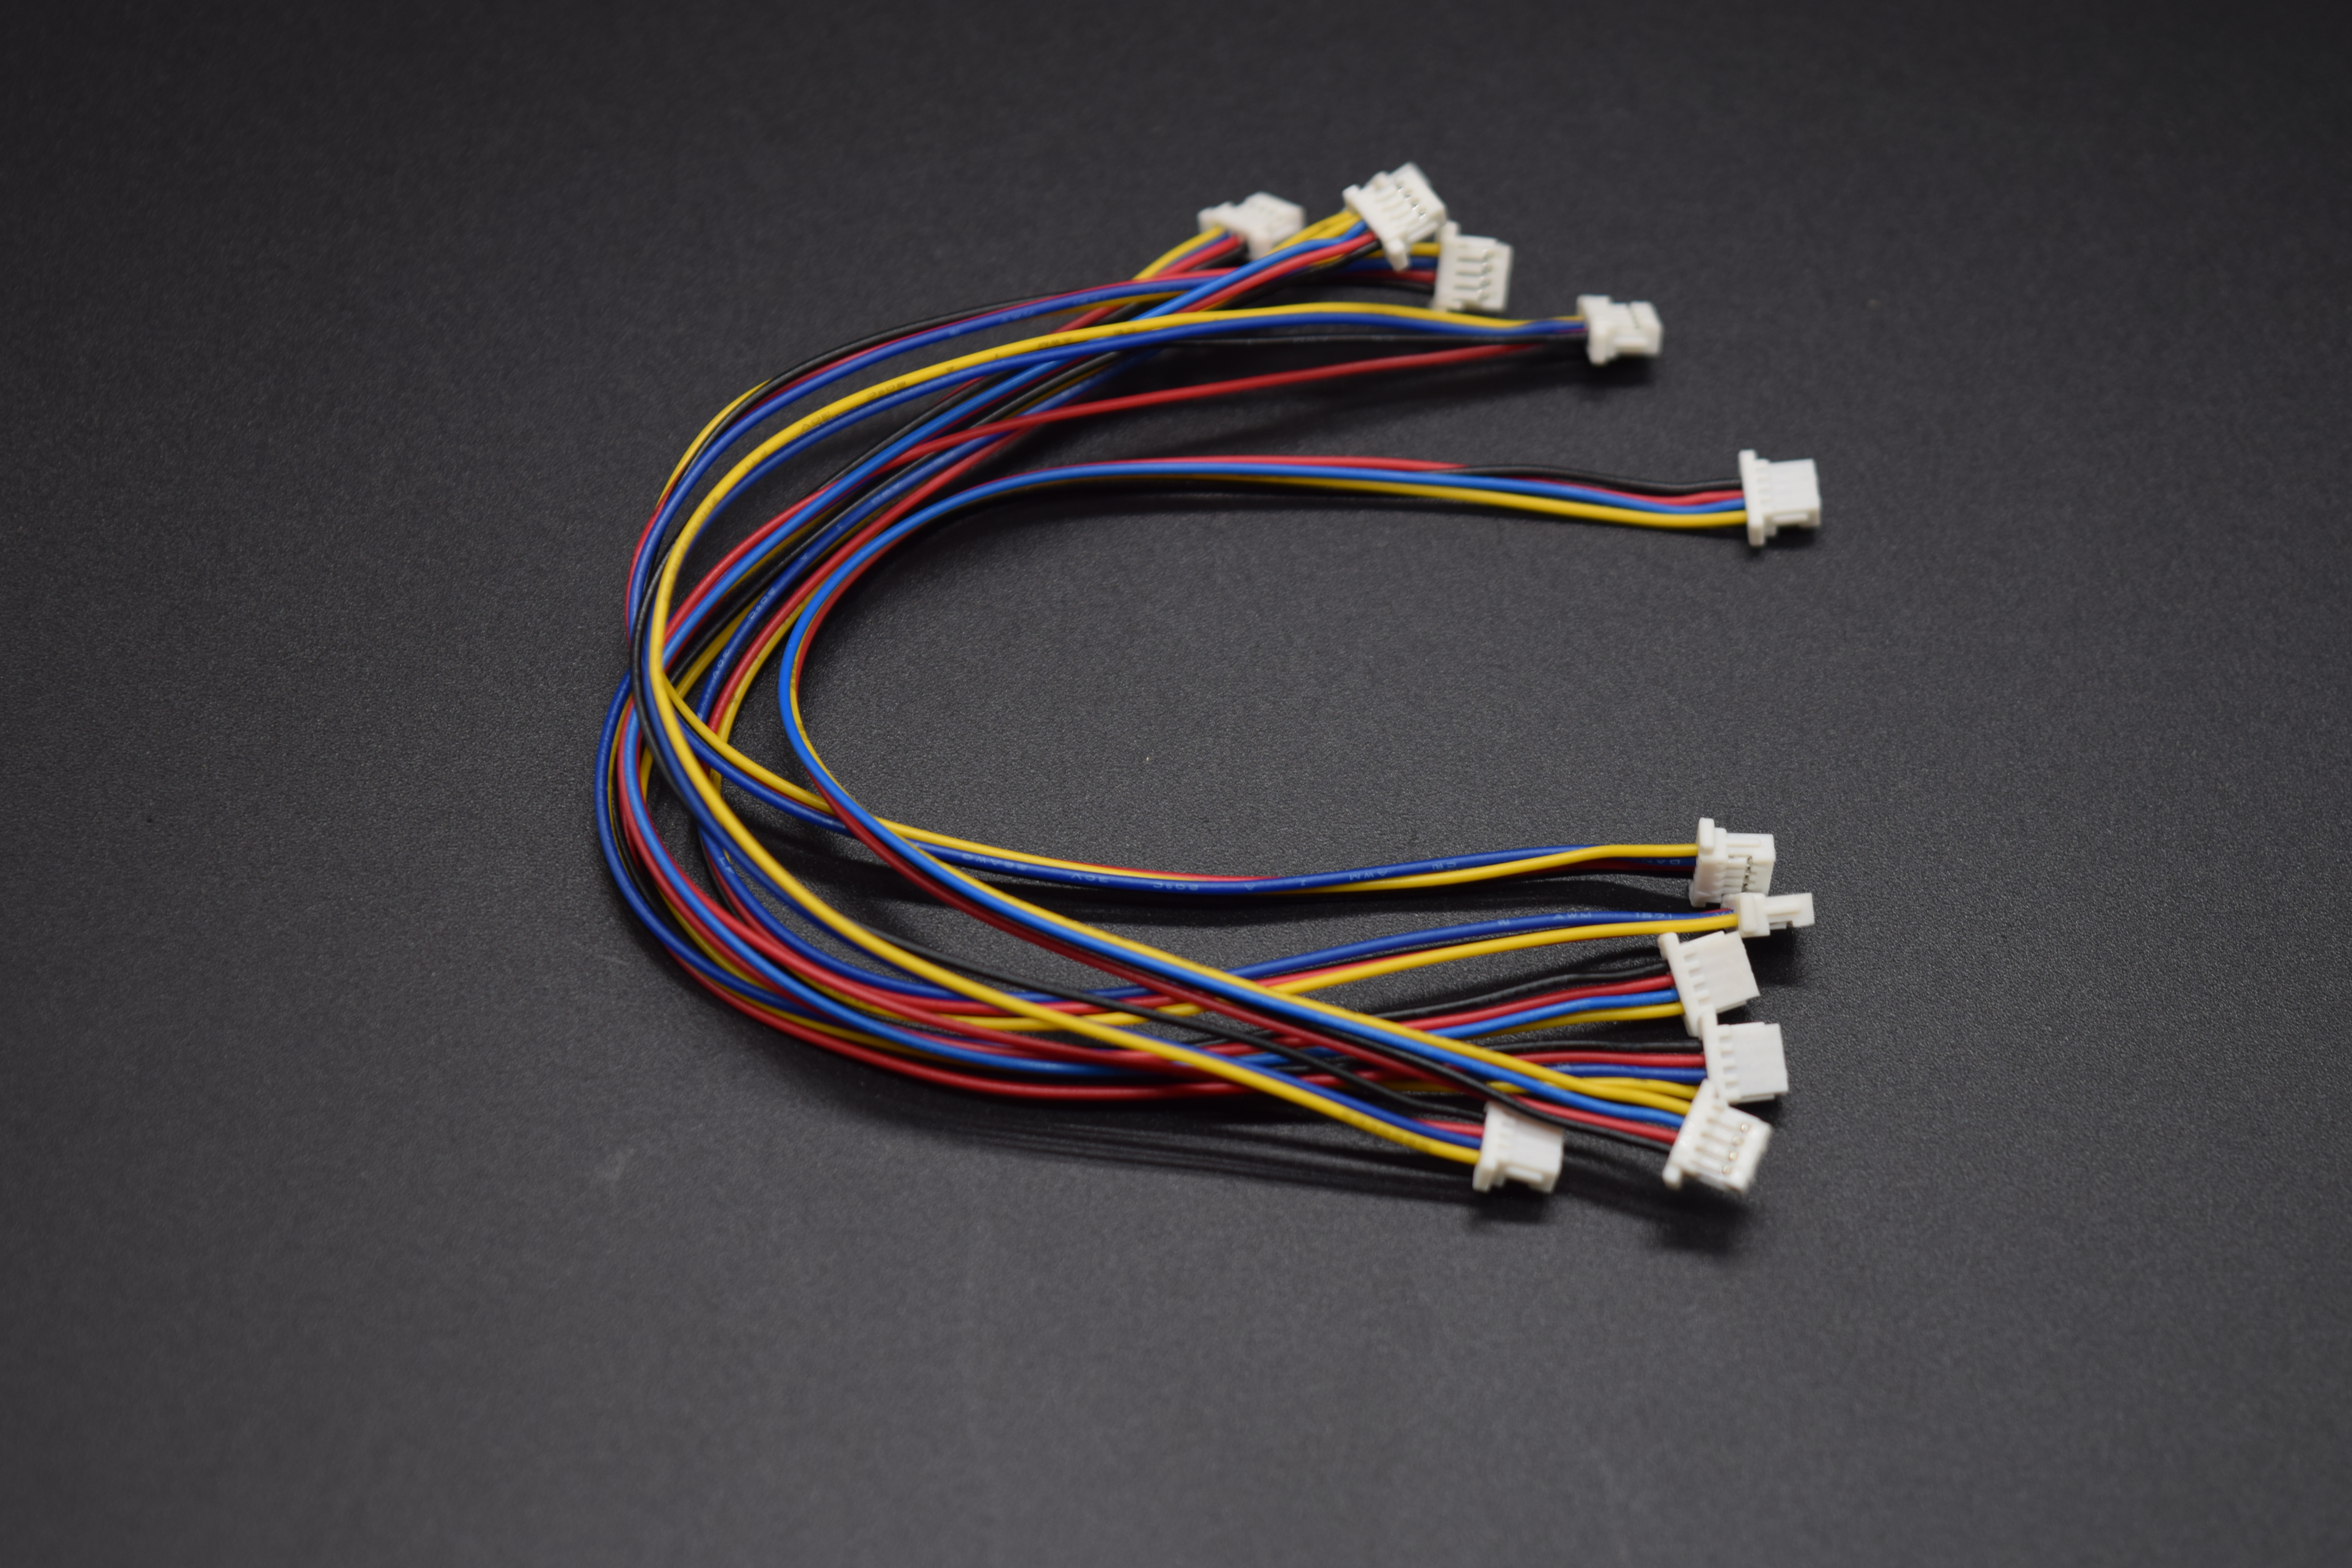
Take the led module connect it to a pin on the Medusa Head for SparkFun ESP32 thing using the Medusa Connector as shown in the photo:
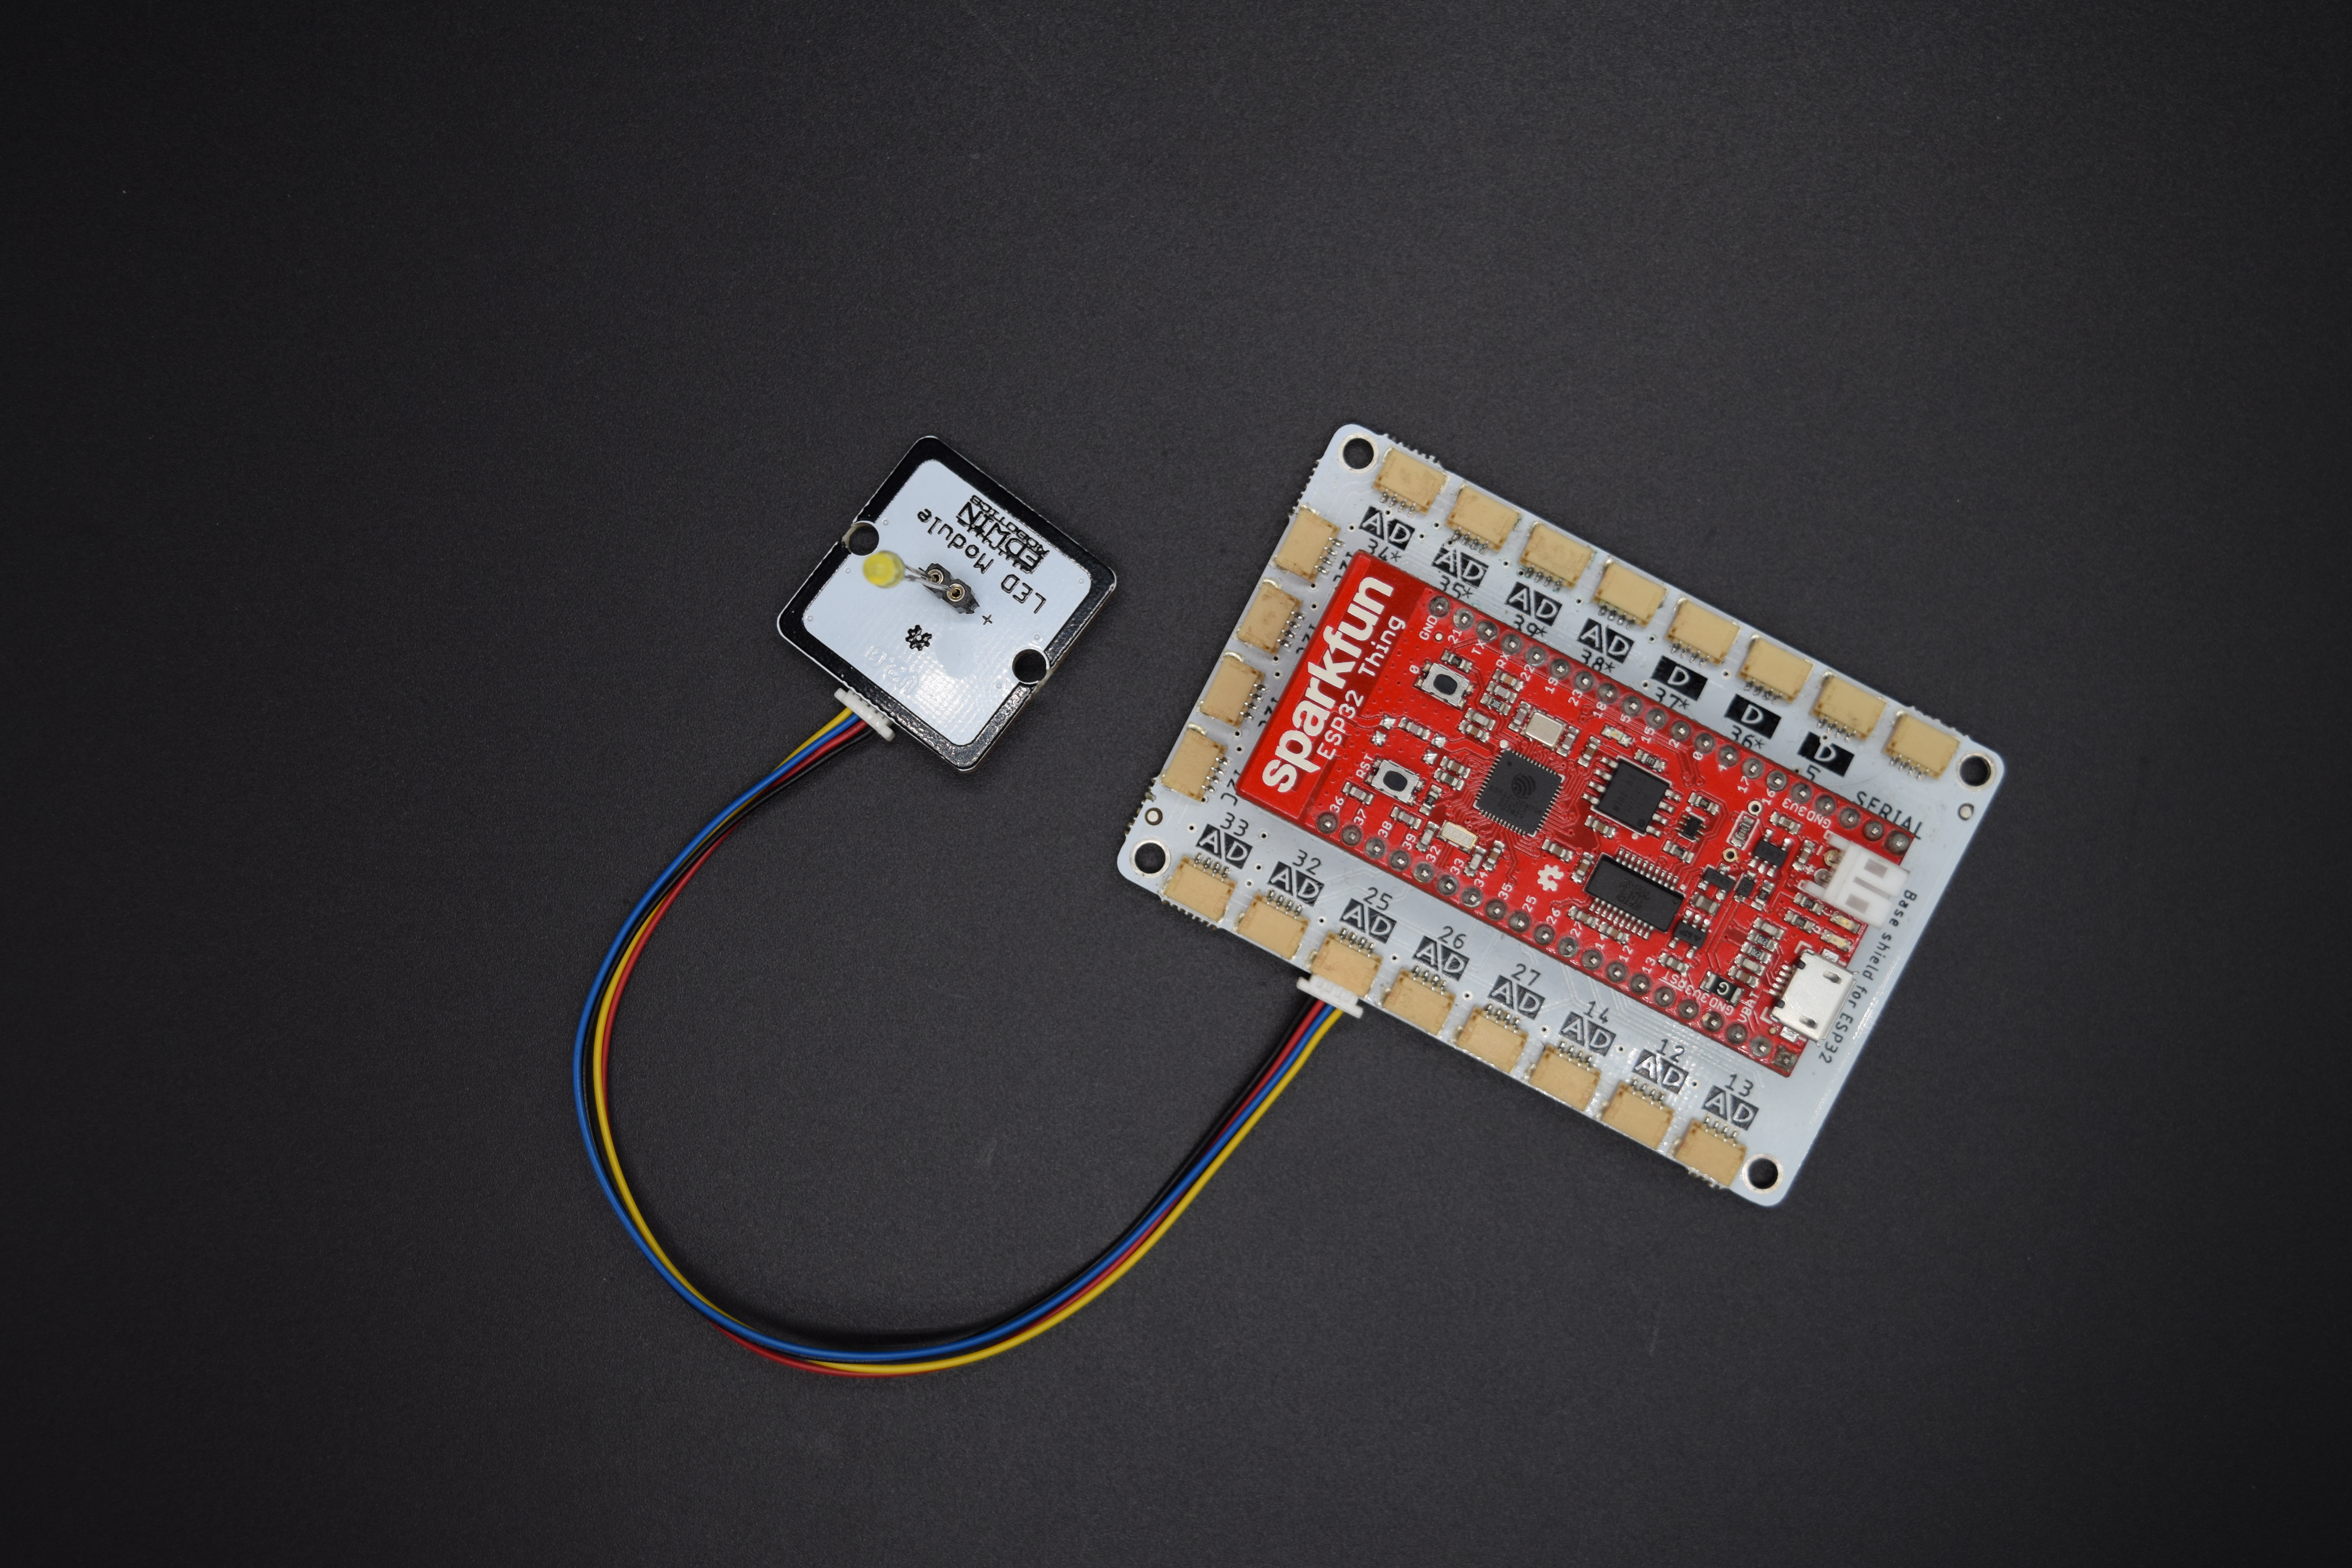
In this case, we will be using the pin number 25 on the Medusa Head.
now let’s create a small blinking on and off of LED for 3 times for 1 second each with a gap of 2 seconds in between. To achieve this duration we will use a Wait block from the Time menu.
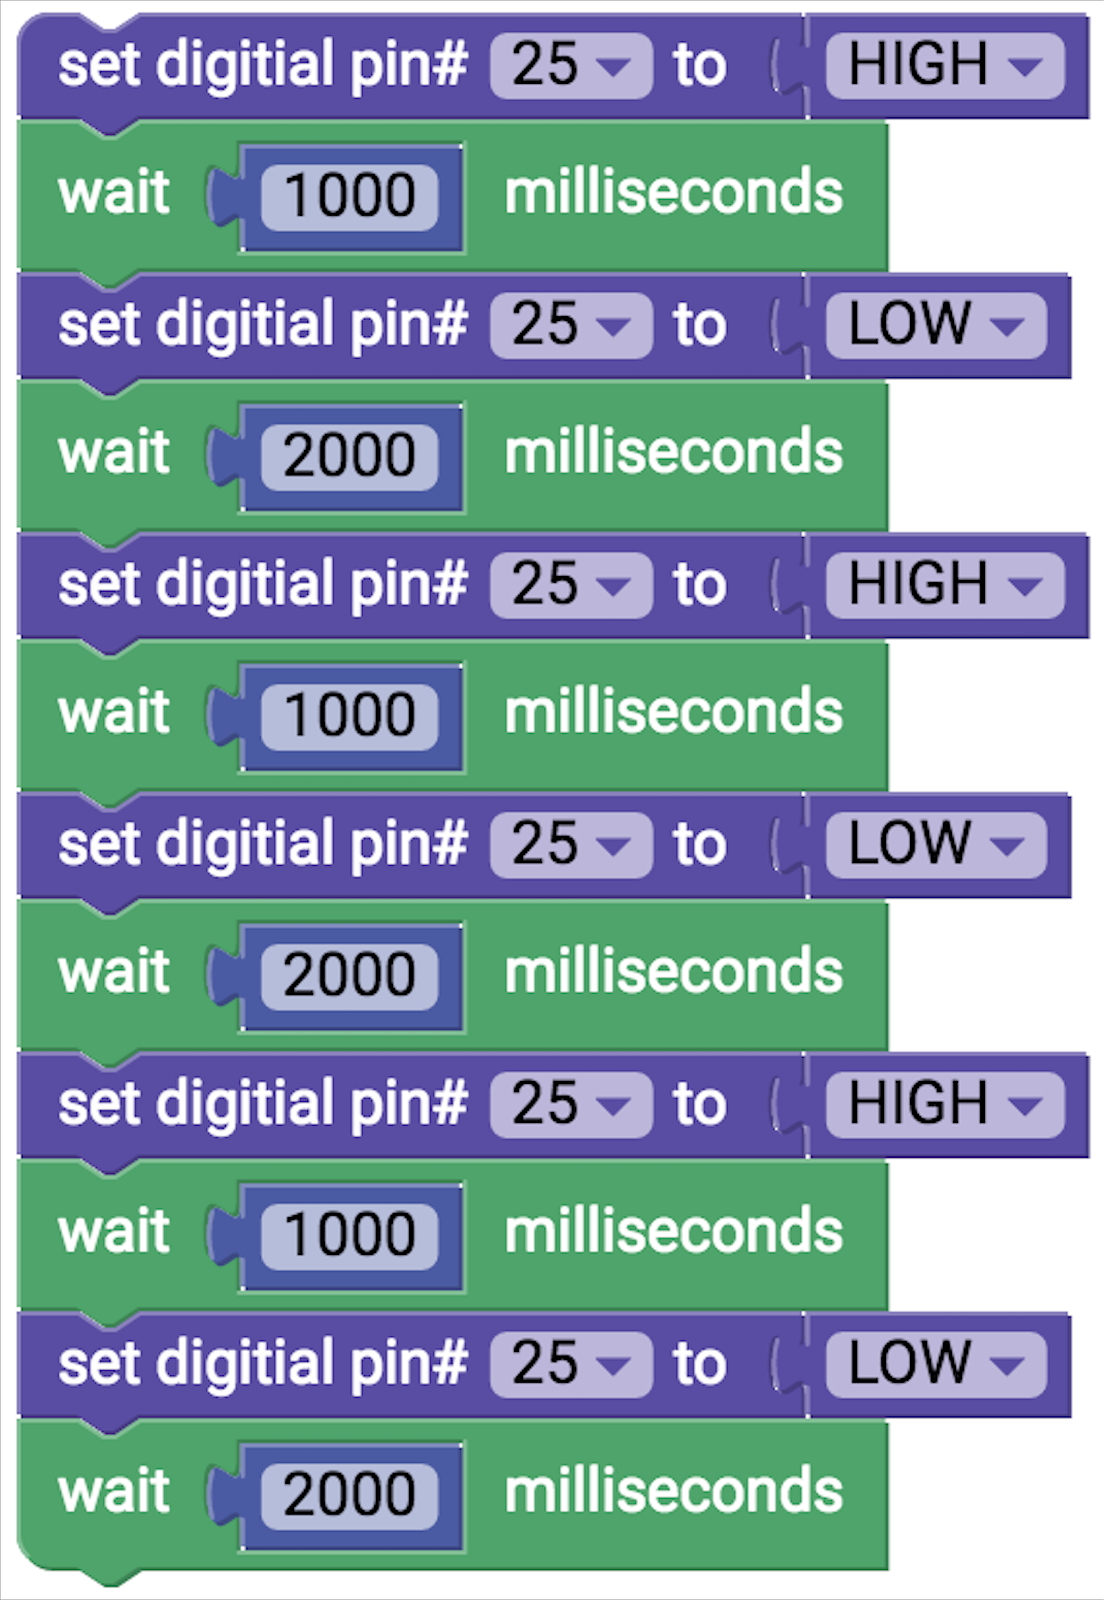
You can also try the following program without wait block, the on and off of LED will be too fast that you can hardly notice the difference.
Go ahead and upload the program on to the board.
While uploading the program there are 2 main things steps, i.e, Under Ardublockly, in preferences Select the Arduino Board option as Spark Fun ESP32 and COM Port as USB serial
Is the LED glowing more than 3 times? Do you think the program is repeating?
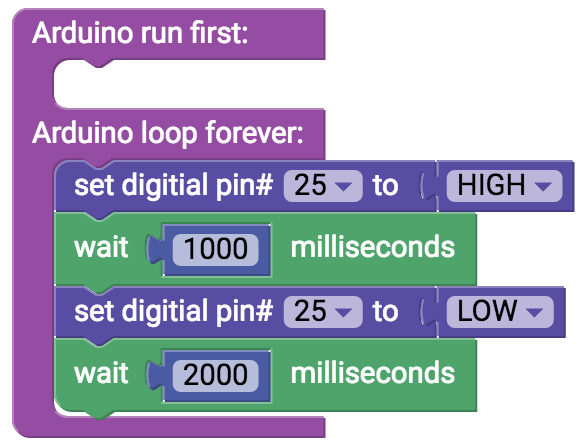
This is because your current program by default is in the forever loop of code. To avoid this we introduce an Arduino start block, which you will be able to find under Functions.
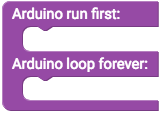
As seen, the start block has 2 parts :
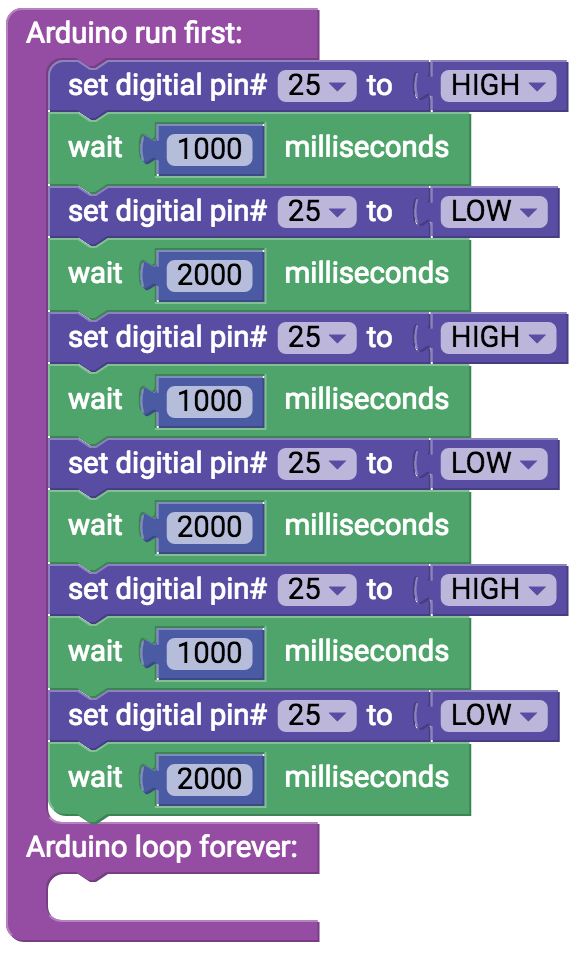
Arduino Run First: Any program written into this executes only once and you will have to reset the microcontroller to execute it for another time. This part serves as the Void Setup () of C programming in which the pin gets initialized.
Arduino Loop Forever: The program written on to this will get executed forever. This part is the void Loop in C programming.
Now the new set of program to avoid repetition will be as follows:
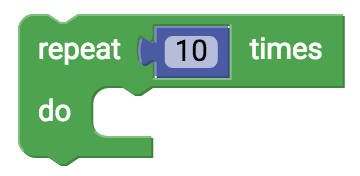
One of the main features of a good program is to avoid maximum unnecessary code. This can be achieved by putting the action of turning high and low into a loop. This is achieved by using a repeat do block found under the loops category. In this block, we can select the number of times the program should run, in this case, 3 times.
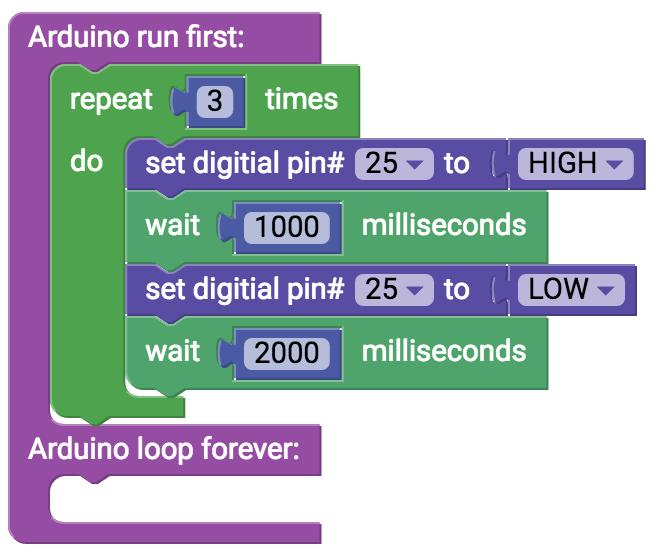
In case you want to repeat the program forever, then you put the on and off command into the loop forever part of the start block.
The following table will help you better understand the function of each block.
| BLOCK | Description |
|---|---|
 | The block for Set Digital Pin does the function of 2 syntax- |
 | Wait block corresponds to delay syntax on to which the programer writes duration in milliseconds. You also have the option of Microseconds wait block under Time Menu. |
 | This block does the function of counting how many times the program should repeat. |
| As explained earlier, this Start block in Functions helps us to define Void setup and Void loop |
Now you can practice the learning from your first project with buzzer as well as Haptic motor module.
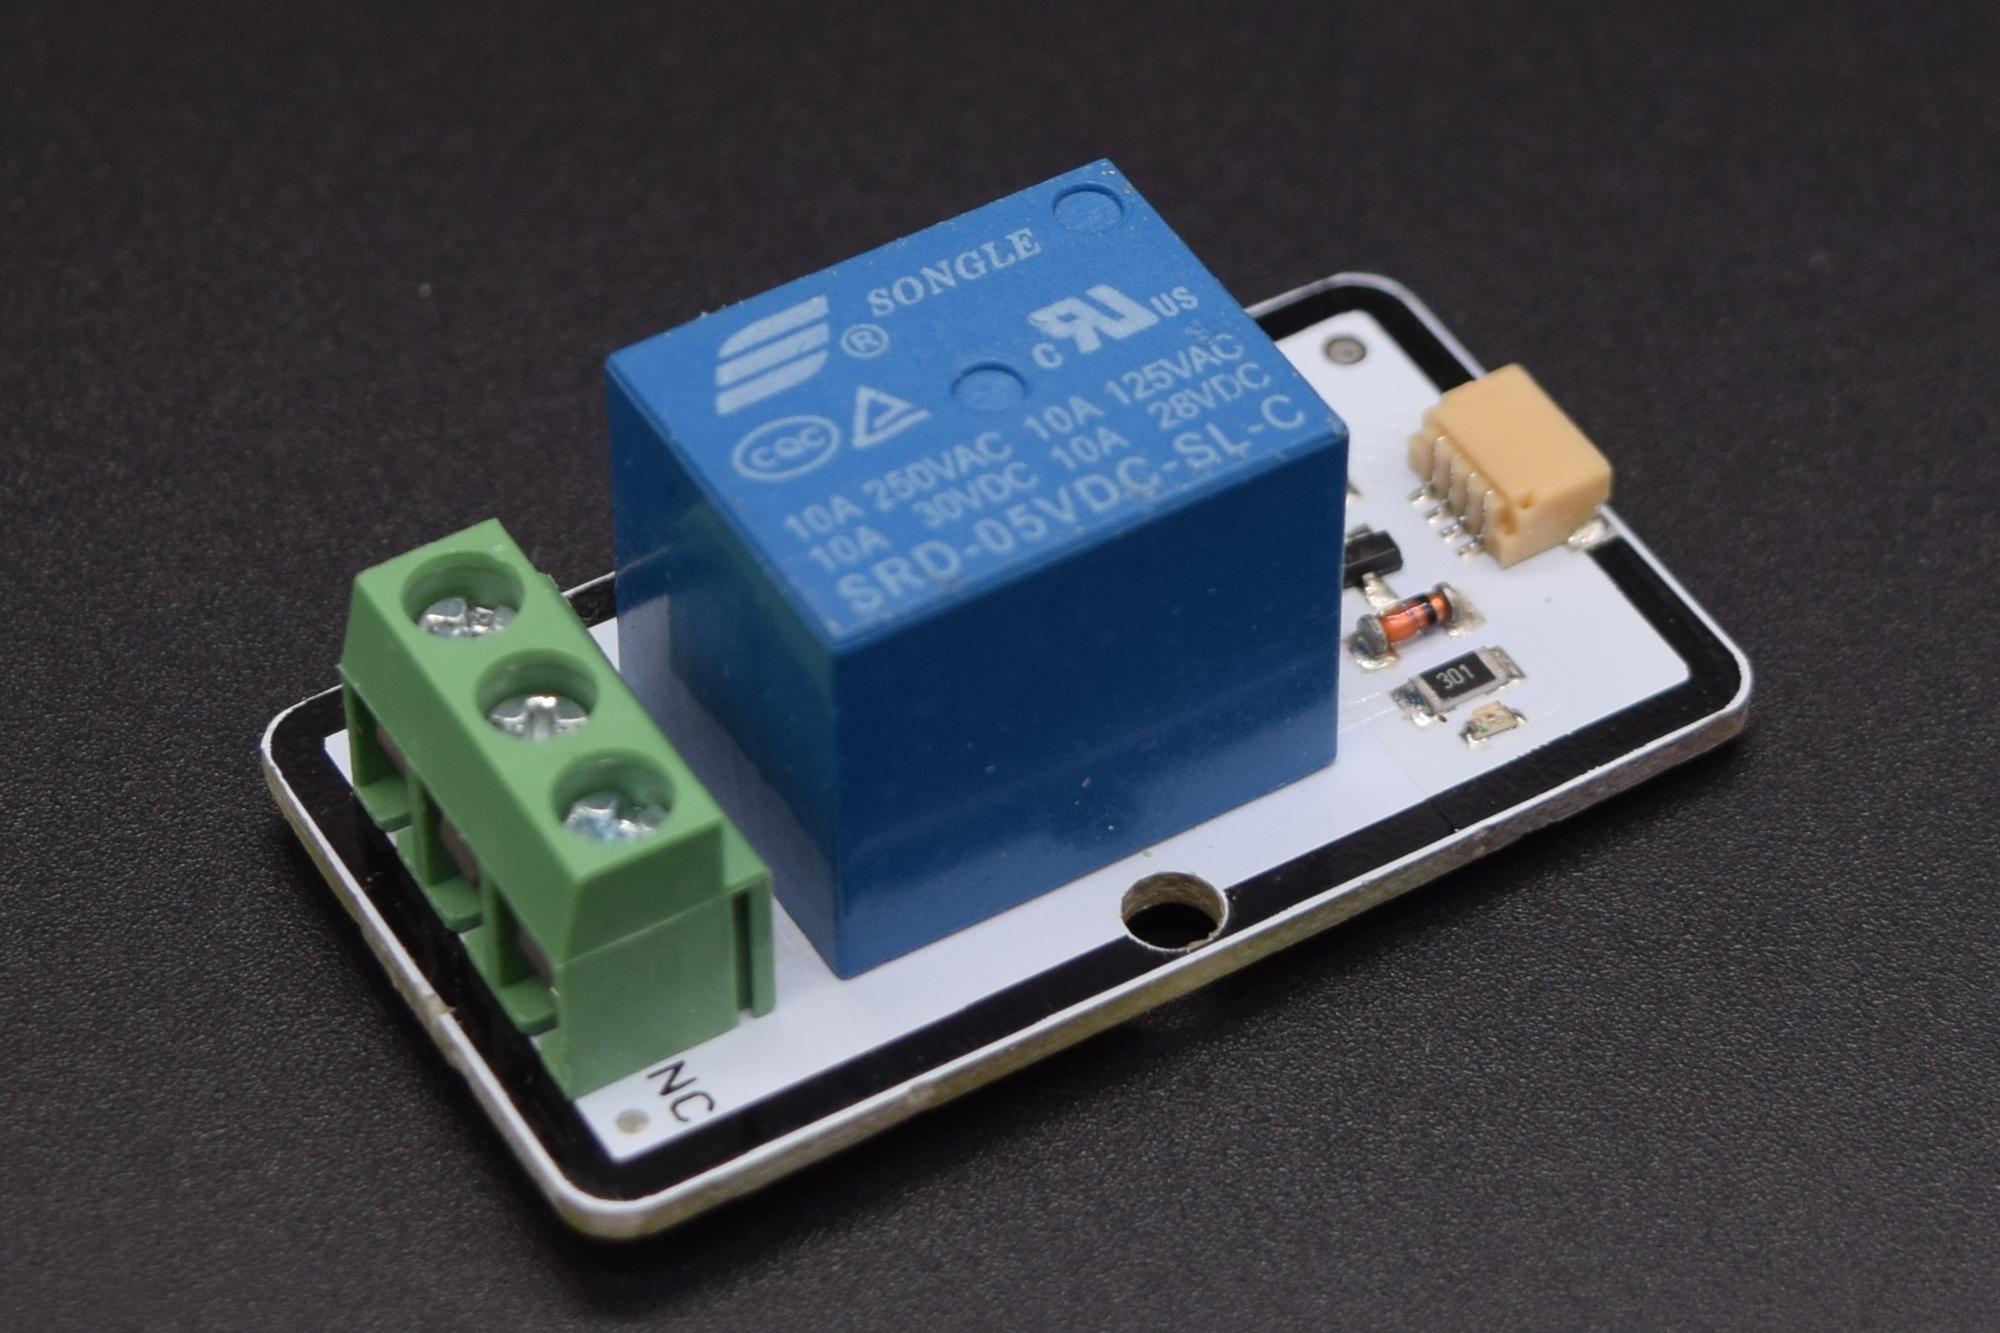
Whenever you want to do projects using elements connected to main power supply we use the Relay. CAUTION: While using the relay, there are high chances of getting electrocuted and may lead to Death. So be careful.
Essentially after this module, you will be able to use the following module with the Medusa Head for SparkFun ESP32 Thing.