HC-06 Bluetooth Module Hookup Guide
Bluetooth is a wireless technology standard for exchanging data over short distances (using short-wavelength UHF radio waves in the ISM band from 2.4 to 2.485 GHz) from fixed and mobile devices, and building personal area networks (PANs). Range is approximately 10 Meters (30 feet). The Bluetooth Module Bluetooth HC-06s with Bluetooth V2.0 have proven themselves to be very reliable and easy to use module, these module uses serial interface for communication , thus very easy to interface with any microcontroller/Computer over RX/TX Lines.
You can refer the list of items we are covering in this hookup guide here:
- Hardware Needed
- Board Description
- Pin Description
- Jumper Description
- AT Commands and Arduino Interface Code
- Datasheets
Hardware Needed:
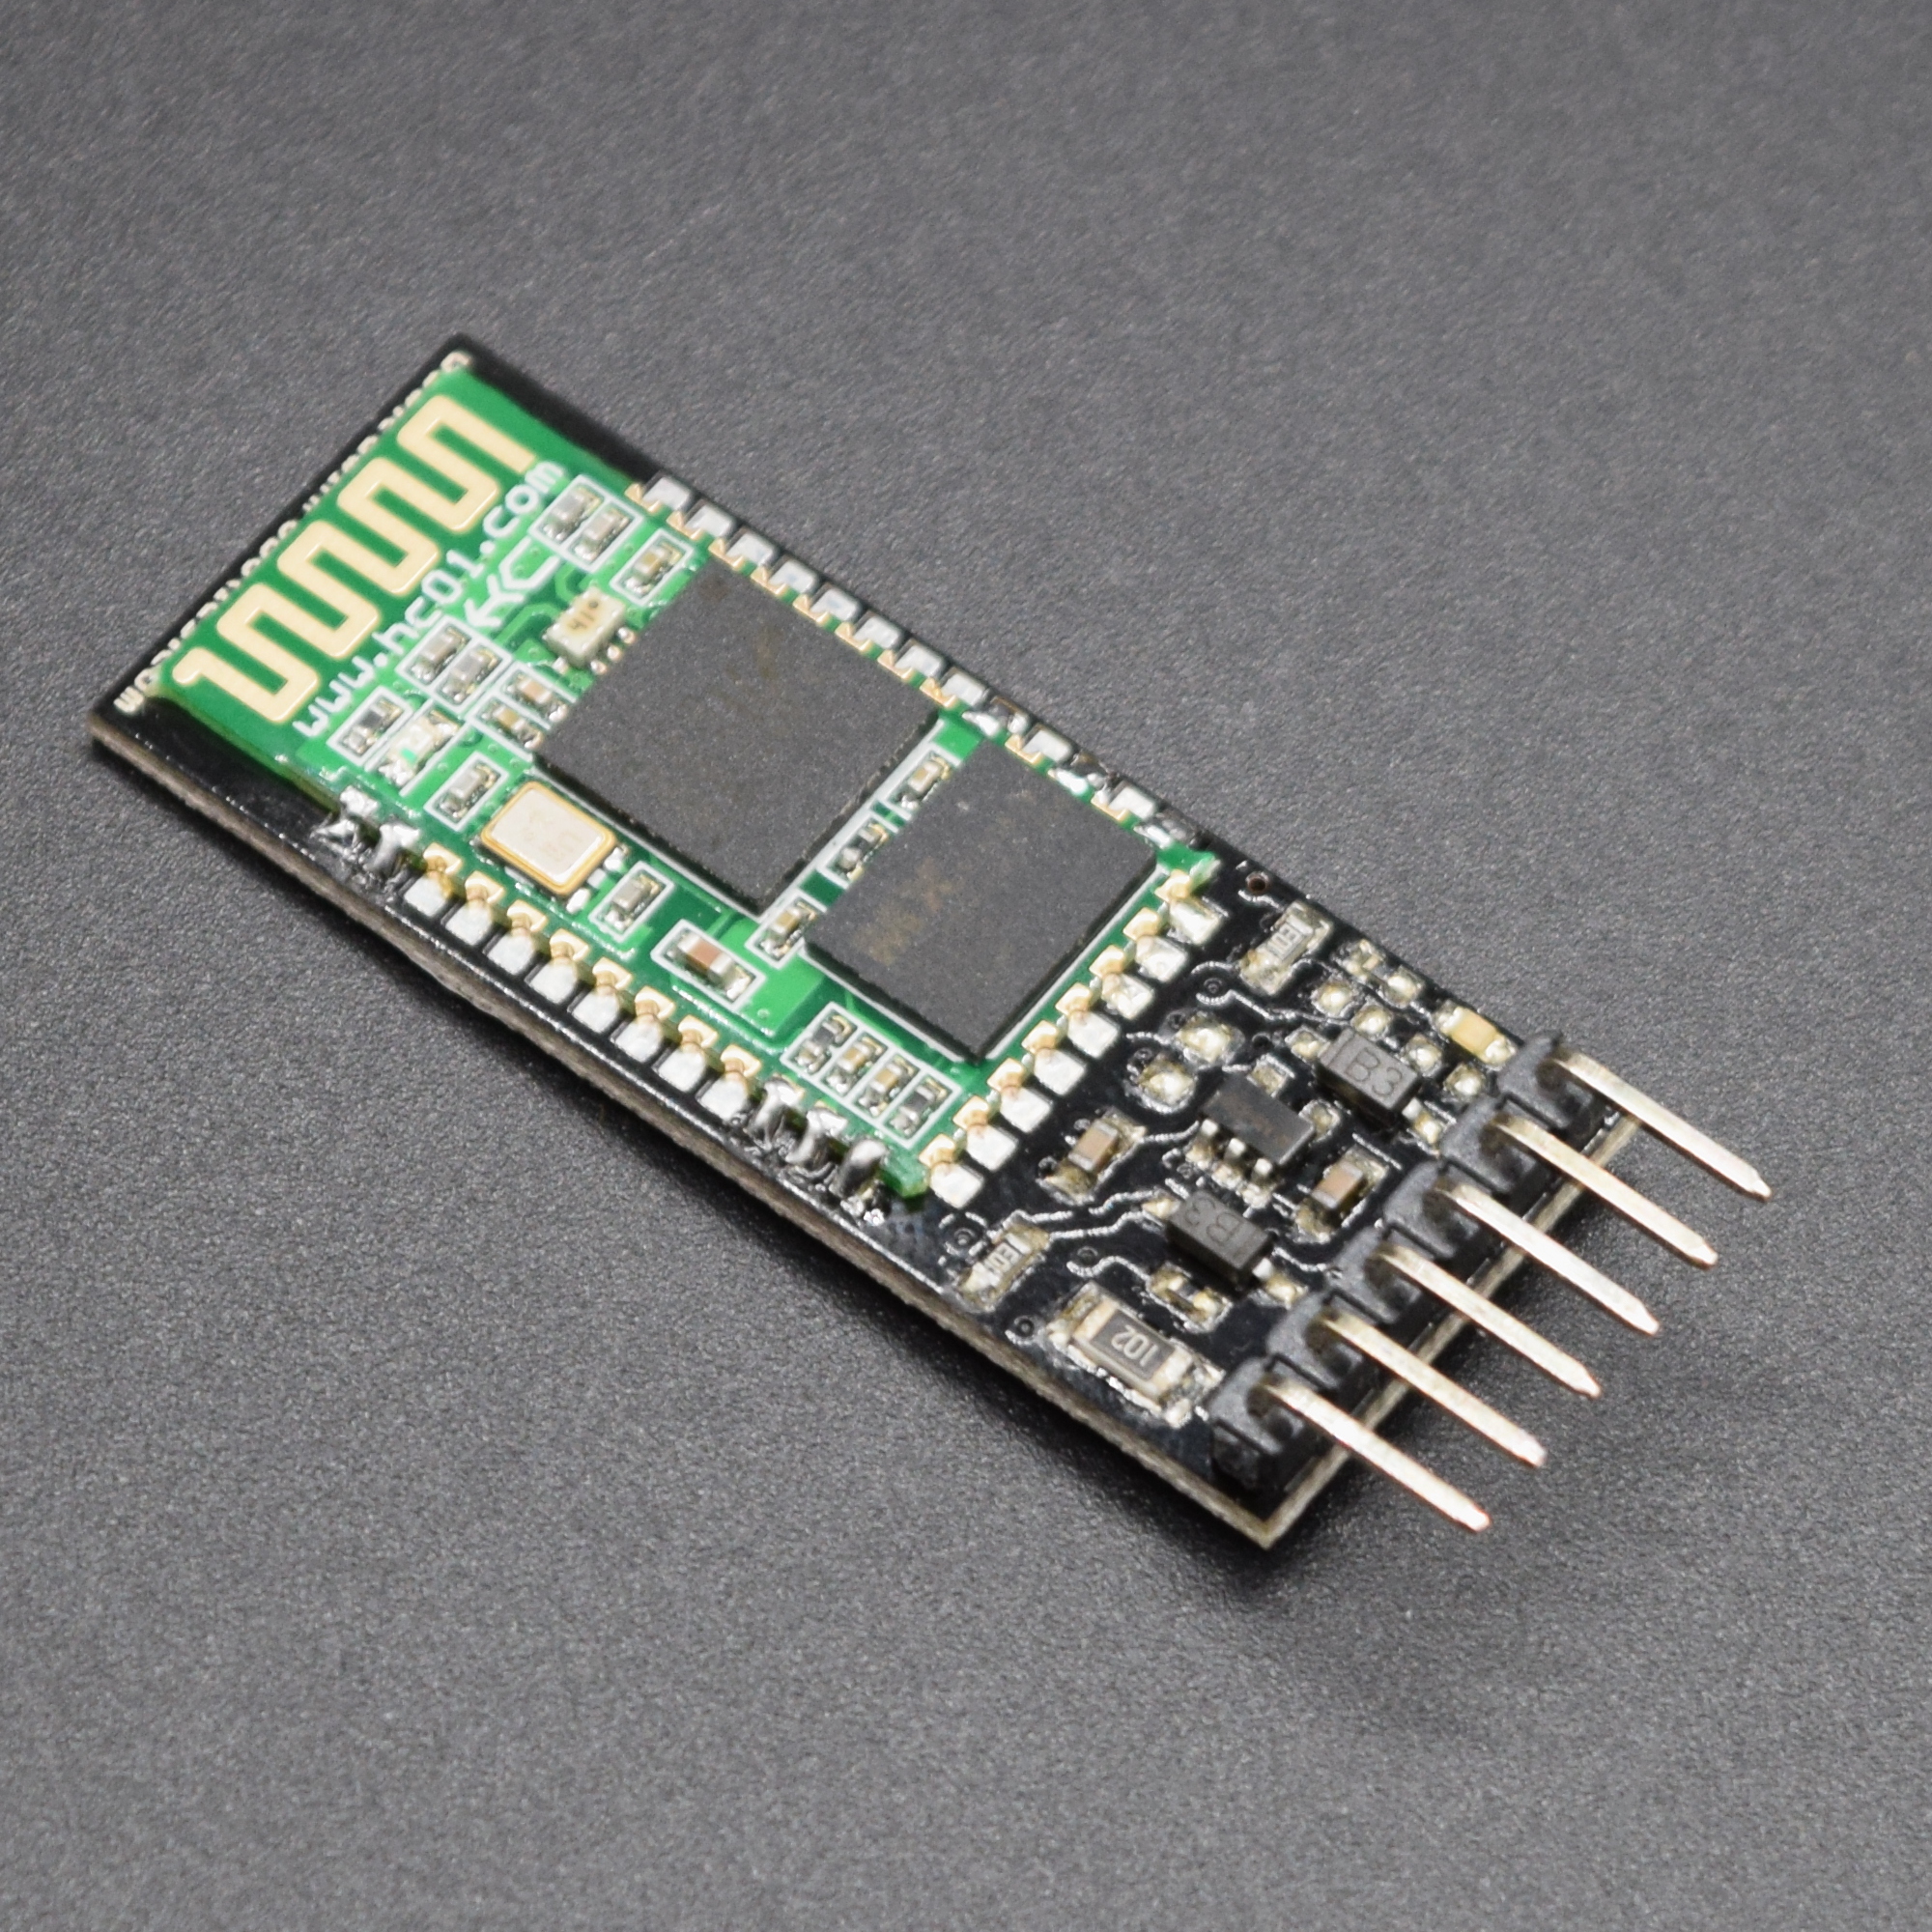 Edwin Robotics Bluetooth Module - HC06 Edwin Robotics Bluetooth Module - HC06 | 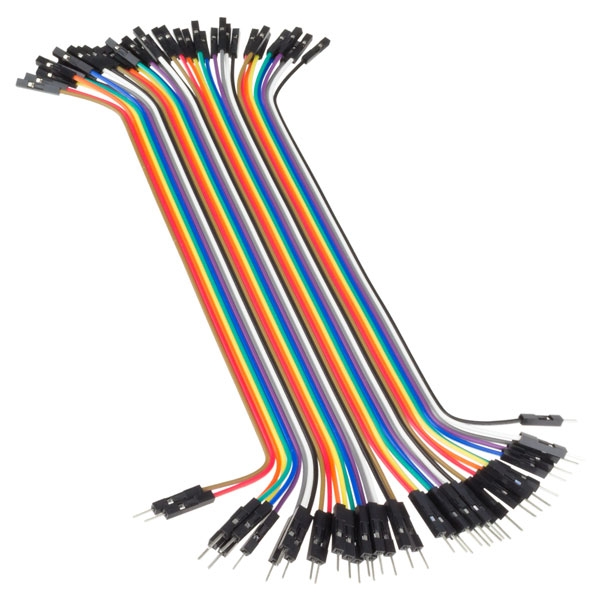 Male-Female Jumper Wires Male-Female Jumper Wires |
Board Description:
The HC-06 modules are based on the Cambridge Silicon Radio BC417 2.4 GHz Bluetooth Radio chip. This is a complex chip which uses an external 8 Mbit flash memory. These low-cost Bluetooth Sub-modules work well with Arduino and other Microcomputers. HC-06 is a Slave only device.The module has two modes of operation, Command Mode where we can send AT commands to it and Data Mode where it transmits and receives data to and from another Bluetooth module. By default the device was in Command mode and needs to pair with some device to get it into data mode.

Edwin Robotics Bluetooth Module – HC06
| Bluetooth version | v2.0 + EDR |
| Firmware | hc01.comV2.0 (It does not use Linvor firmware) |
| Default baud rate | 9600 |
| Default PIN | 1234 |
| Default NAME | HC-06 |
| Status LED | Blue (Top Left) |
| Power LED | Red (Bottom Right) |
There are two LED’s on board for indication, refer the diagram below, for better idea:
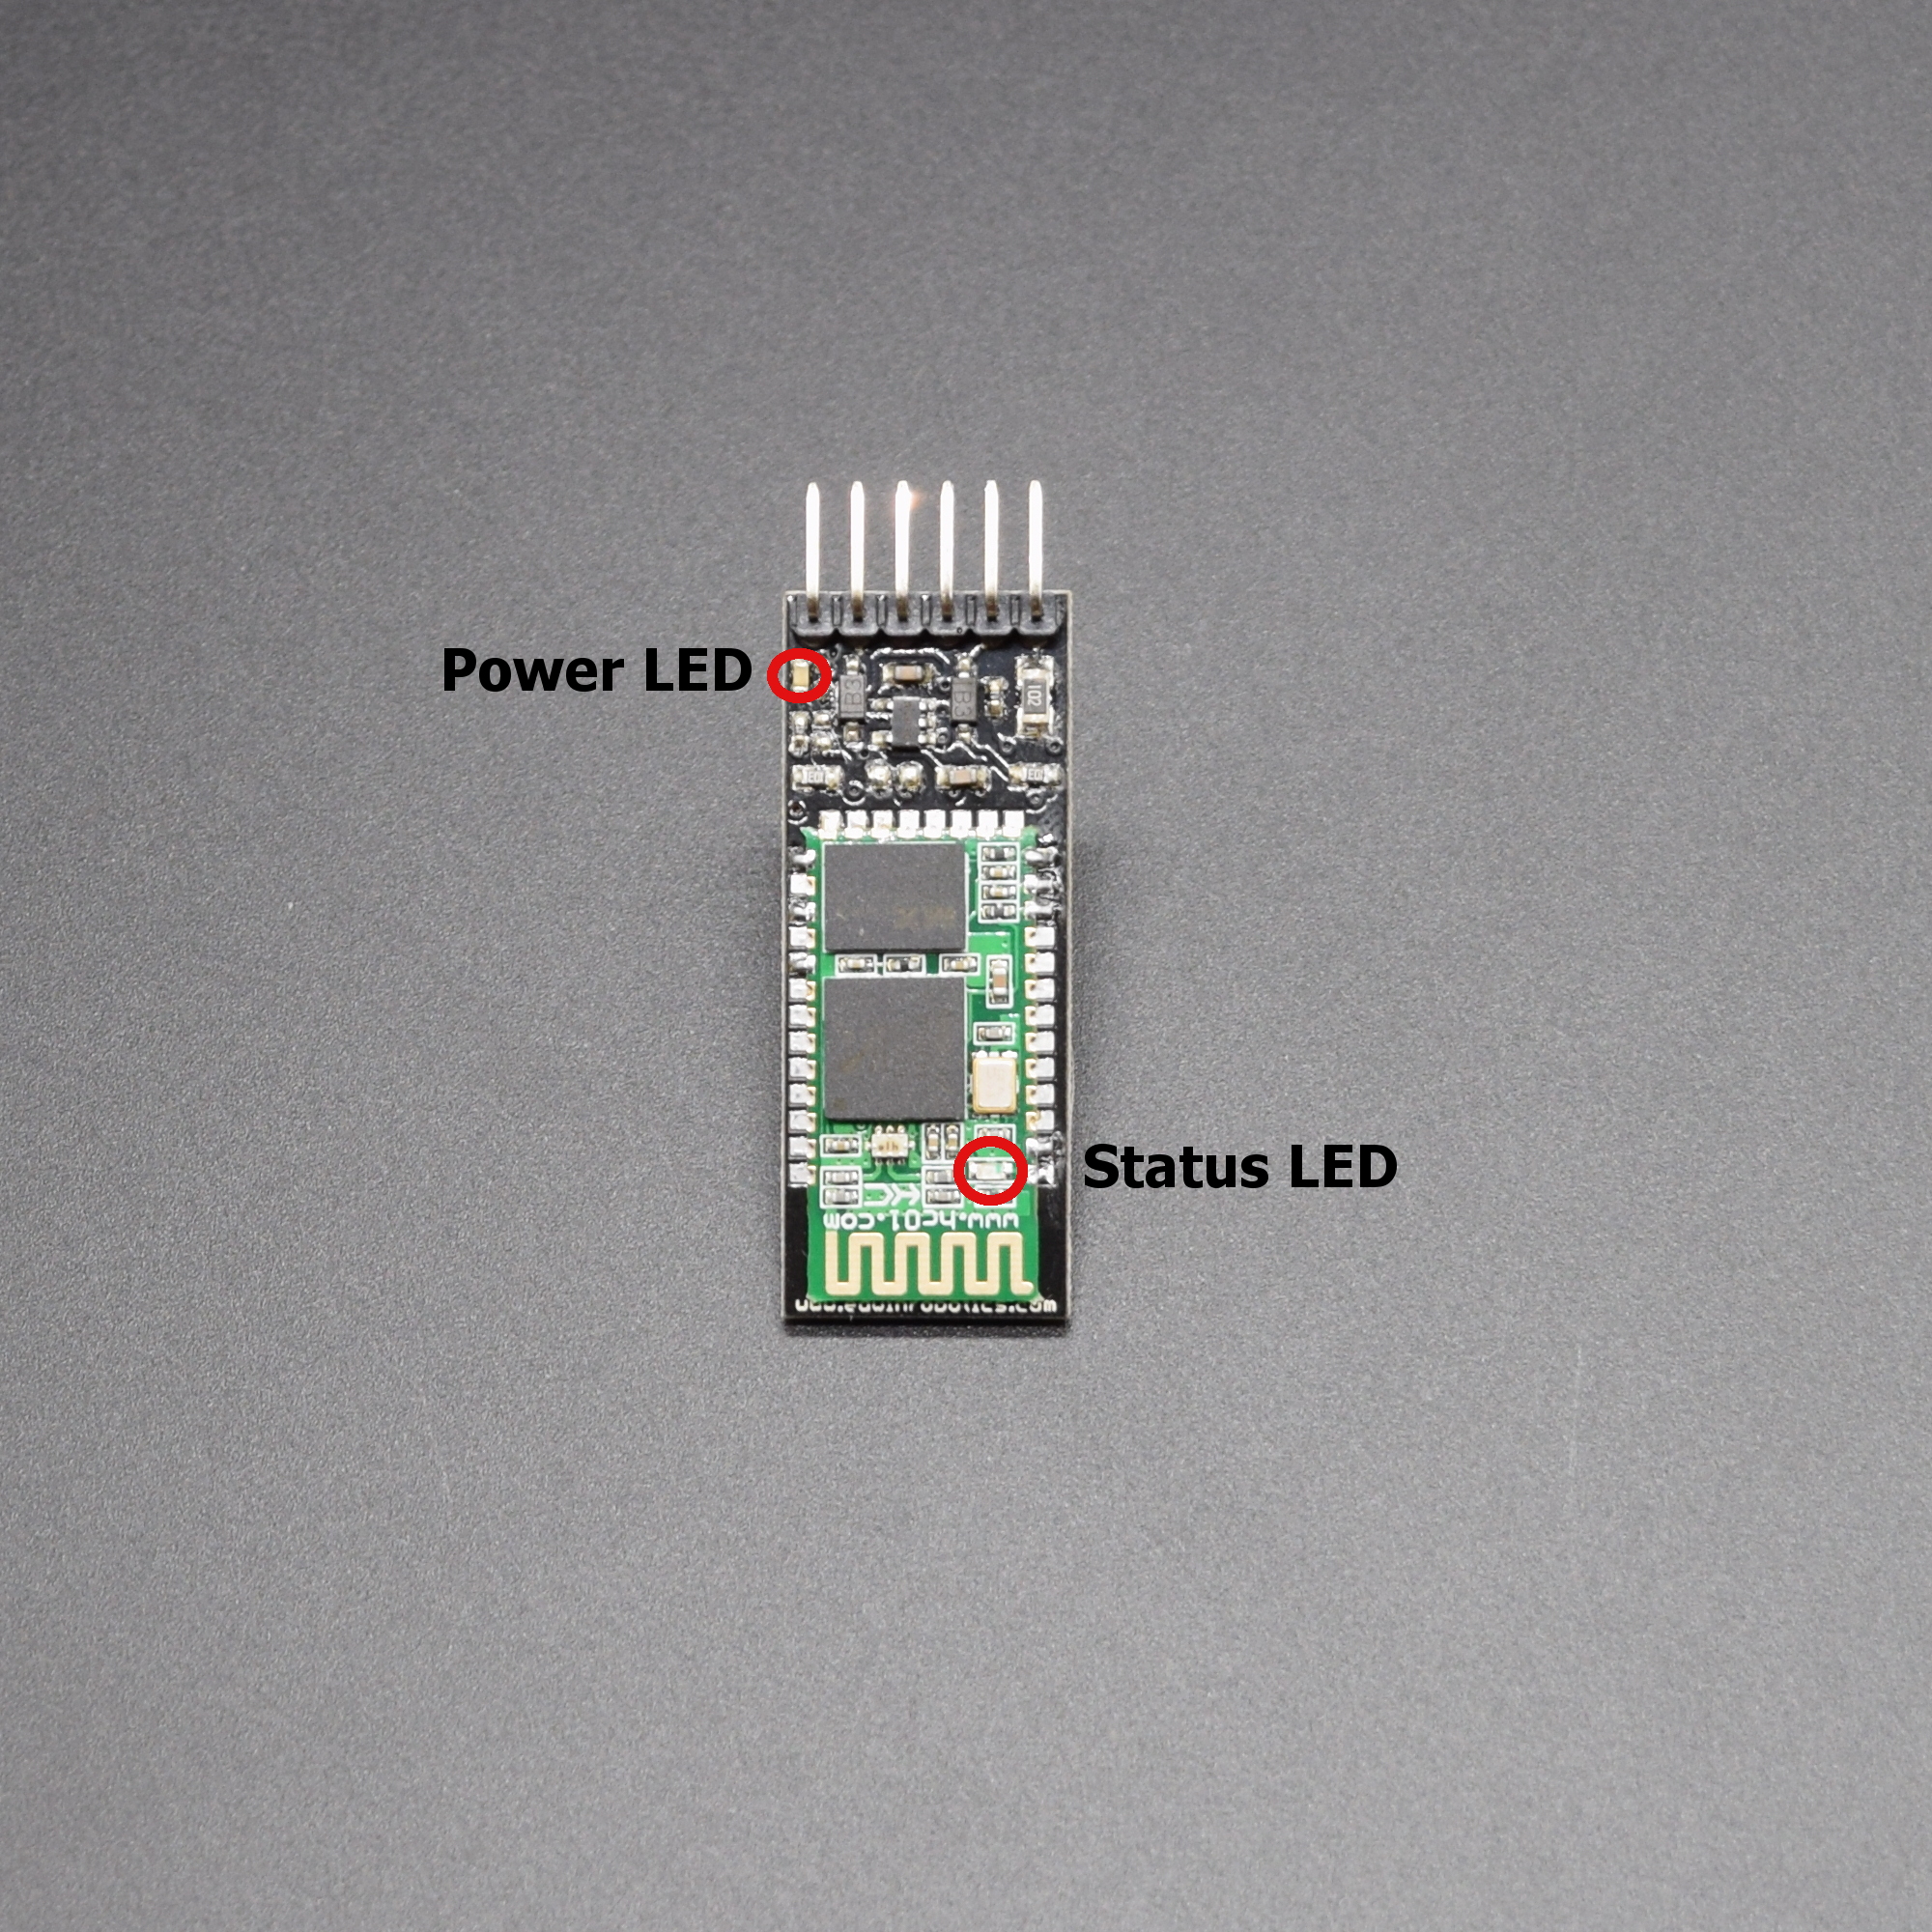
LED Indication
Pins/Headers:
Board needs 4-lines to communicate most of the times, i.e Vcc, Gnd, RX and TX pin. There are two additional pin onboard, one is Key pin and the other is Reset pin, this Reset pin can be used to send reset signal from microcontroller to reset the bluetooth module. Refer the table and image below in detail:

Silkscreen
| Pin | Description |
|---|---|
| RST | Reset input (Logic Low resets the Module) |
| VCC | Supply input 3.3V to 5.5V Input |
| GND | Ground |
| TXD | Transmit Data (Connect RX line from other peripheral here) |
| RXD | Receive Data (Connect TX line from other peripheral here) |
| KEY | This function is intended to use with Master module to clear the memory and search for new slave device |
Jumper’s:
There are Jumpers provided on the bottom side of the module, refer the below image and table for better idea:
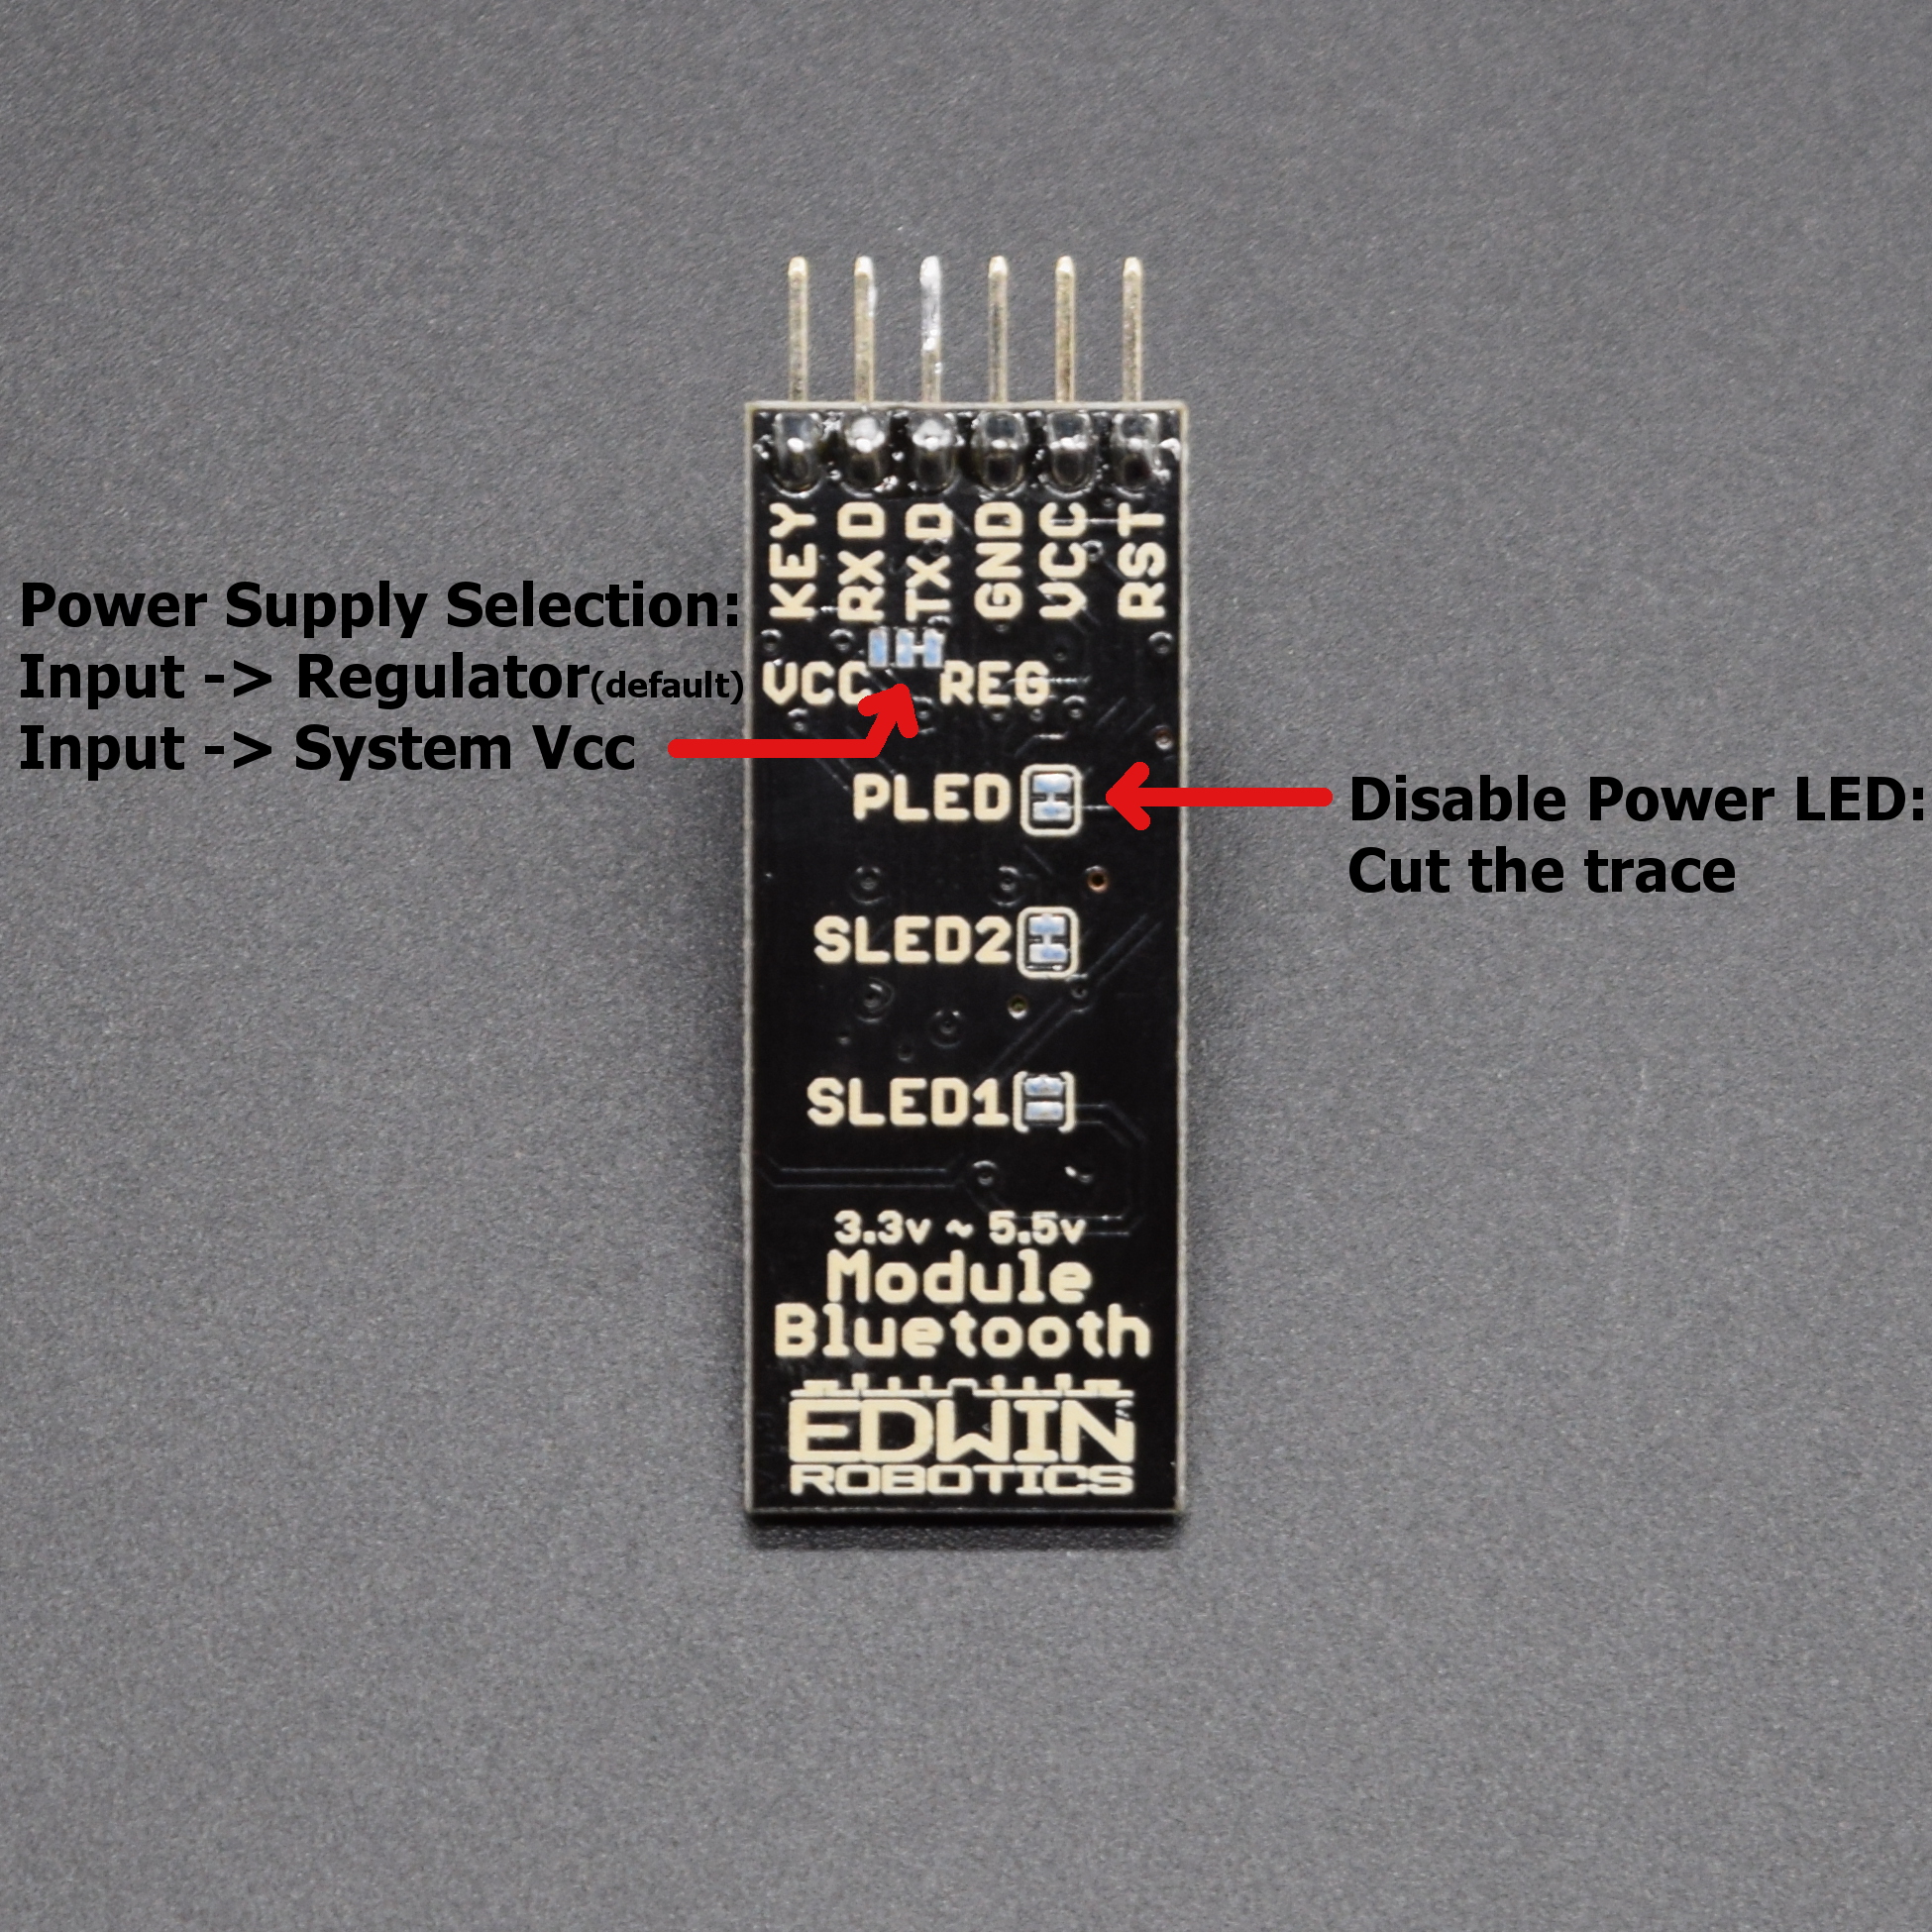
Jumper Settings
| Jumper | Description |
|---|---|
| VCC/REG | Its a two way jumper, to Use/ bypass regulator. By default: VCC connected to Regulator. Cut the trace and solder the center pad with VCC to supply 3.3V Supply to daughter board directly. |
| PLED | Cut the trace to disable Power LED |
| SLED2 | Cut the trace to disbale status LED on Mother Board (Blue LED next to Power LED, not provided on some boards) |
| SLED1 | Dedicated for future purpose/Other boards. |
AT Commands:
The bluetooth module supports some limited commands set, which you can refer from the datasheet, we had addded the code below, to get the AT command interface working on any Arduino board. All the Supported commands are well documented in the code below, make sure of following things:
- nl/cr line endings not required in the serial window.
- AT commands are required to be in upper case
- Default Serial Communication baud rate: 9600
/**********************************************************************************
AT_Command_Interface.ino

Description:
  Sample AT Command Interface code for Arduino and HC06 Bluetooth Module

Tutorial Link:
  learn.edwinrobotics.com/hc-06-bluetooth-module-hookup-guide

Created by:
  Abhishek Nair @ Edwin Robotics
  Feb 9th 2017

Distributed as-is; no warranty is given.
**********************************************************************************/
#include <SoftwareSerial.h>

SoftwareSerial mySerial(2, 3); // RX, TX

void setup() {

Serial.begin(9600);
Serial.println("------------------------------------------------------------------------------------------");
Serial.println("             Edwin Robotics HC06 Bluetooth Module Serial Interface ");
Serial.println("------------------------------------------------------------------------------------------");
Serial.println("                 Connect Bluetooth Module RX -> Arduino pin 3 ");
Serial.println("                 Connect Bluetooth Module TX -> Arduino pin 2 ");
Serial.println("------------------------------------------------------------------------------------------");
Serial.println("");
Serial.println("Entered AT command Mode, please Enter AT Commands from the list of supported commands:");
Serial.println("******************************************************************************************");
Serial.println("AT              > connection test command. Returns OK");
Serial.println("");
Serial.println("AT+BAUDx        > sets the baud rate to respective board rate for entered 'x' value(refer values below) and returns OKBaud_Rate");
Serial.println("                   1: 1200  2: 2400  3: 4800  4: 9600  5: 19200  6: 38400  7: 57600  8: 115200  9: 230400  A: 460800  B: 921600  C: 1382400");
Serial.println("");
Serial.println("AT+NAME(myName) > sets the name to (myName), returns OKsetname");
Serial.println("");
Serial.println("AT+PIN9999      > changes the PIN to 9999, returns OKsetPIN");
Serial.println("");
Serial.println("AT+VERSION      > returns the firmware version : hc01.comV2.0");
Serial.println("");
Serial.println("AT+LED0         > turn off the blue LED, returns LED OFF");
Serial.println("");
Serial.println("AT+LED1         > turn on the blue LED, returns LED ON");
Serial.println("");
Serial.println("AT+PN           > sets no parity");
Serial.println("");
Serial.println("AT+PE           > sets even parity");
Serial.println("");
Serial.println("AT+PO           > sets odd parity");
Serial.println("******************************************************************************************");
Serial.println("");

mySerial.begin(9600);
delay(300);
Serial.println();
Serial.println("Note: if 'Version: hc01.comV2.0' is not printed below, make sure that your connections are correct or your module is not connected to any other device,try restarting the device/Serial Window");
Serial.println("----------------------------------------------------------------------------------------------------------------------------------------------------------------------------------------------");
Serial.print("Version: ");
mySerial.write("AT+VERSION");
}

void loop()
{
  if (mySerial.available())
    Serial.write(mySerial.read());

  if (Serial.available())
    mySerial.write(Serial.read());
}
Datasheets:
Download English Datasheet : In this datasheet, the photo would appear to be of an older version but the commands, pins and functionalities are same.
Download Chinese Datasheet
Other command which we did not added in the code but can be found in the data sheet is the ROLE command:
AT+ROLE=S puts the module in to SLAVE mode, returns OK+ROLE:S
AT+ROLE=M puts the module in to MASTER mode, returns OK+ROLE:M
We did not seen any affect or usage of this command, we will update this section , if there is some information on this part from the manufacturer.