RetroPie Install Guide
Good to see that lots of people are interested and looking forward for Raspberry pi, to have the feel of old gaming experience. We already wrote one blog on Retro Gaming machine using Raspberry pi, we mentioned there how to download RetroPie Image and ROM and Install it in your system. We will recommend you to go through Retro Gaming machine using Raspberry pi Blog
This blog is targeted towards people who might not want Raspberry pi to be dedicated just for Retro Gaming Purpose or whom already have our Raspberry Pi Gaming Kit or whom having Raspberry loaded with Raspbian. Here we mentioned steps on how to install RetroPie on a Raspberry pi running Raspbian. This setup will give you flexibility to use any one system(Raspbian or RetroPie) as per their need, i.e they can run RetroPie without uninstalling Raspbian and choose between any one at a time to work with. We will show you how to set RetroPie EmulationStation as default environment and from their if you want you can skip the RetroPie and go to either terminal or Raspbian desktop environment.
To start with, we will recommend you to have our Raspberry Pi Gaming Kit ready with you, its comes with SD Card preinstalled with latest Raspbian on it. Note: If you aren’t comfortable with the terminal you would be wise to just use the RetroPie SD image as described in this Retro Gaming machine using Raspberry pi Blog. Follow the steps mentioned to get it working.
- Download RetroPie Setup script
- Download and Install Putty to run Command via computer
- Set EmulationStation as default boot option (video)
- Download ROM
- Install ROM
- Configure Gamepad
- References
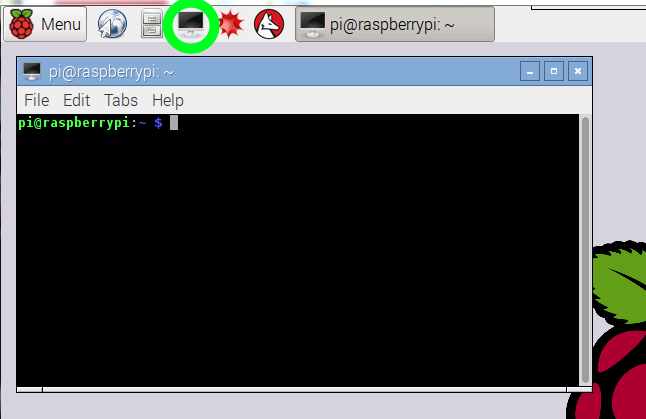
1) Open the command terminal, refer the following image if you don’t have idea where is it:
2) Download RetroPie Setup Script:
cd
git clone --depth=1 https://github.com/RetroPie/RetroPie-Setup.git
All you need to do is copy the mentioned command line by line and paste it(mouse right click) to the terminal. If you are wondering how to copy paste this, then you can either open this blog in the Raspberry pi browser or It is recommended to use putty on your computer to access the Raspberry Pi terminal.
Download and Install Putty to run Command via computer:
Download Putty from here and install it, then you need to enter you Raspberry Pi IP address in the space provided, refer the following image for the same:
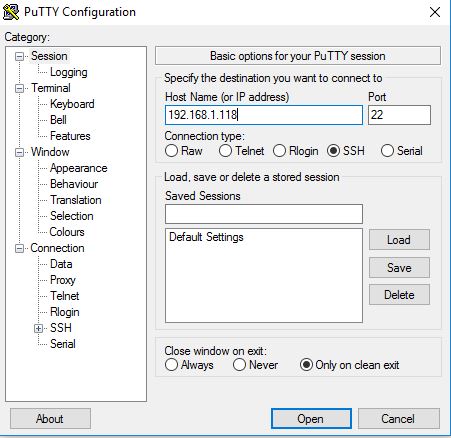
Raspberry Pi IP address can be found out by running the ifconfig Command in your LX terminal. Make Sure that your Raspberry Pi is connected to Wifi or ethernet before doing this step.
3) Once the Script is downloaded you need to execute the script as follows:
 cd RetroPie-Setup

chmod +x retropie_setup.sh

sudo ./retropie_setup.sh
4) Make sure to run command line by line as shown, refer the video shown below on how to install the RetroPie
5) Set EmulationStation as default boot option (video): It will take some time to install the RetroPie on Raspbian, you need to wait till then, once done, the last step you need to do is to run the script again and set EmulationStation as default in the boot option, refer the video below for the same:
6) Once the above step is done, you can see that after the computer reboots, it will open the EmulationStation by default, if you want to access command terminal, you need to press F4 on you keyboard to exit the EmulationStation, you can type emulationstation in the command terminal to open EmulationStation back again. To open pixel desktop you need to run startx command in the terminal, it will load pixel environment for you.
Note: You cannot run EmulationStation and the LXDE/ Pixel Environment at the same time so you need to reboot your system to turn on your EmulationStation.
7) If you are all done till previous point, now all you need to add is ROM to your system, due to the nature/complexity of Copyright/Intellectual Property Rights Law, which differs significantly from Country to Country, ROMs cannot be provided with RetroPie and must be provided by the user. You should only have ROMs of games that you own.Refer this link to see how to download ROM and Install ROM
8) Configure Gamepad: Once you added the ROM, its time to configure your gamepad, to do so open the EmulationStation Menu( refer the below shown Image)
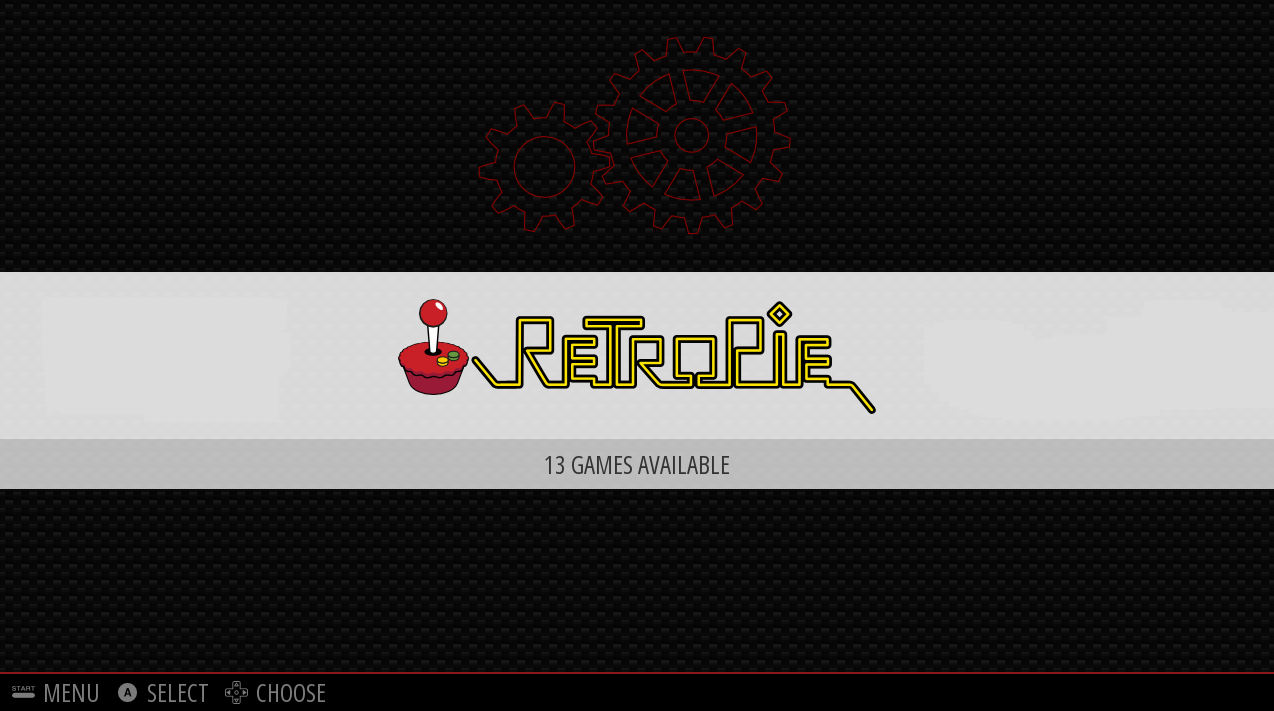
Select: retroPie menu -> Input options.
9) Make Sure to connect your game pad before selecting Input options from the Menu. Once selected refer the below key map to configure your gamepad, all you need to do is to press the corresponding key for the shown input option.
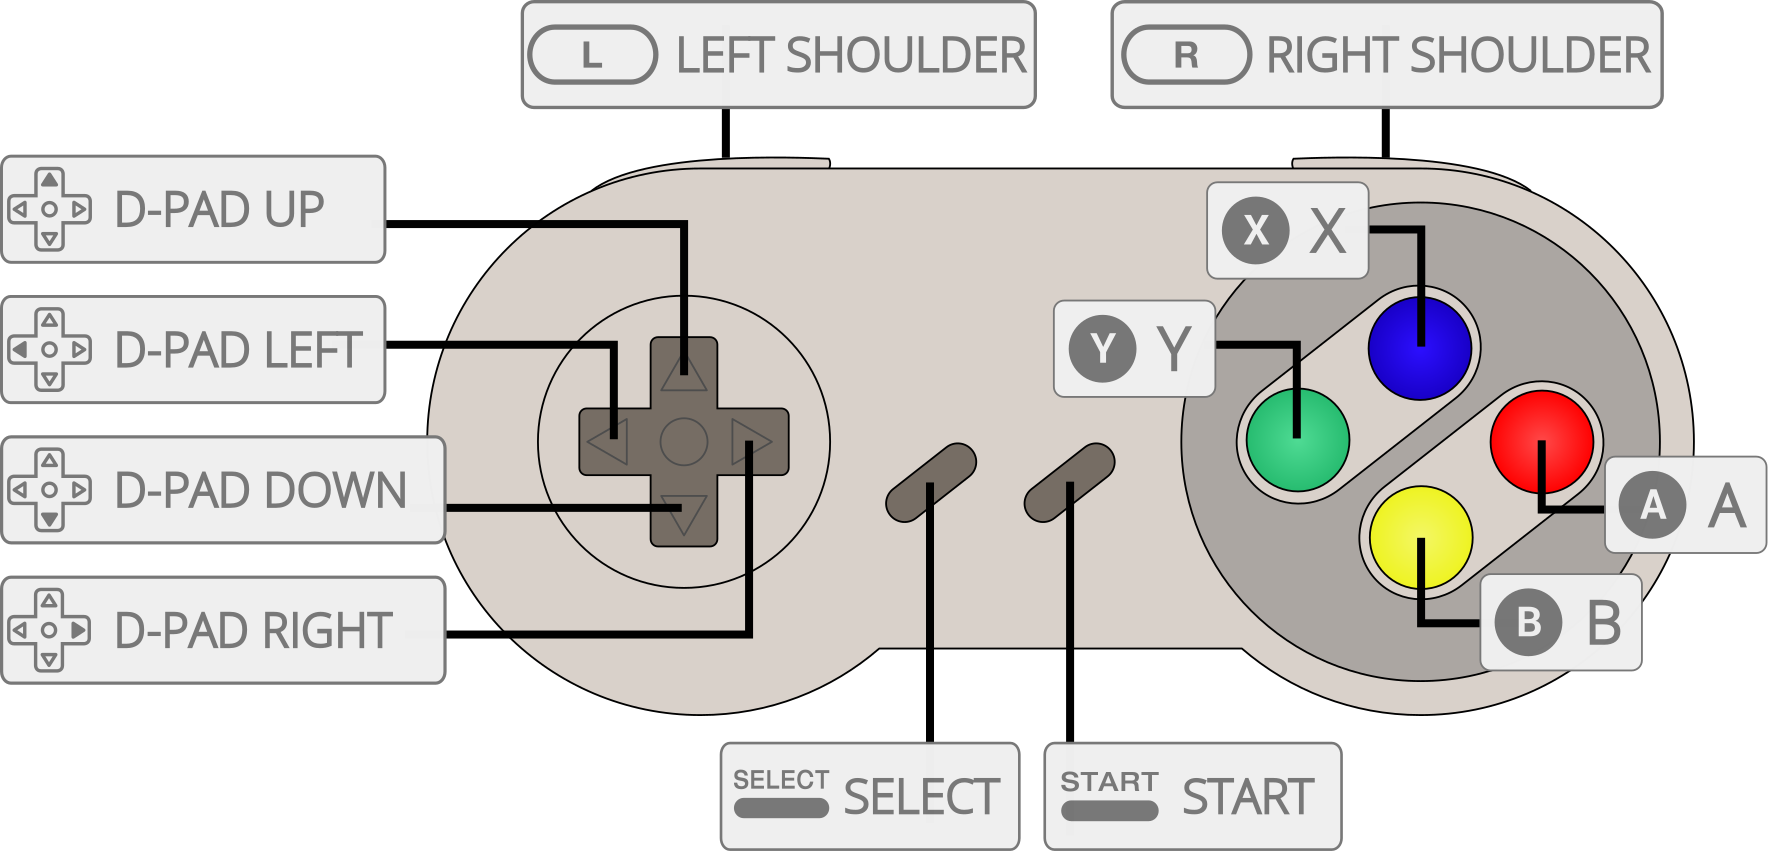
Once done, the settings will be saved permanently in your system, incase any mistake happened, you can reconfigure your gamepad anytime. Refer this link, if you are planning to add some other gamepad to your raspberry pi, once done you are ready to control your EmulationStation and play games using your gamepad.
Note: Only one input is supported for single player games, thus if you had connected multiple inputs like keyboard and gamepad, make sure to disconnect whichever not needed and connect only one.
Do let us know if you are facing any issue with any step, our team will get back to you, to help with installation.
References:
0 Comments
Trackbacks/Pingbacks